
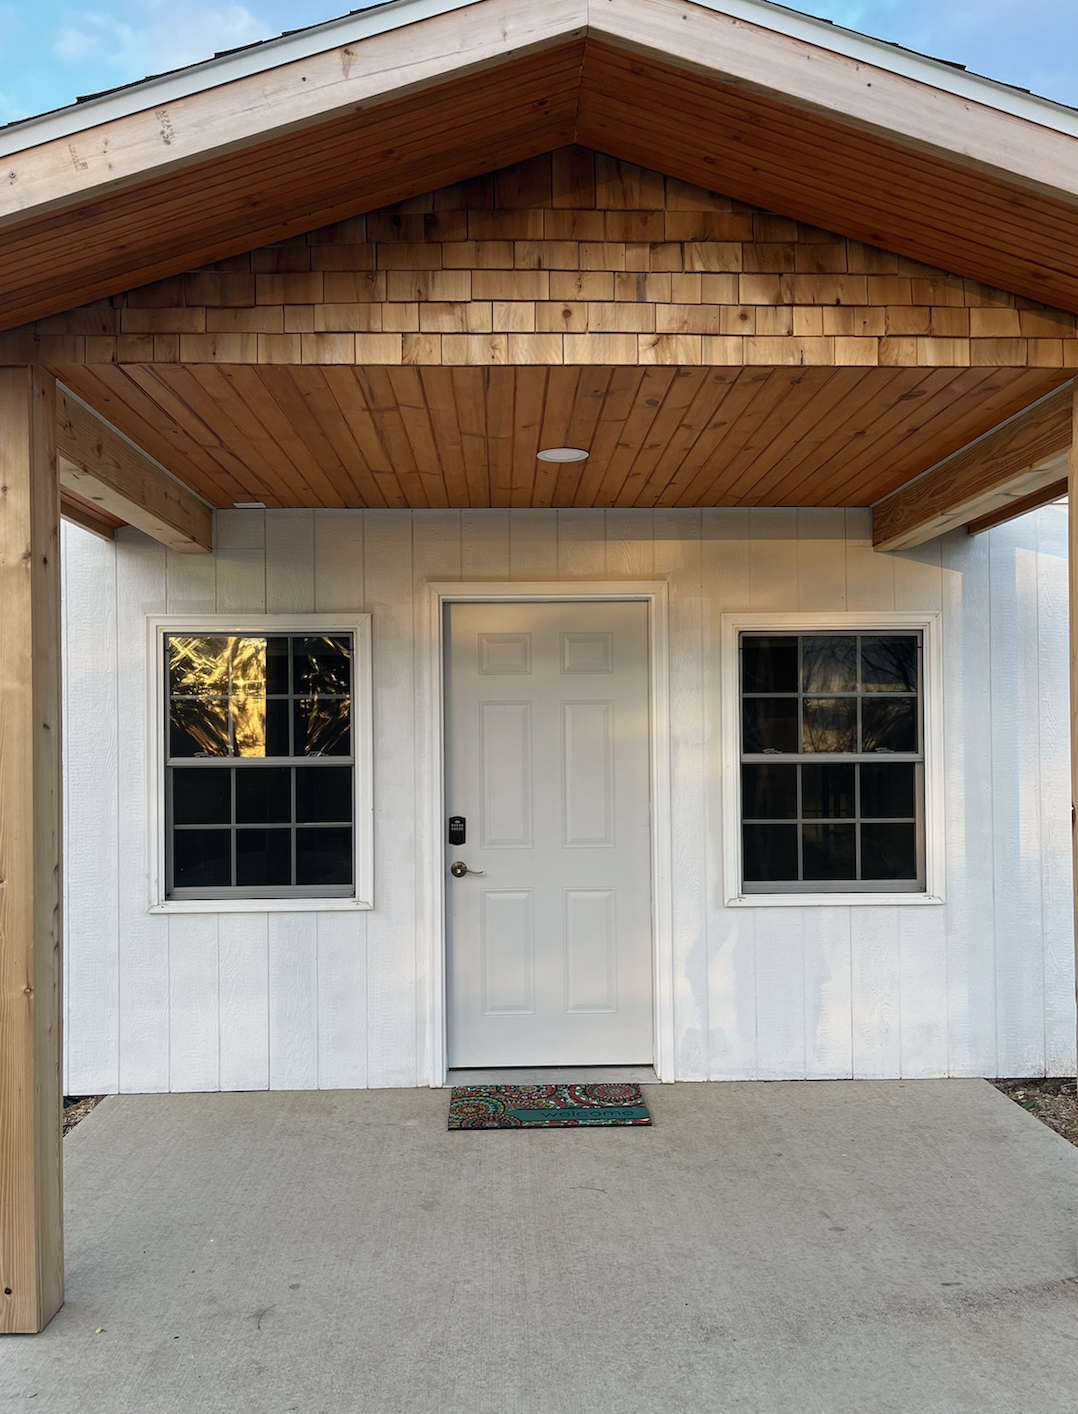
Tailwind Cottage: Garage to Guest House

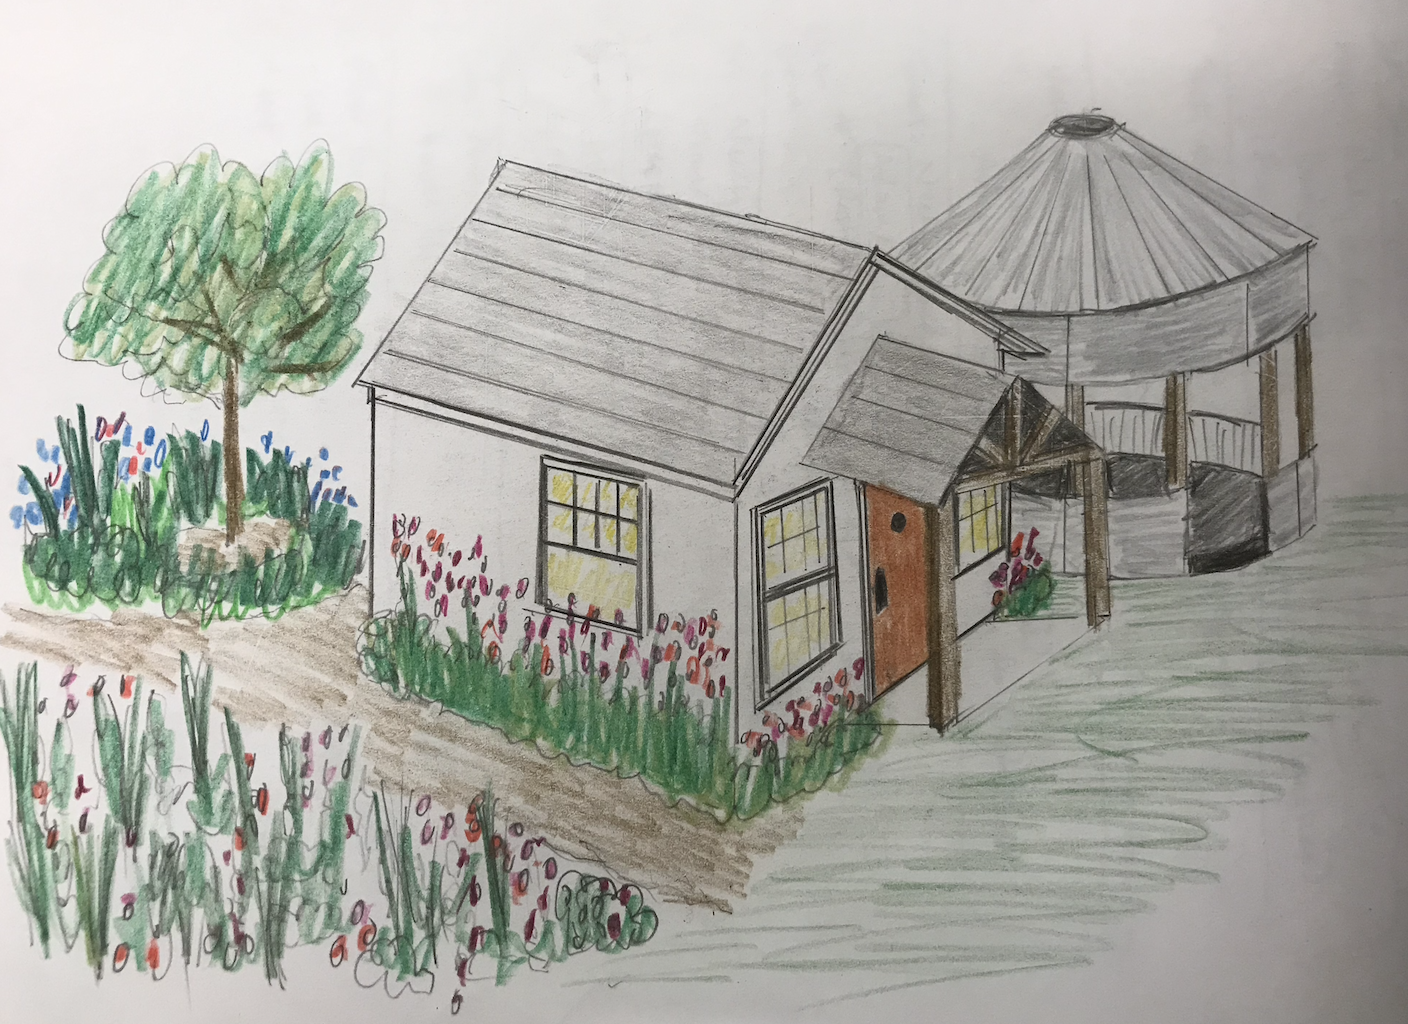
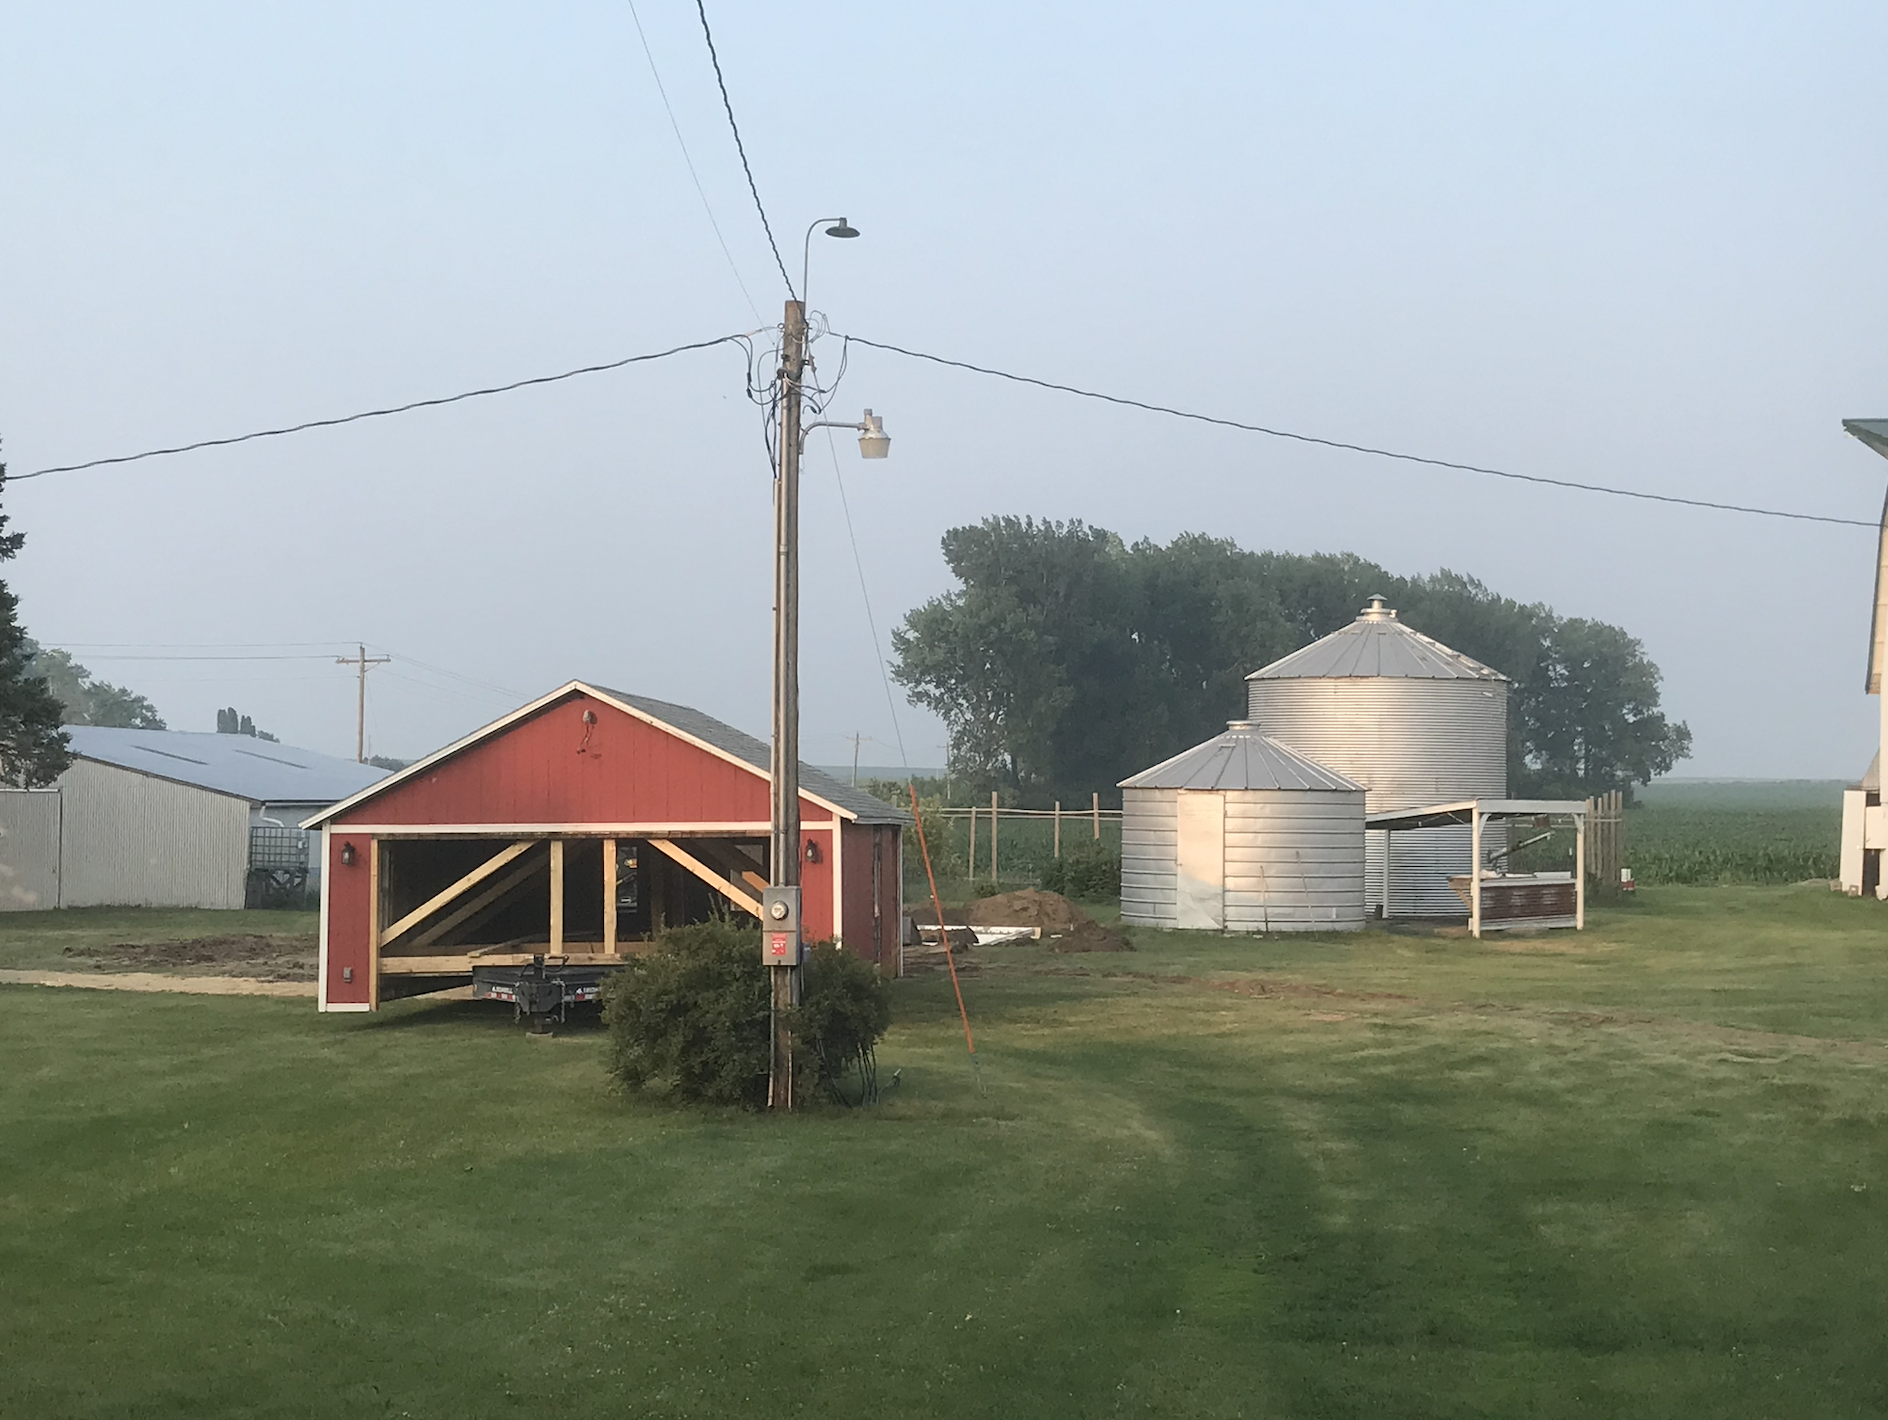
When Flannery and I decided to renovate our barn for hosting workshops and events, we quickly realized we would need a climate controlled space for a public restroom. After talking to a few contractors we decided it was best to install the septic tank and leach field in the NE corner of the property and convert our 20x24’ 1950s garage into a multi-functional space. The garage had been serving as a space to house our two best vehicles. Yet, the space was too small and it was always a challenge o get the vehicles in and out safely. We opted to clean out an already existing machine shed that could serve as a new or temporary garage while the original was renovated.

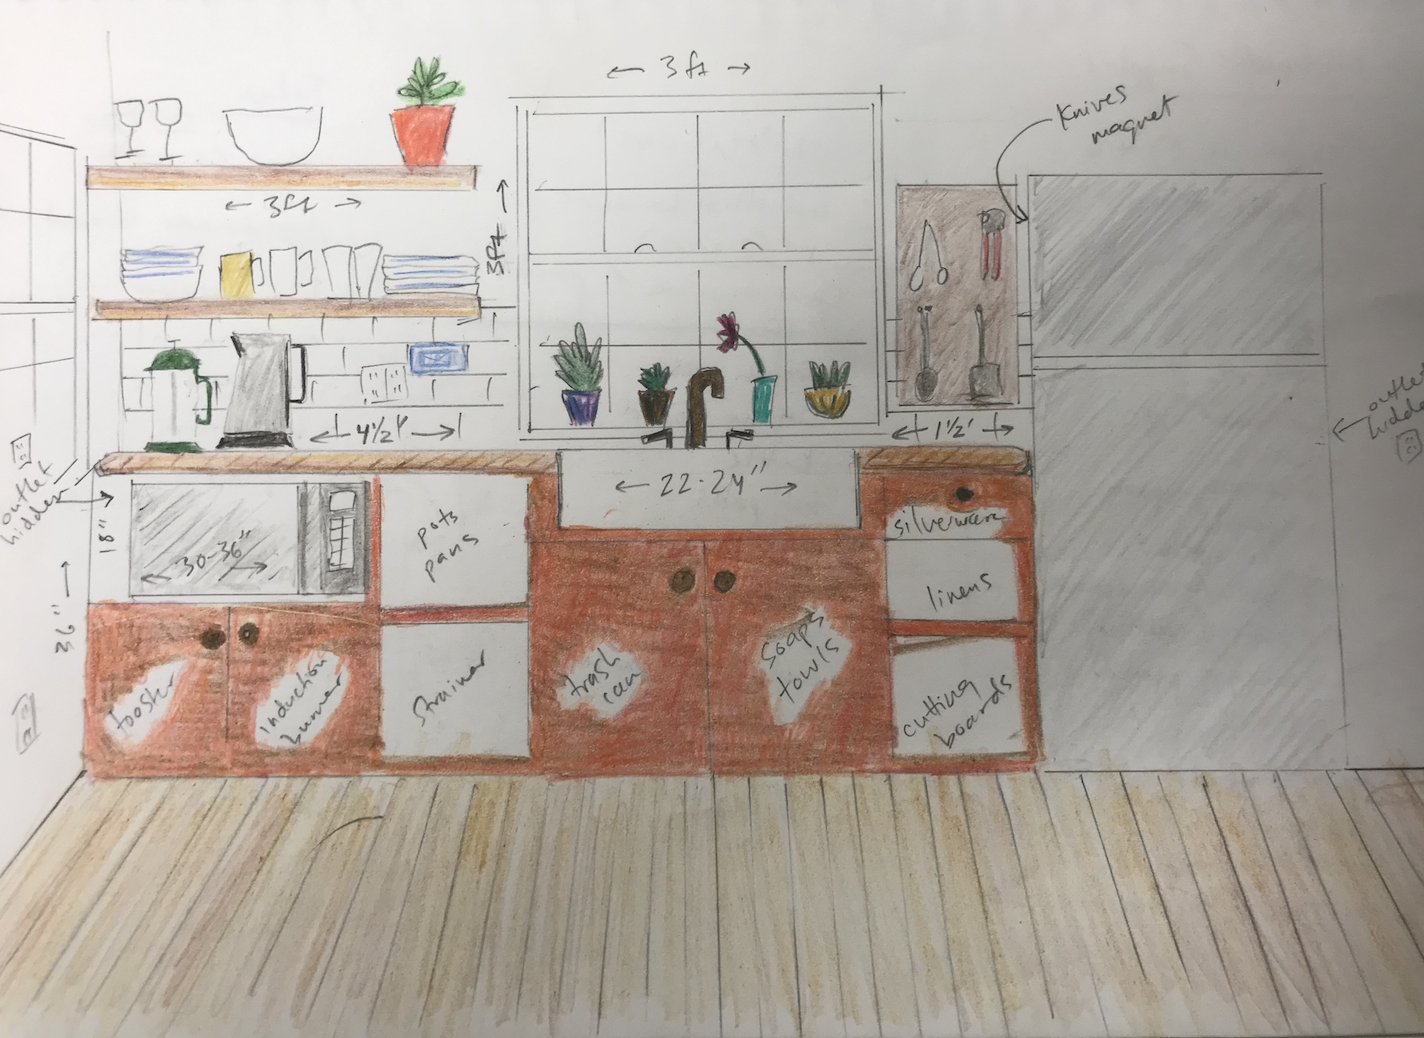
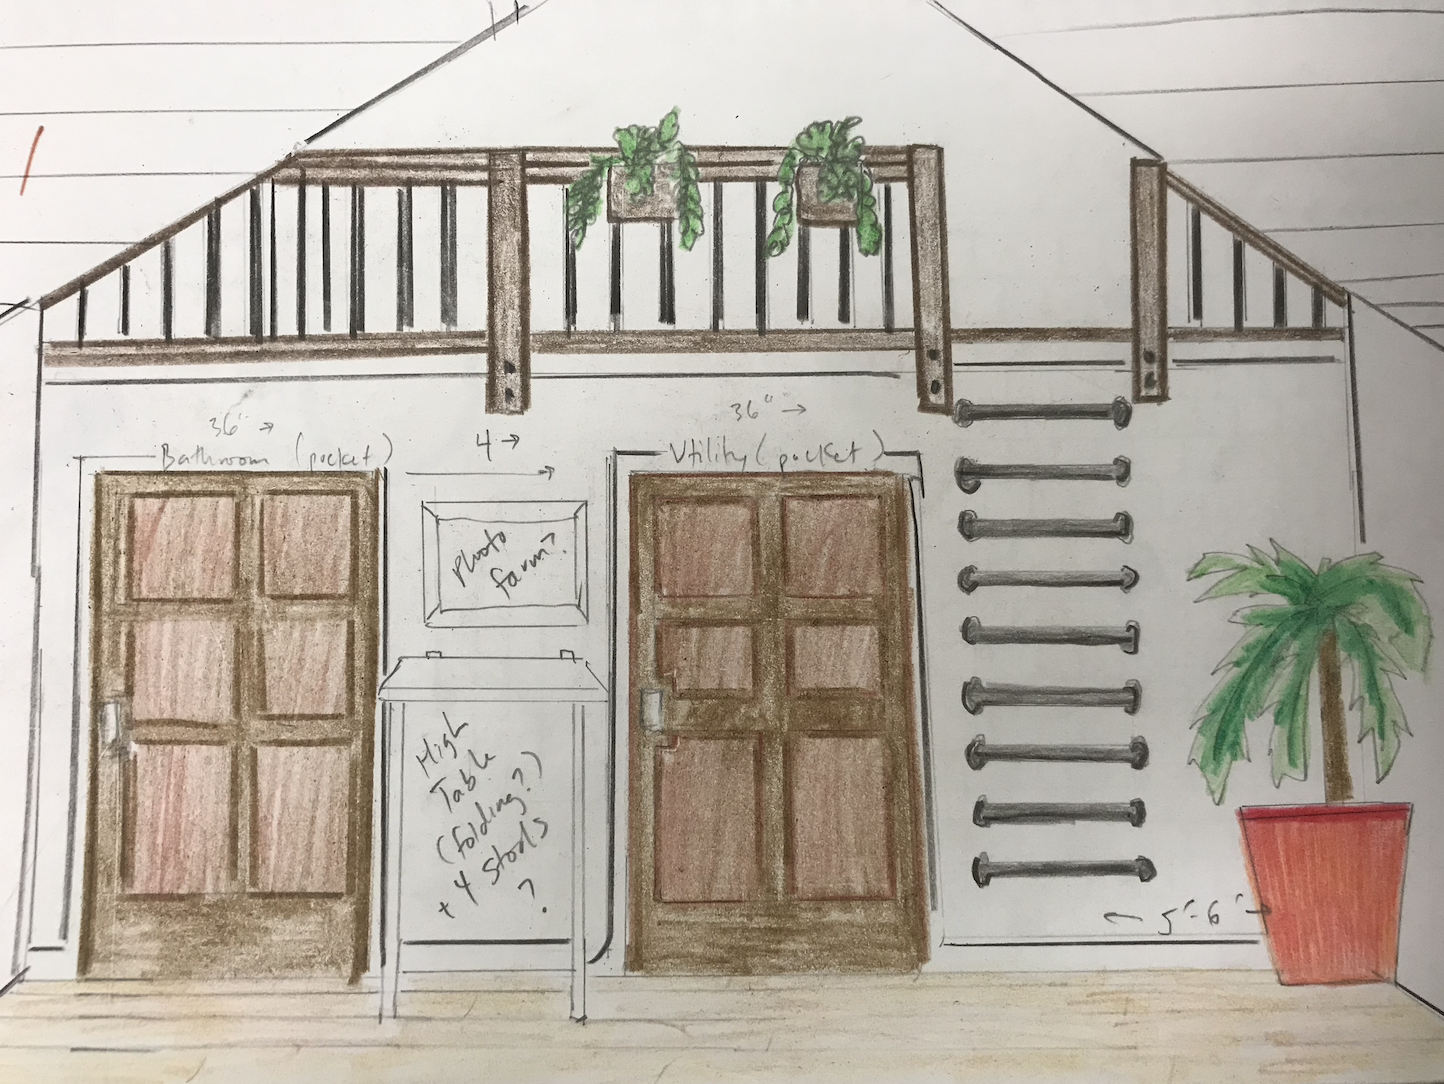
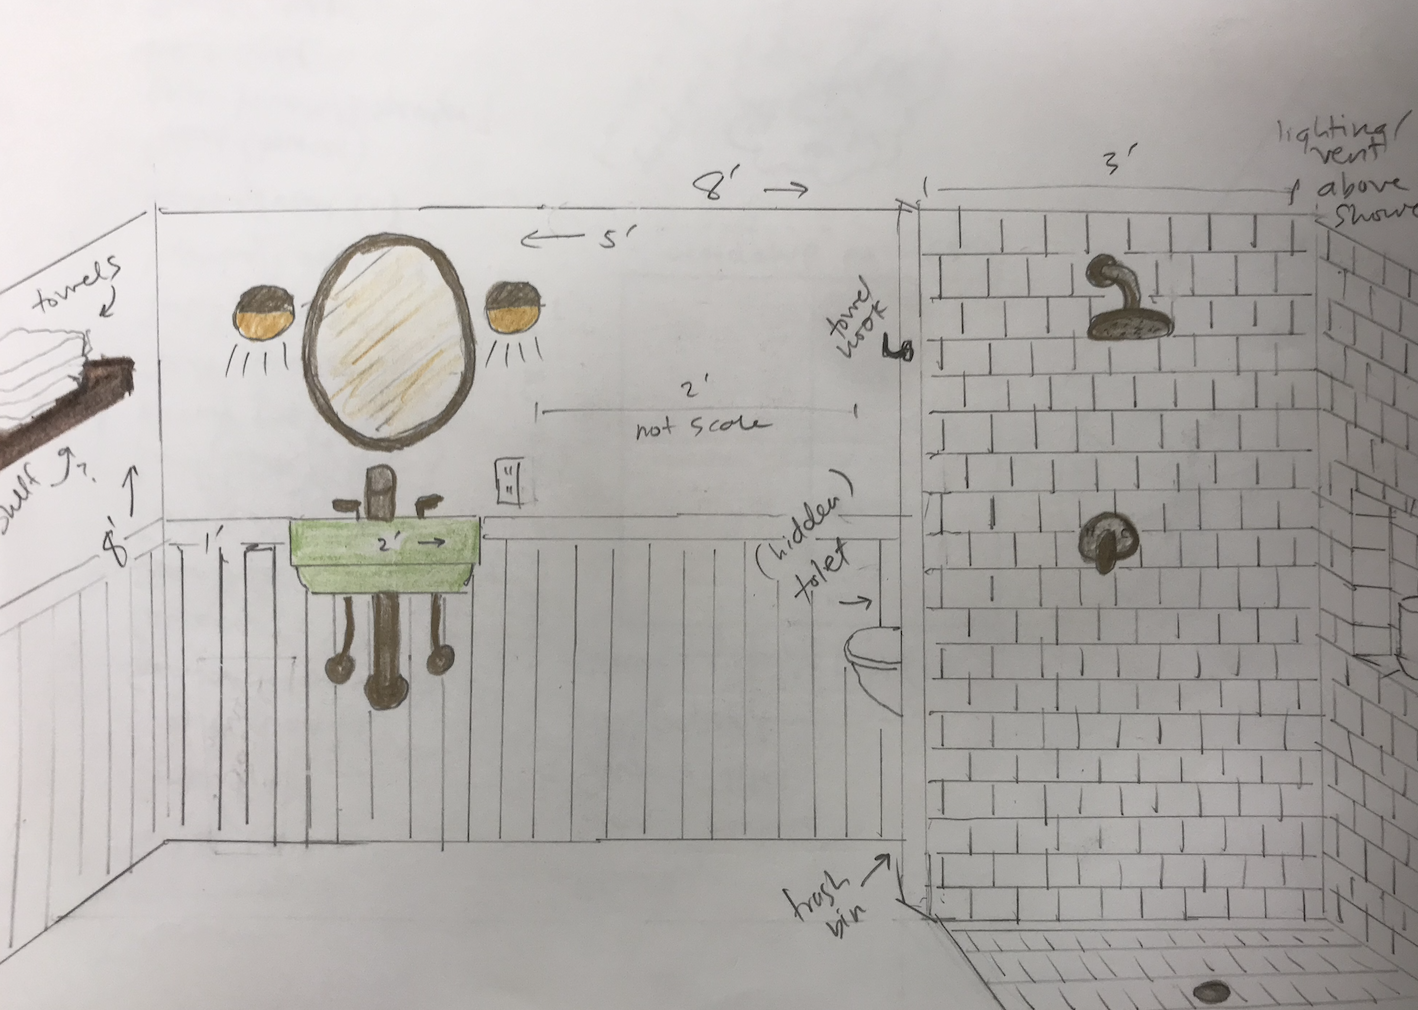
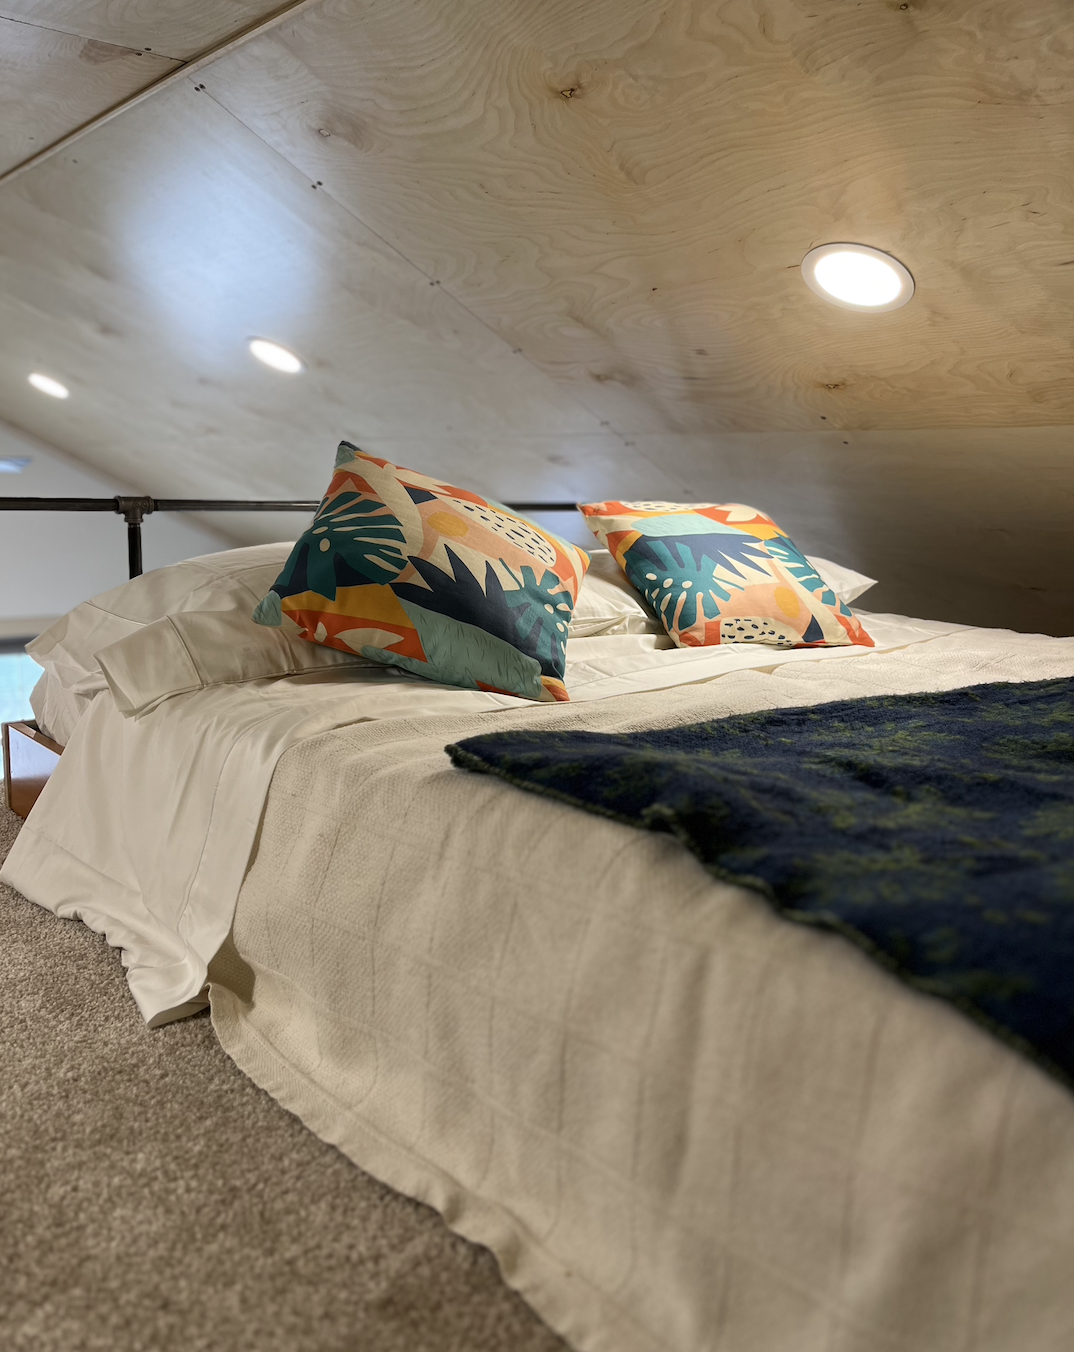
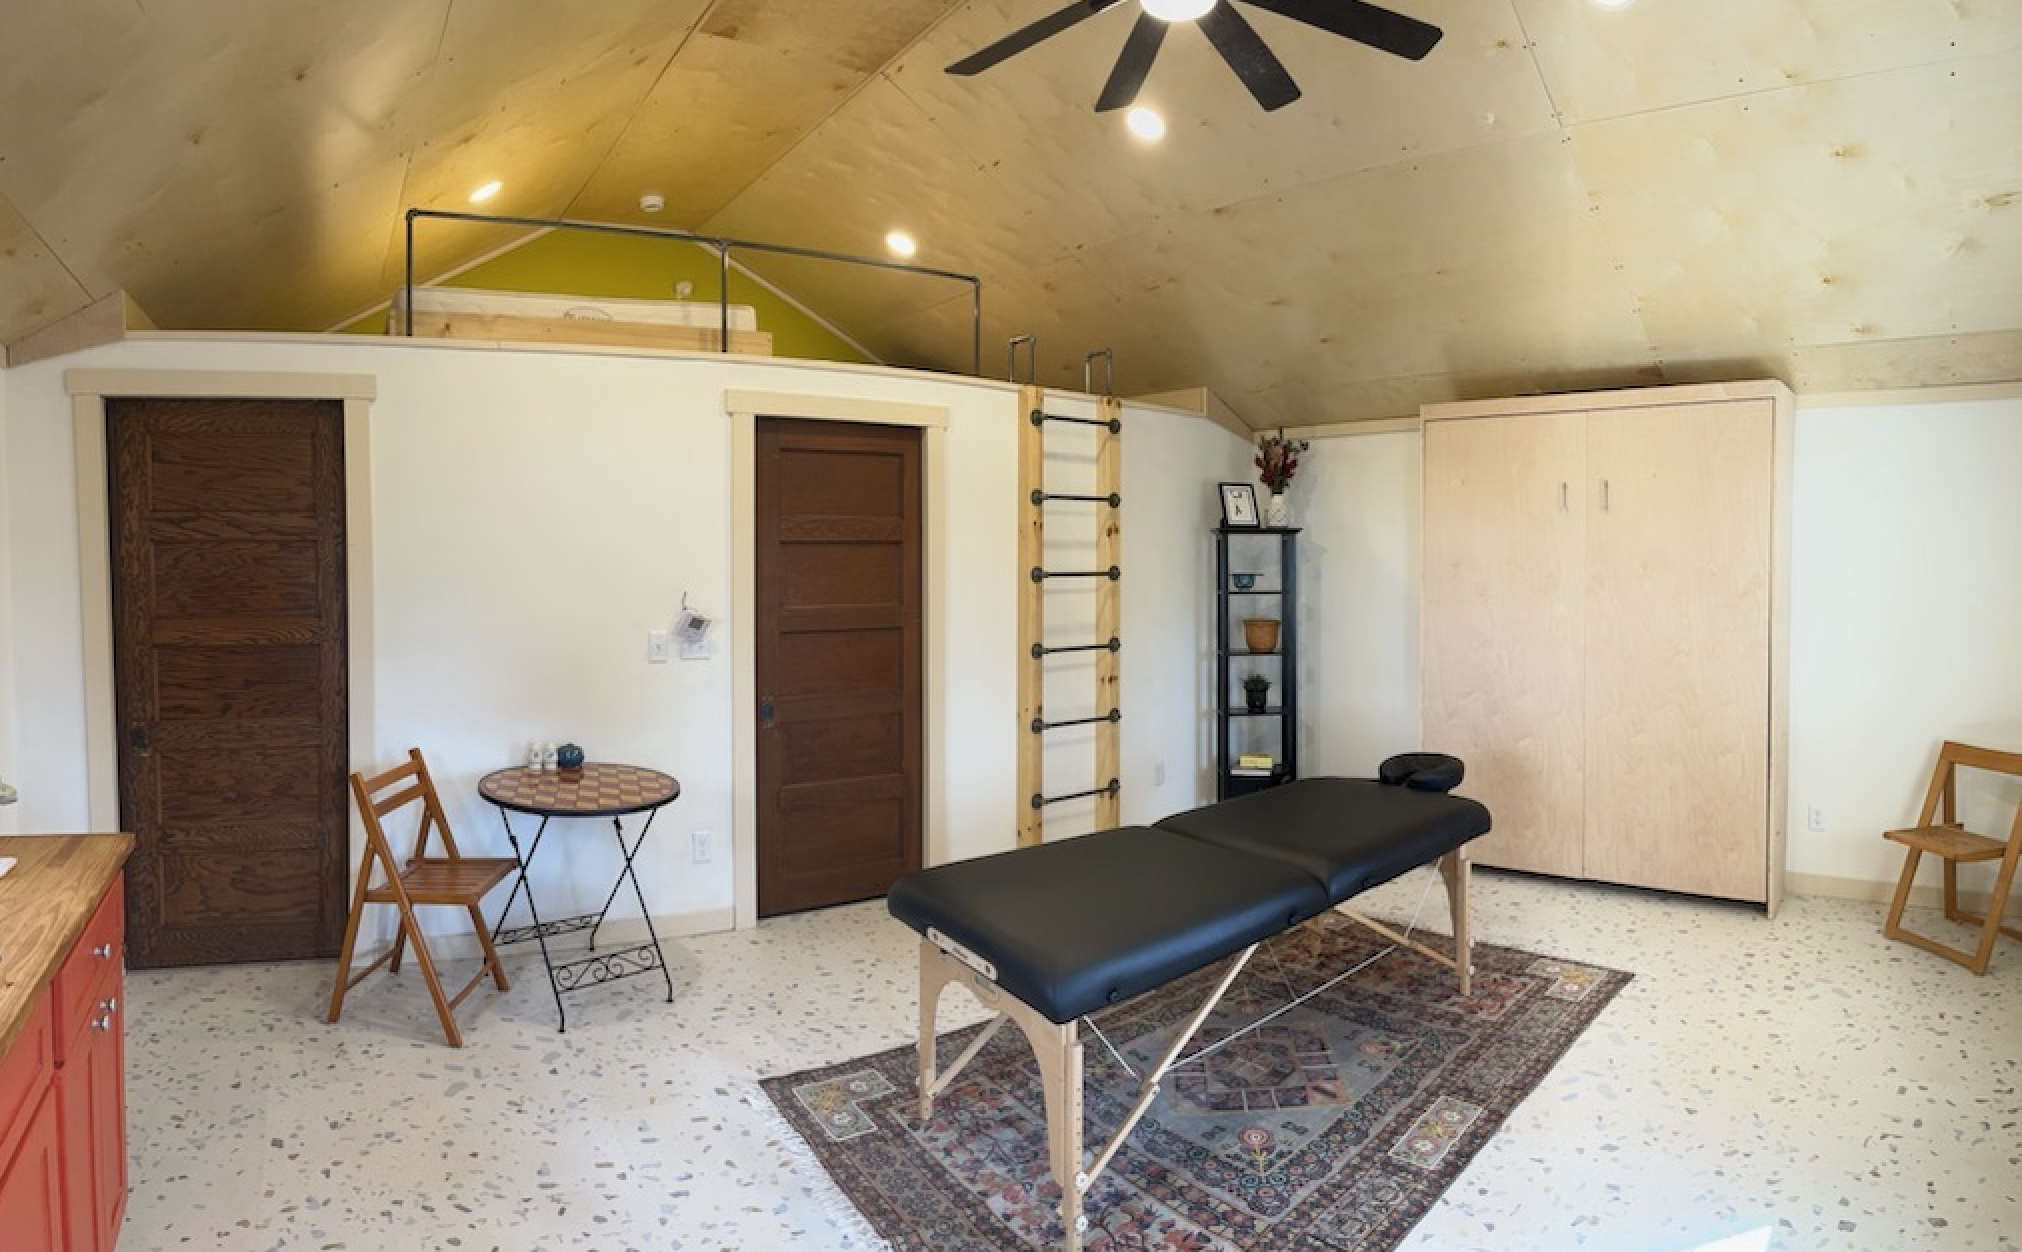
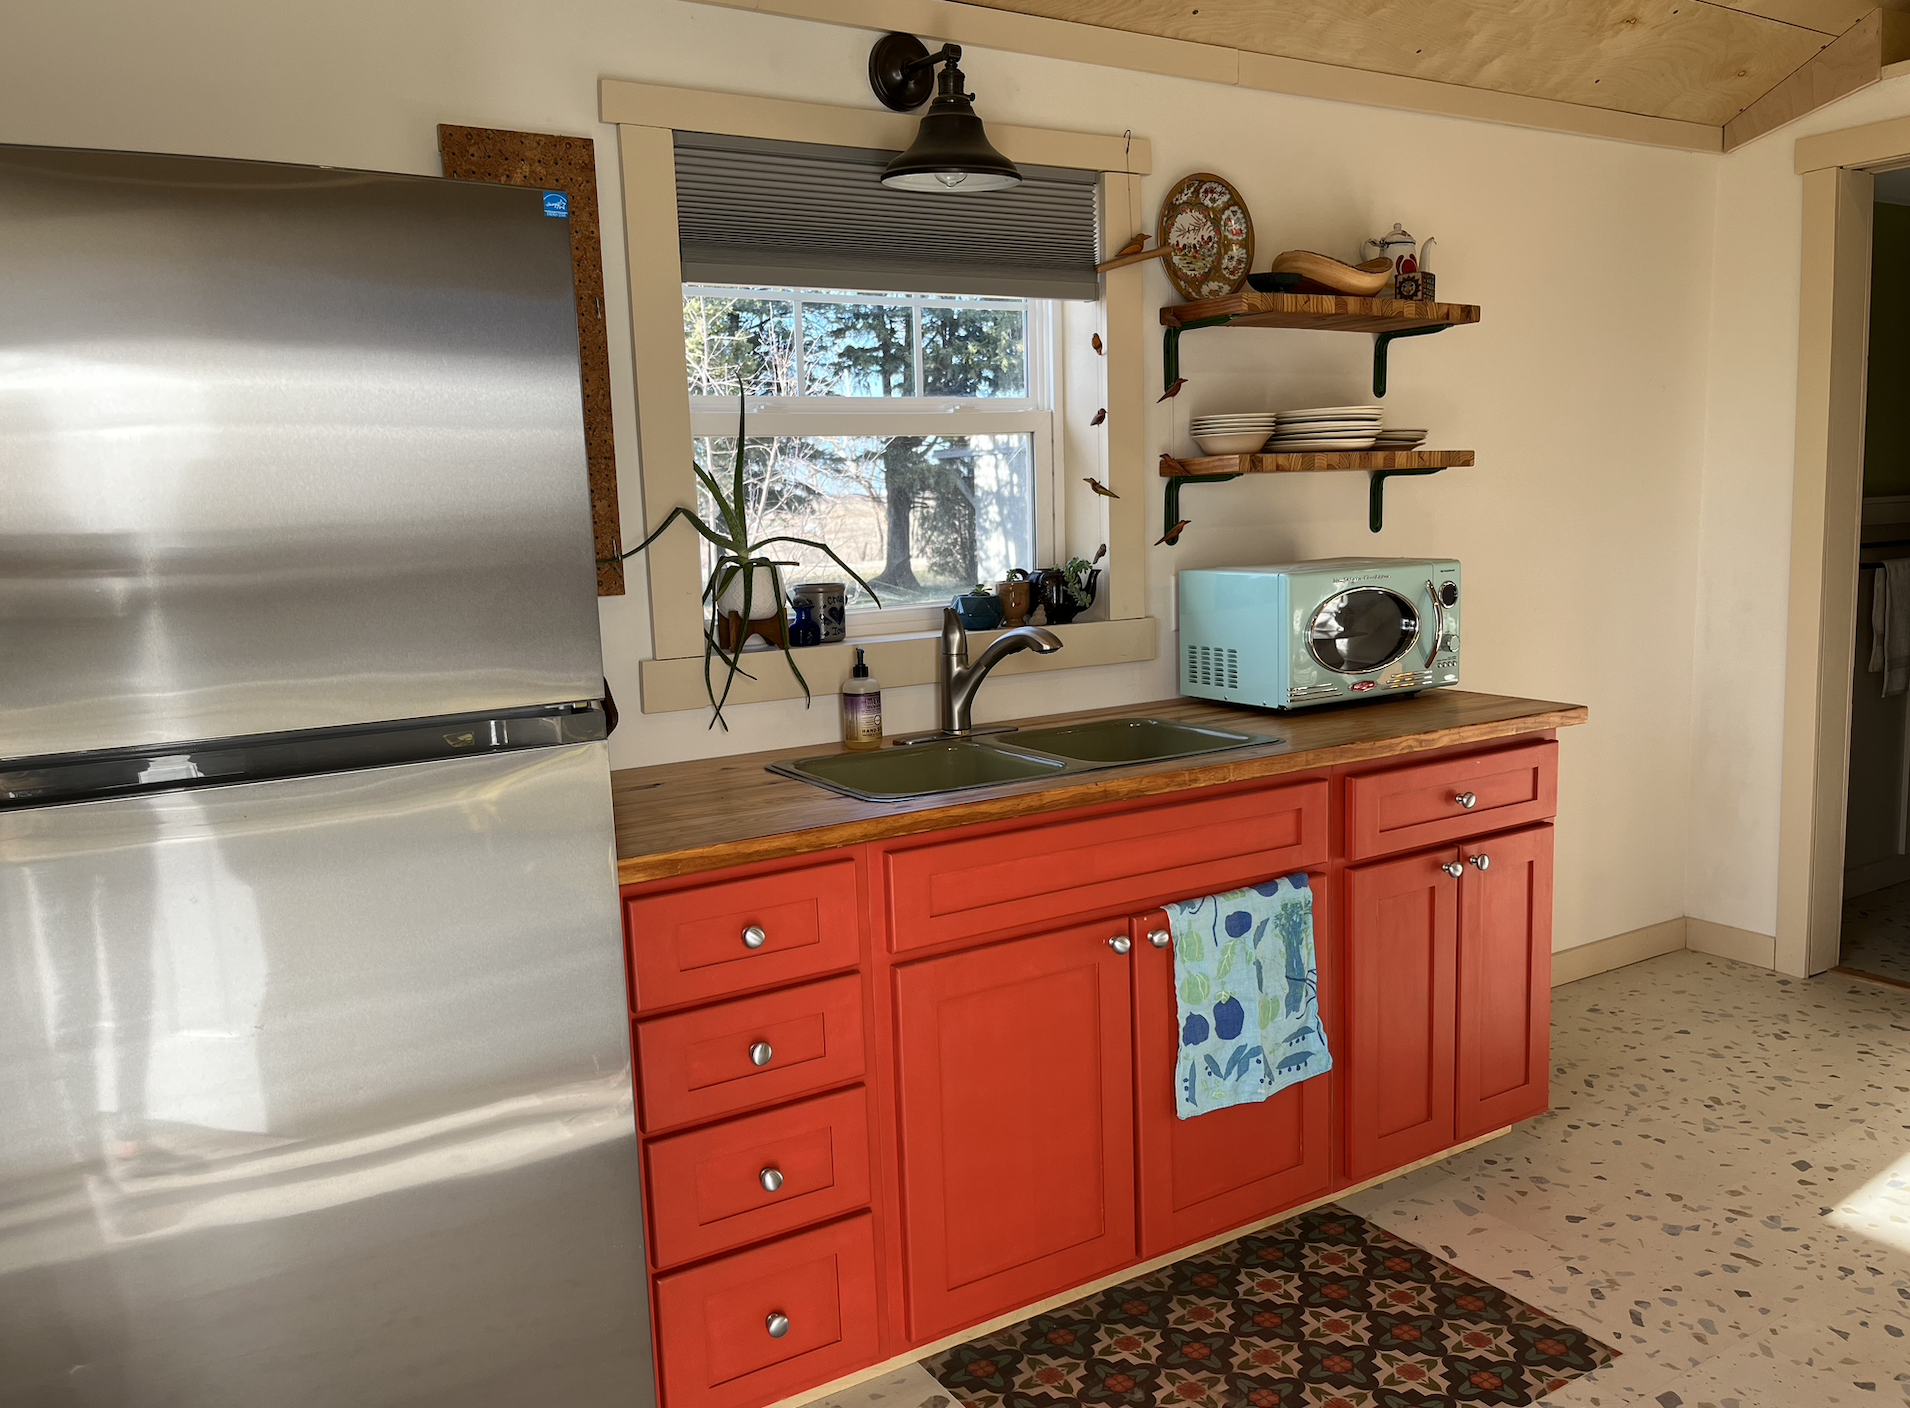
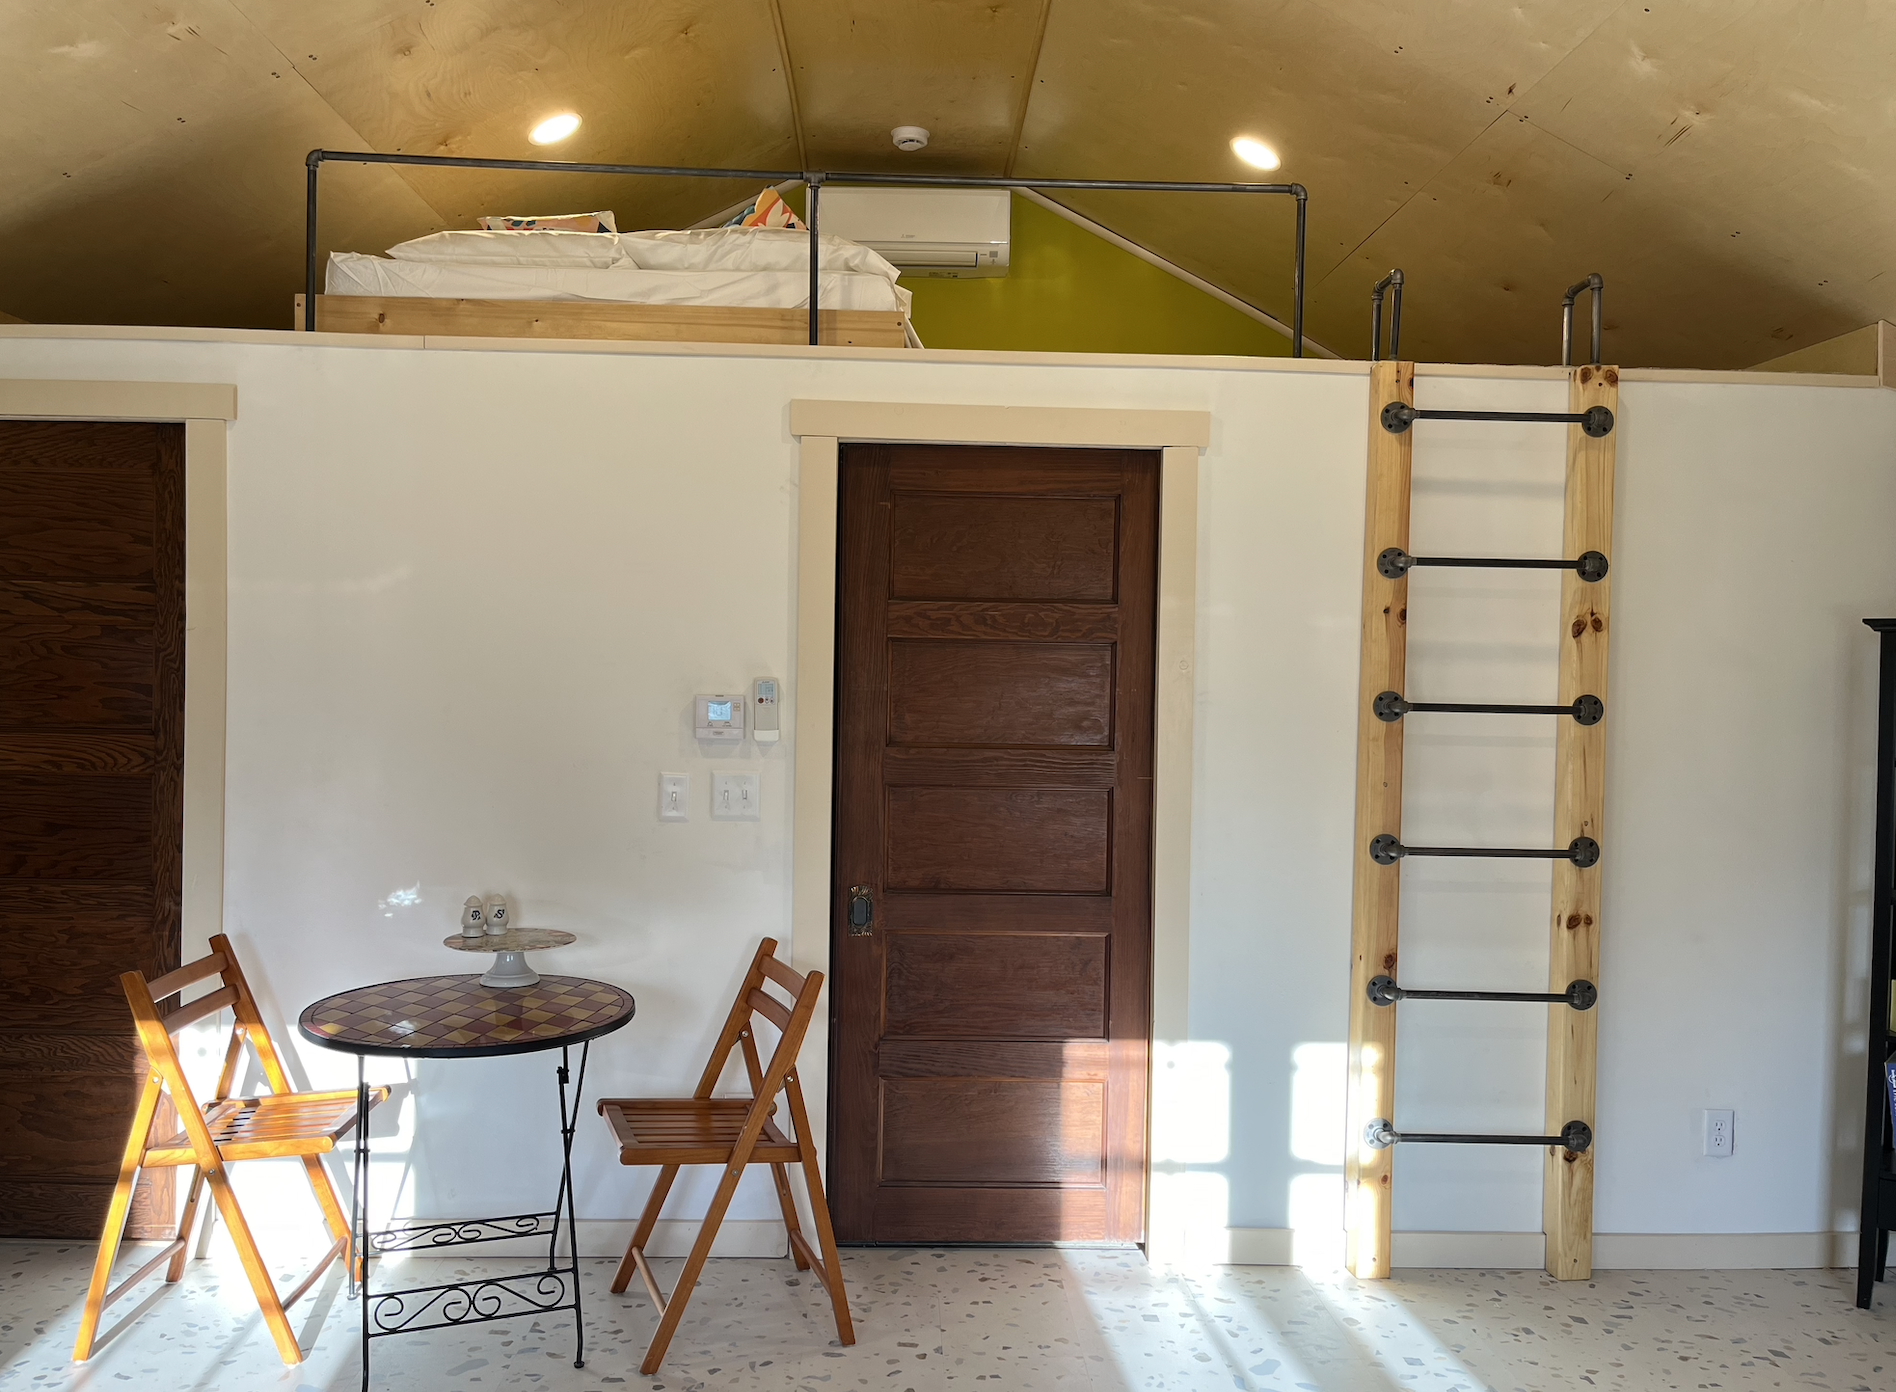
Our contractor for the project was Built Rite LLC from Lime Springs. We began with a simple 2D floor plan. What was the main garage door on the west side was to become the main entrance. It would open into a larger space (16x20’) that would include a kitchenette, full fridge, microwave and a Murphy bed. The east side would include a private on-suite bathroom (7x8’), a utility room (5x7’) and a separate public bathroom (7x7’) that could only be accessed from the outside. Above these three smaller rooms would be a lofted space for additional sleeping.
In order to make the loft work the contractors had to remove the bottom chord of the truss and reinforce the top chord with 2x6” treated lumber. When the contractors went to remove the existing cement floor, the 18” foundation started to give away. This meant the entire foundation was going to need replacing. The only way to do this was to literally lift the entire structure and move it.

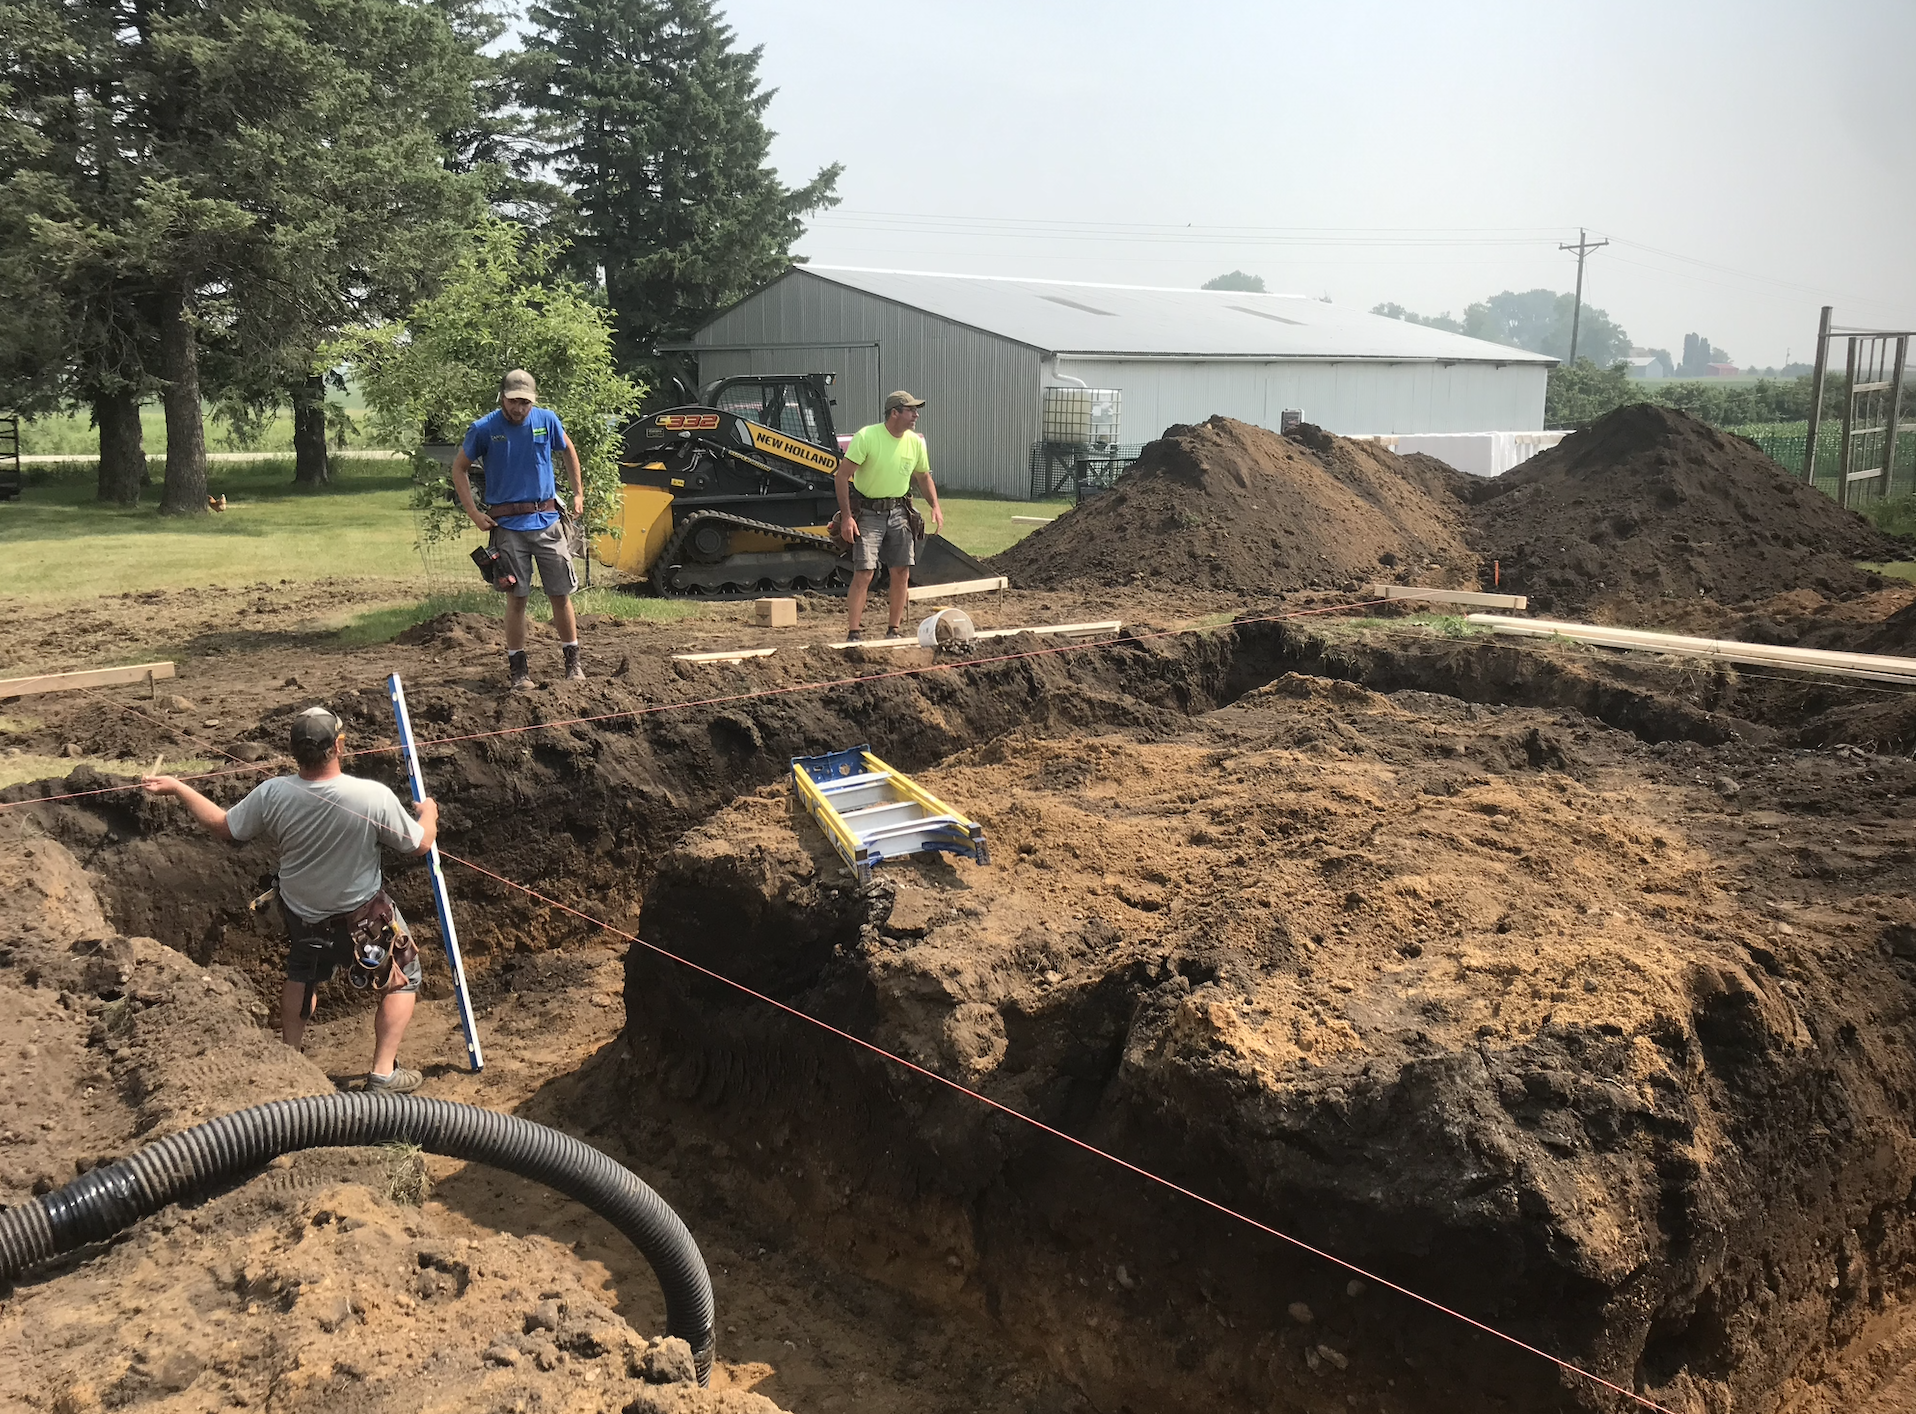


After moving the shed off the site, a new foundation was dug and ICF foam was installed. The plumbers (Pickar-Oulman, Rockville, IA) installed the tubing for plumbing and inflow heat and the cement was poured. After curing the structure was carefully placed back and the internal framing commenced once again.
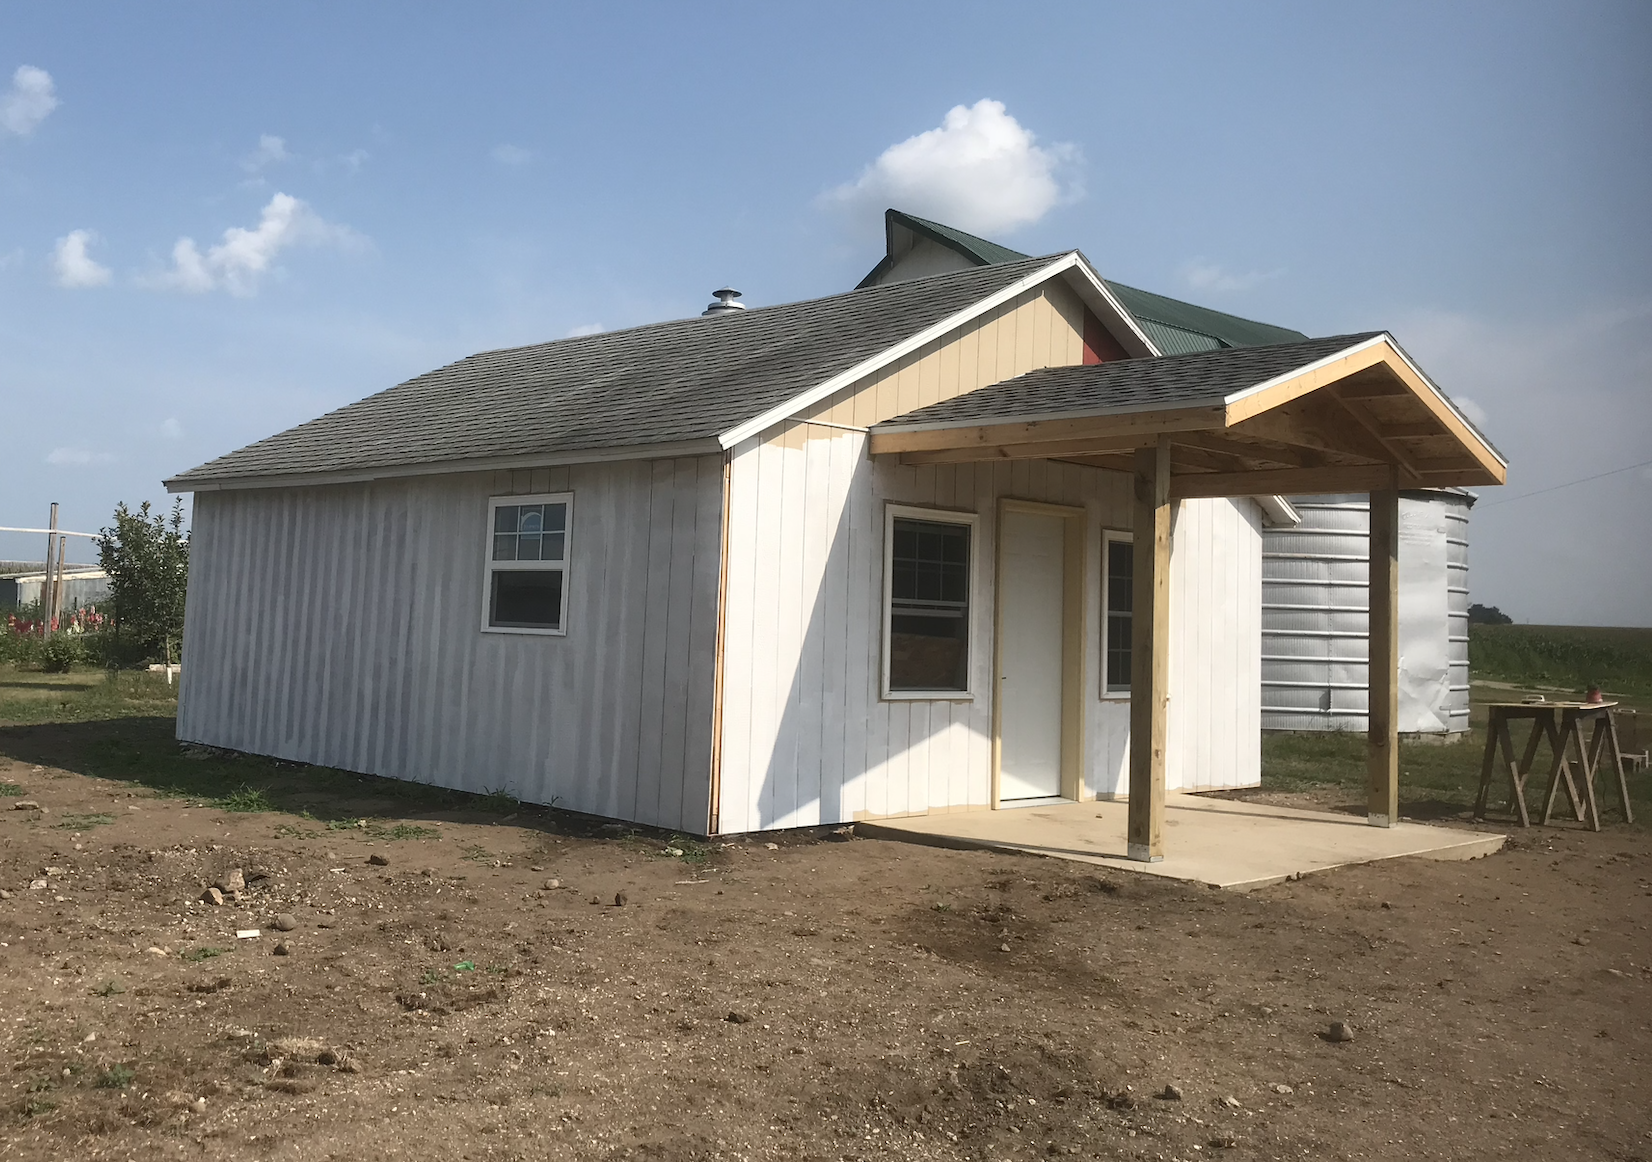
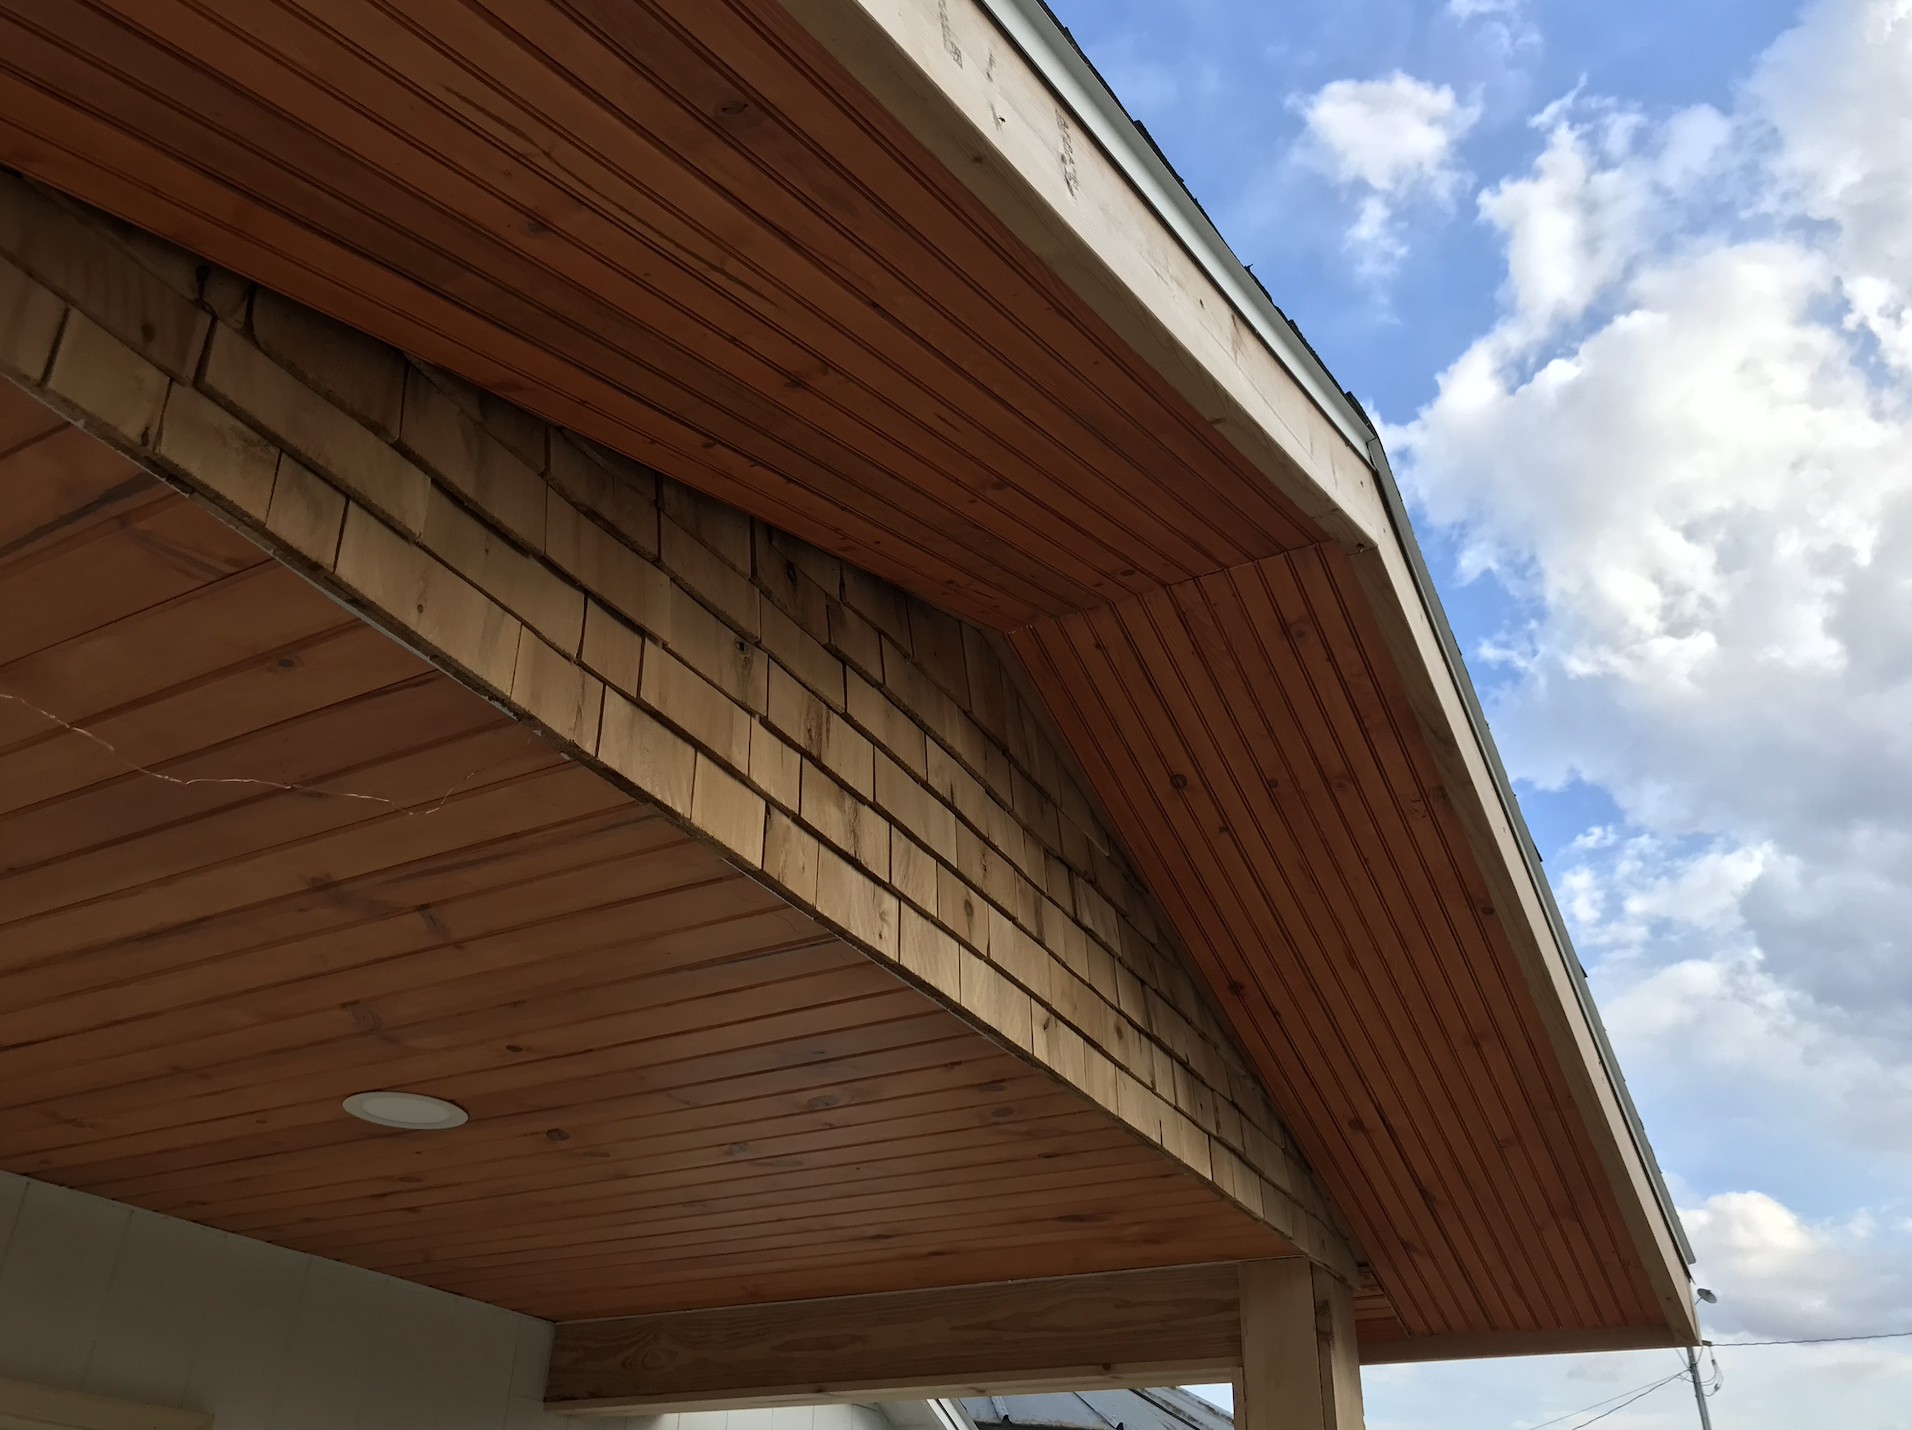
One additional feature was to add an overhang or porch (8x10’) over the front entrance. The cement pad for this was also poured and framed up using two 6x6” beams.
Once all the framing (Built Rite) and electrical work (Pickar-Oulman) was finished inside and it was time to insulate we had to make the decision whether to spray foam or use blanket insulation. When we received the quote ($4,500) for spray foam we decided it was out of our budget. It was at that point that Flannery and I had to/decided to take over and do the rest of the work ourselves.
The remainder of this project could not have been done without the help of family, friends and Youtube. Neither Flannery nor I had ever done insulation, drywall, texturing, vinyl floor installation, tiling a shower, or carpet installation. We were excited and willing to to learn how to do these things and the smaller structure seemed like a good way to learn without becoming overwhelming. We also knew it meant the project would take longer to complete on our own time and every available minute would be devoted to the project.
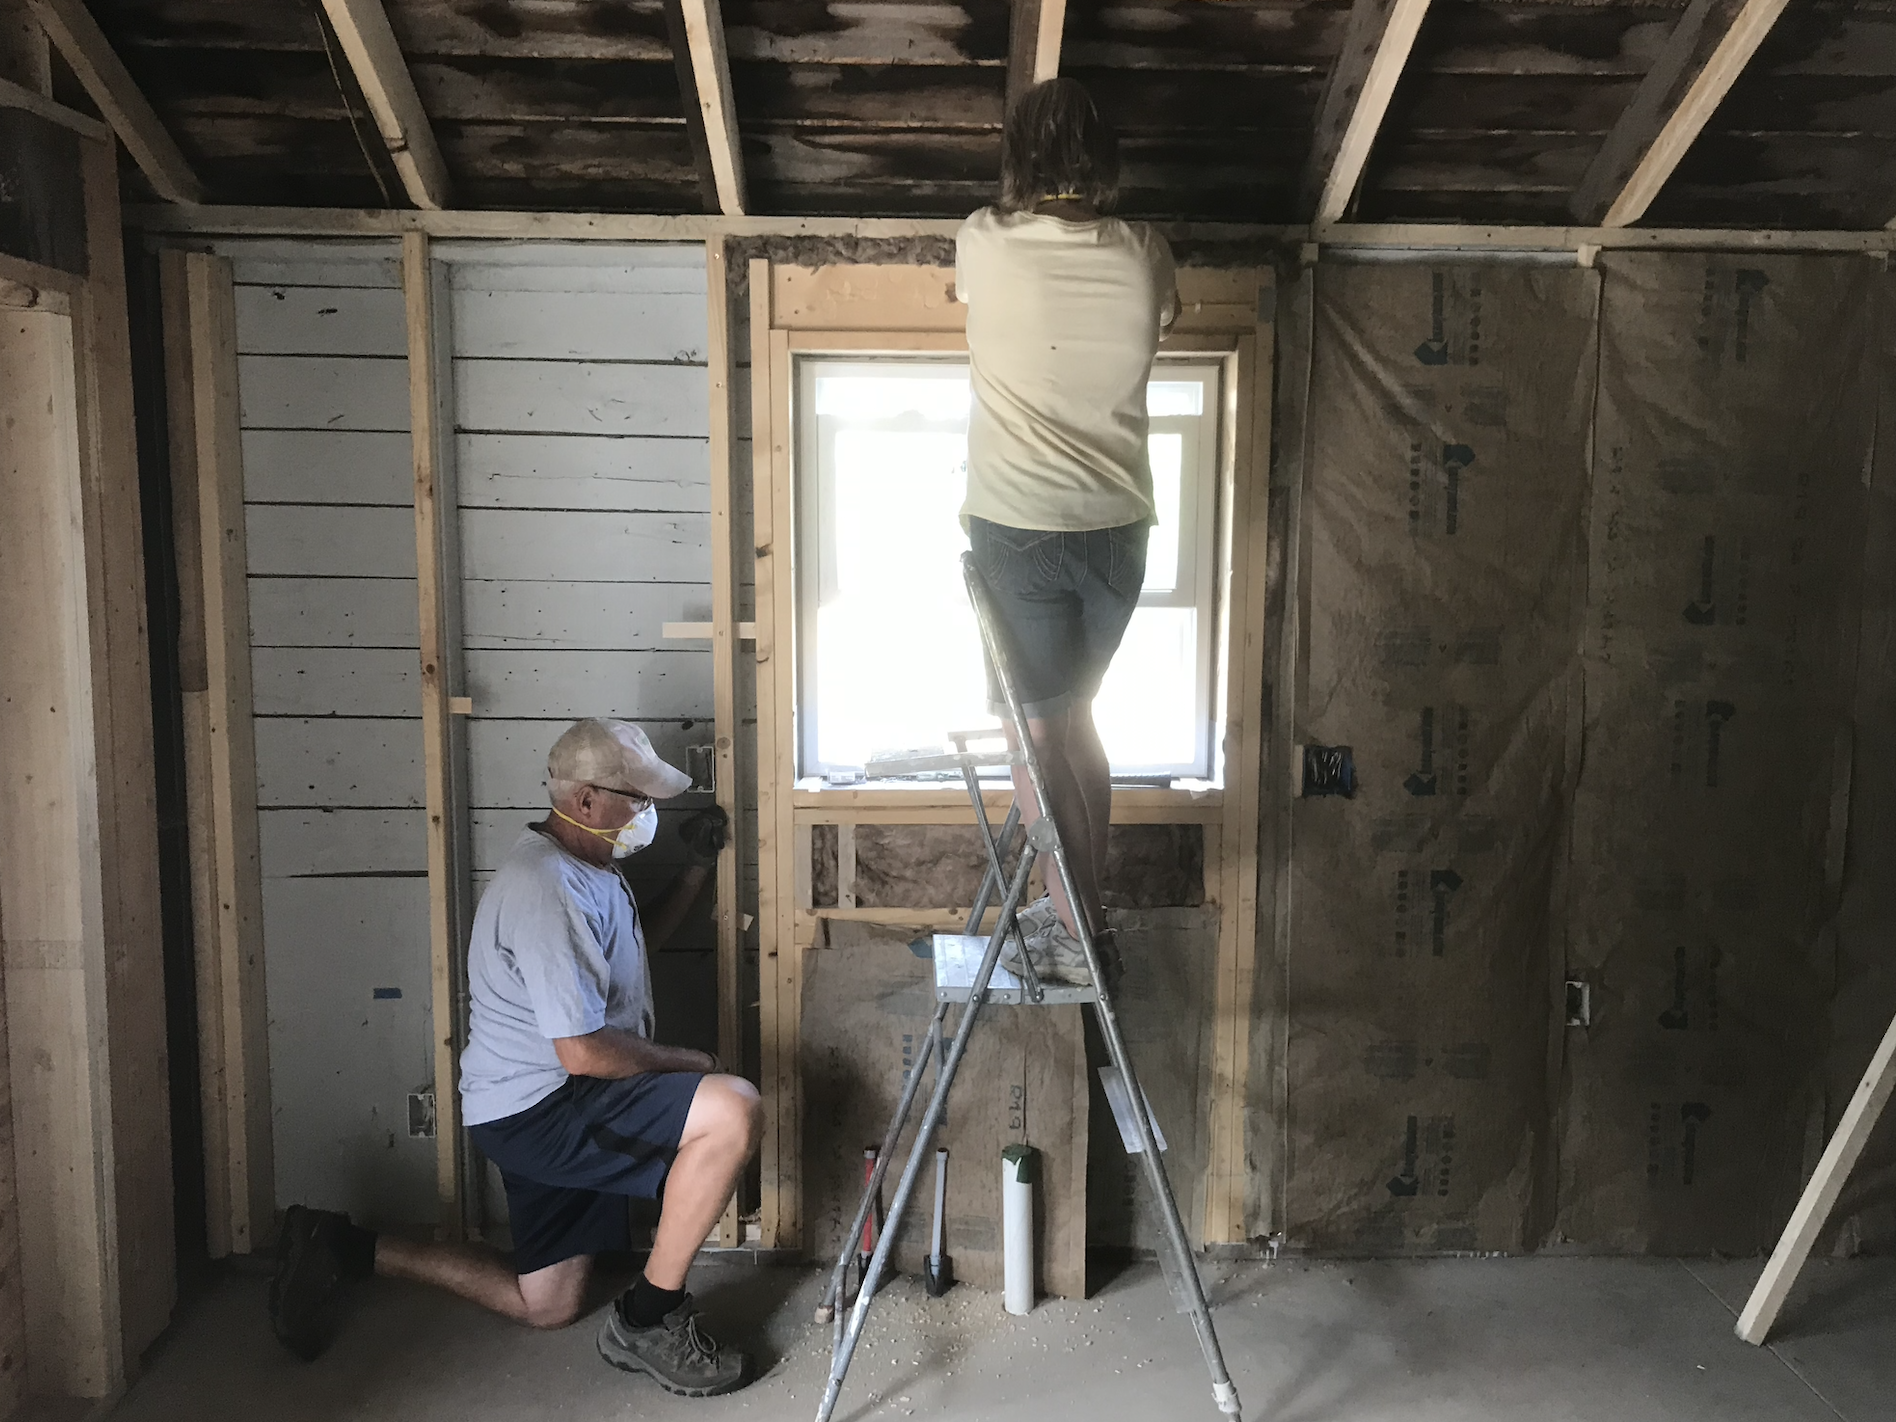
Adam’s parents (Mark and Barb) had just finished off the basement of their new home and were very knowledgeable in helping us get though the first hurdle of the walls. In an afternoon they came over to show us how to install the blanket insulation (R-19). To complete the project a friend, Will Ode, came over to help Adam complete the ceiling and bathroom walls. Once the insulation was installed we put a layer of 2-mm plastic sheeting (vapor barrier) on top of the insulation. Next came the drywall.
We decided to use 1/2” drywall (4x8’) and drywall screws. For the private bathroom with a shower, however, we purchased drywall that had a mold resistant coating. Once again, Mark and Barb came over to teach us in one day how to do drywall. Adam and Flannery worked together to finish the remainder of the drywall themselves.
Before we started taping and mudding we wanted to do the ceiling. In previous AirBnB stays we had seen and liked the look of finished birch plywood for a ceiling. We bought 14 sheets of this (4x8’) and rented a drywall lift from Decorah Rental. In a weekend Adam, Linden and Flannery installed the plywood sheets. The project was not too difficult until we had to install the ceiling over the loft. This proved extremely difficult because the drywall lift couldn’t be used, which meant Flannery and Linden had to leg press the sheets up to the ceiling long enough that Adam could set and screw them into place. Flannery said it might have been harder than child labor.
Once the ceiling was installed and secured using 2.5” cabinet screws, we set out to finish the drywall. Once again, Mark and Barb came over to show us how to tape and mud. This took longer than we expected. After doing three rounds of mudding and sanding and re-mudding and sanding we thought we were ready to texture. When Mark came over to inspect our work we realized we weren’t ready for that stage yet. With inadequate lighting we couldn’t see all the imperfections and Mark realized this. He then installed two large fluorescent shop lights to the ceiling which illuminated those imperfections. Disappointed, Flannery and I set about sanding and mudding and sanding and mudding for another few weeks. We are grateful though for this extra patience because the final product turned out really well.


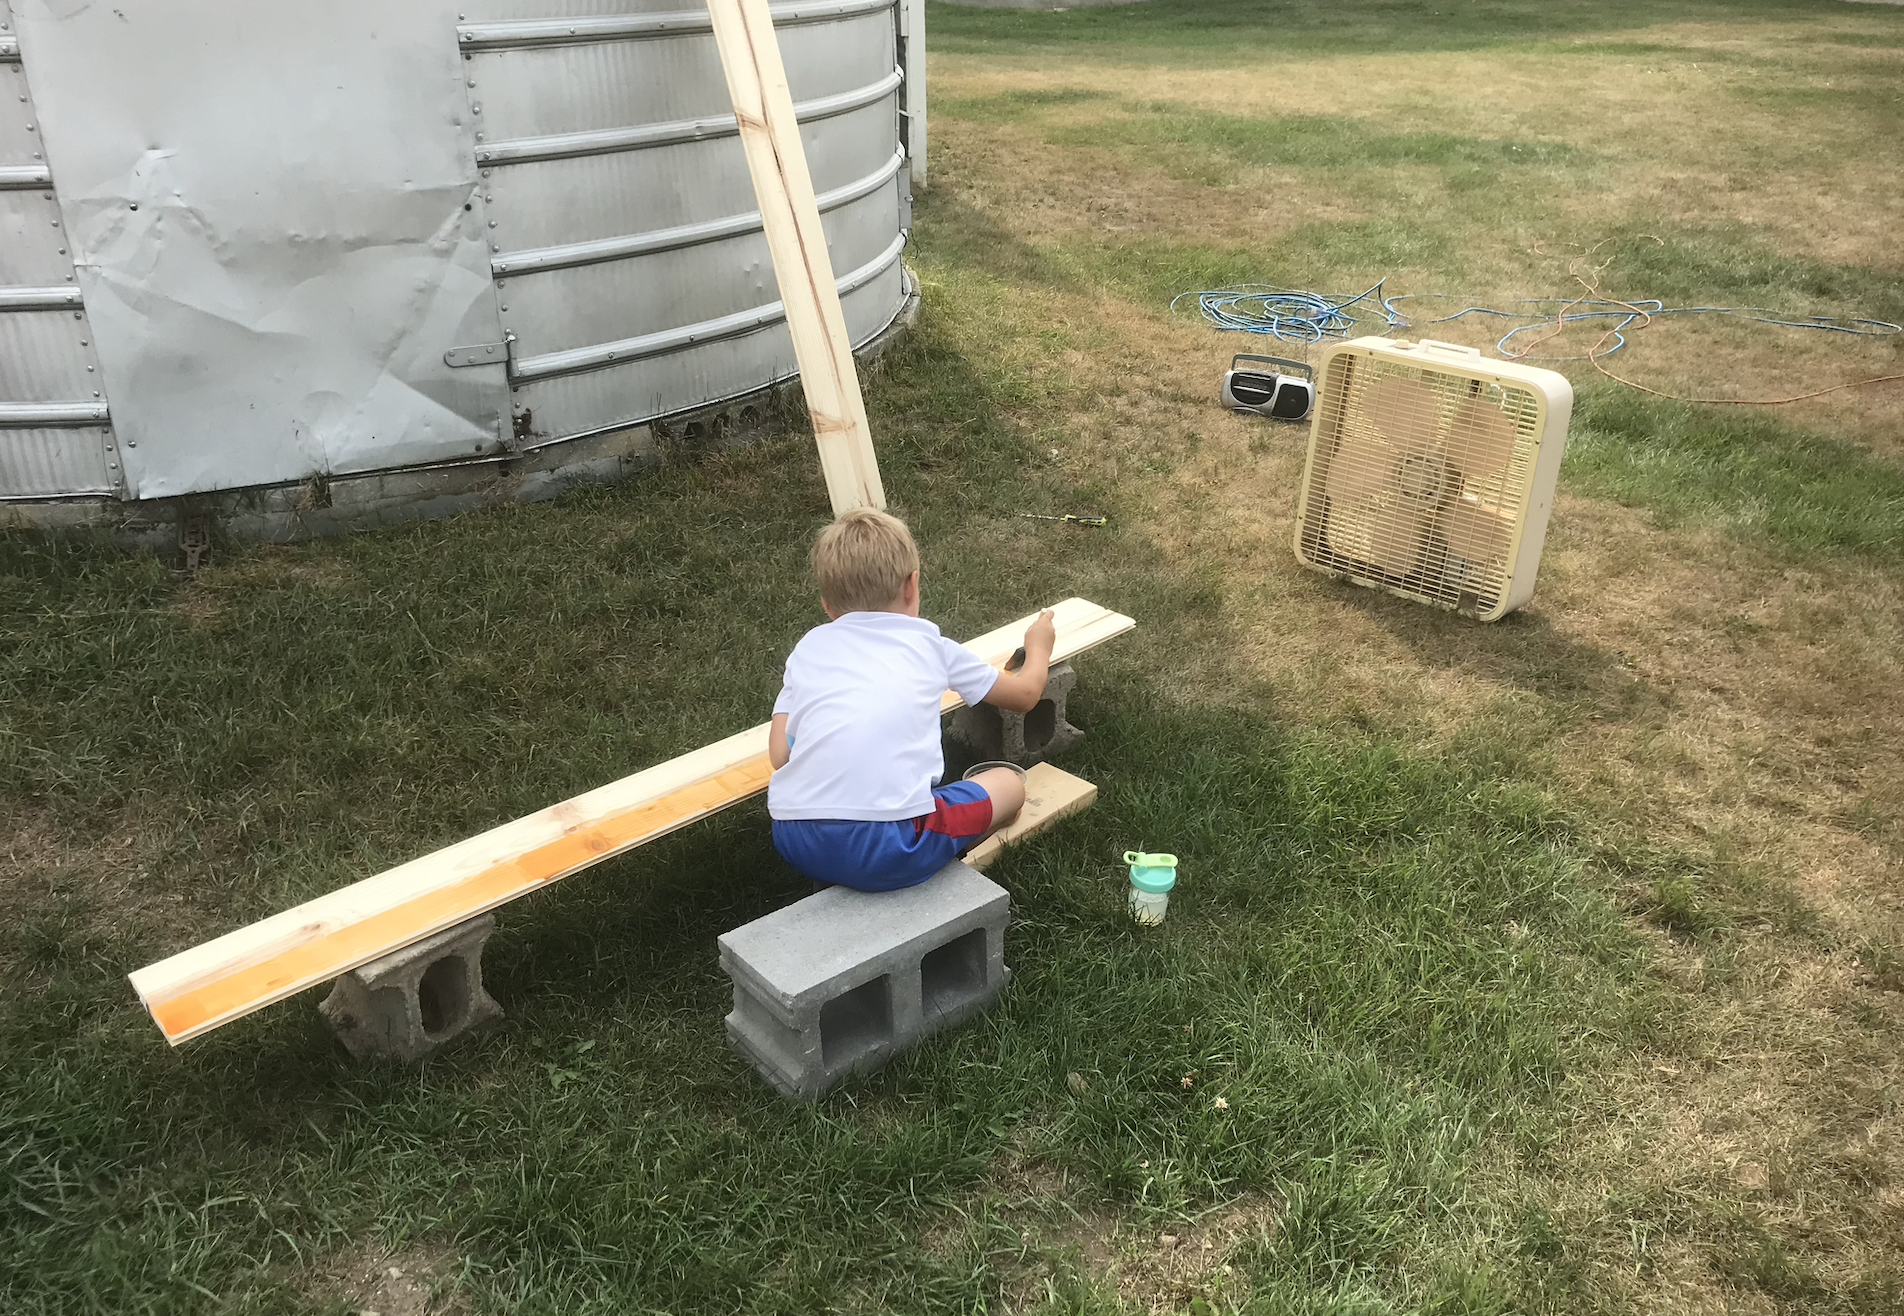
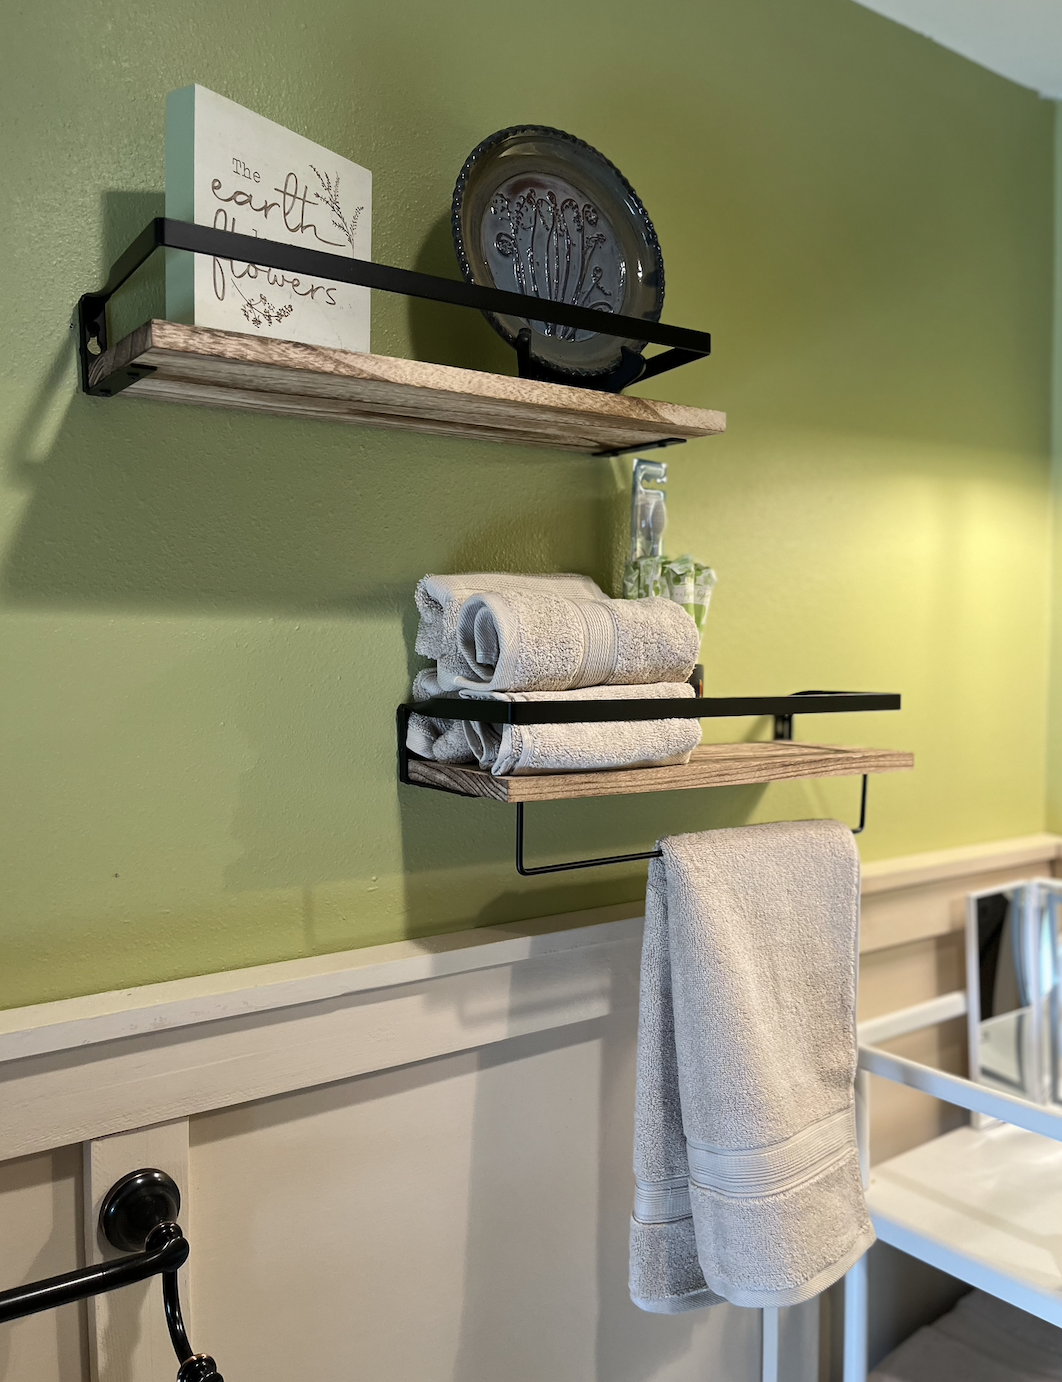
The morning of Christmas (Dec 25) Adam finished texturing the final walls which meant in a day or two we’d be able to paint. We purchased all our paint from Sherwin Williams in Decorah. The colors we chose were: wall = Greek Villa, trim - Irish Cream, wall in loft - Citronella, public bathroom wall - Hearty Orange, and private bathroom wall - Heart of Palms. Flannery did the bulk of the painting after I did the priming.
During this time we also started to work on the cabinet for the kitchenette and the floors. We got lucky that during the holiday we mentioned the challenge we were finding in locating a quality, used cabinet that fit the dimensions we were looking for. Adam’s sister-in-law, Kennidee, said her parents were redoing their kitchen and had some pieces for sale. When we contacted them we happily found a section of cabinets (handmade by the Amish) that worked perfectly. Flannery painted them the same Hearty Orange color as the public bathroom. For the countertop we discovered a used, real butcher block in Albert Lea, MN for only $50. Adam cut it to size and removed the wood for setting the kitchen sink. For the kitchen sink, Flannery had found on FB Marketplace a used 1970s avocado green sink in Rochester, MN.
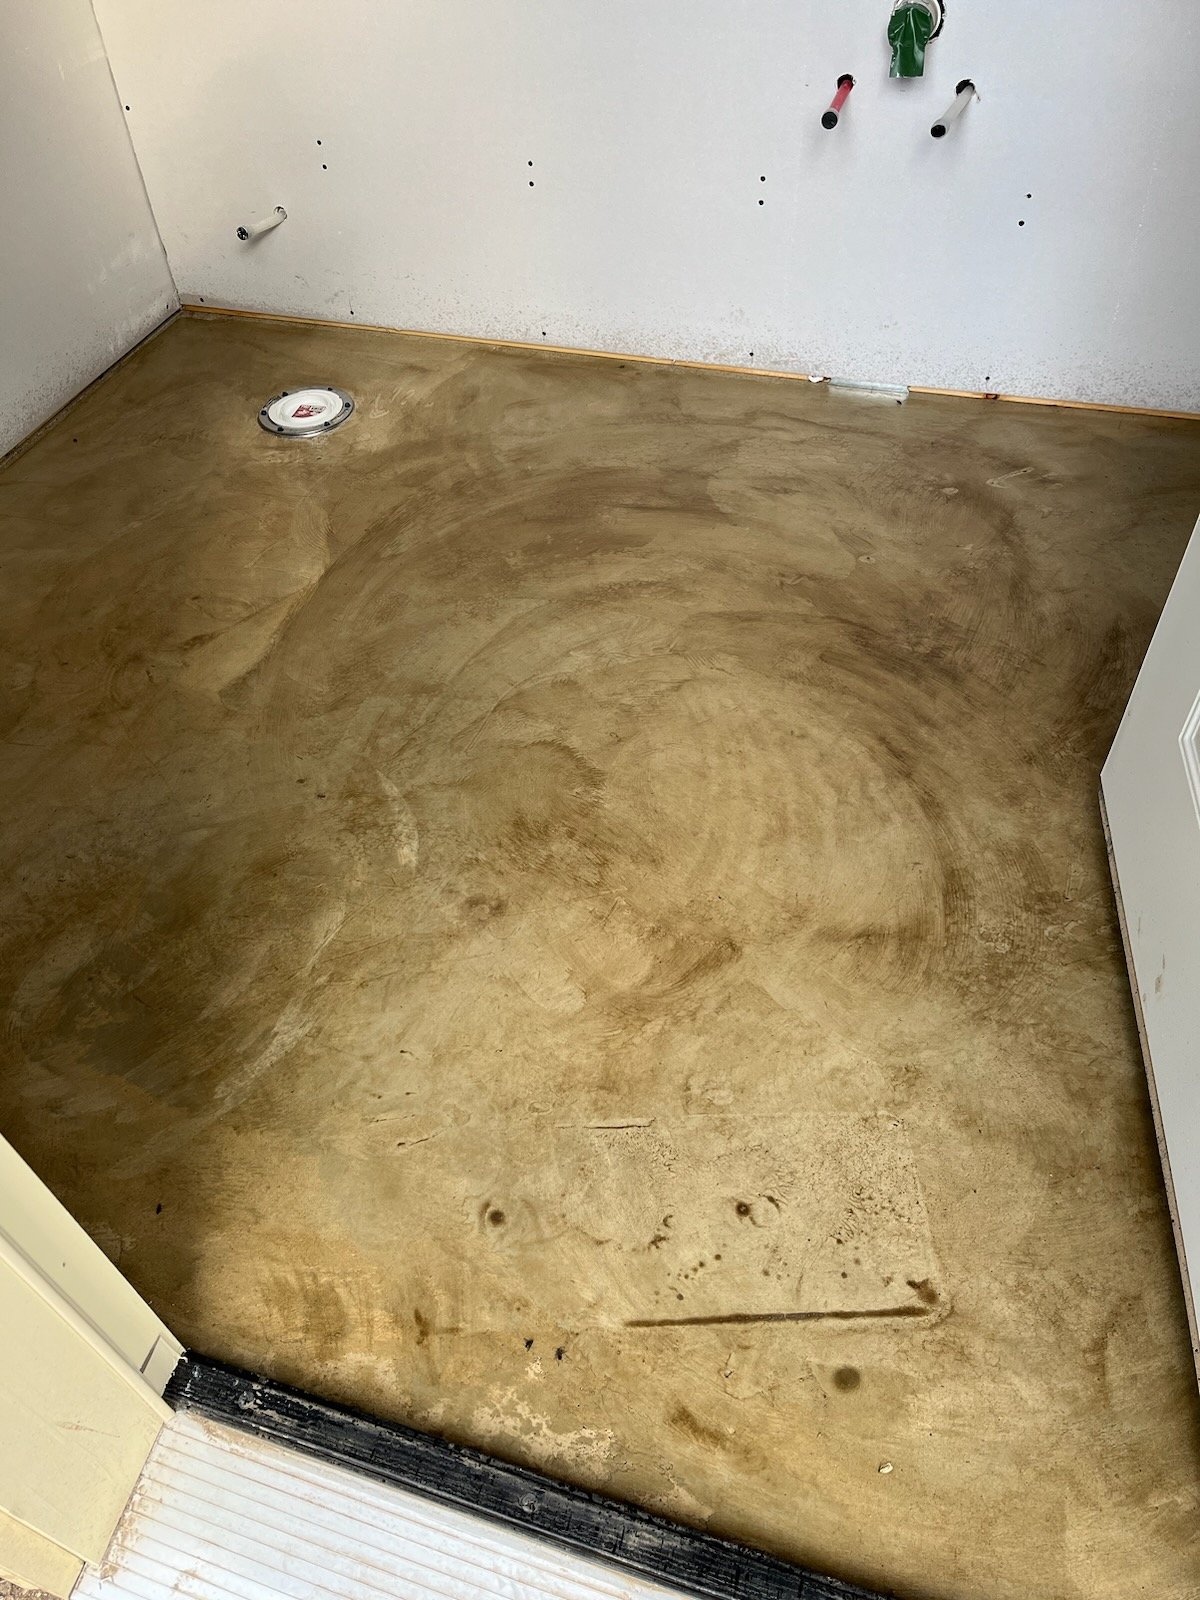
The floor proved to be a bigger challenge than we bargained for. We originally had envisioned a stone=looking floor. With radiant heating we knew we couldn’t install ceramic tiles so we planned on doing an acid-stain and sealer over the new cement. After talking with some friends and doing a lot of thinking we finally pulled the trigger on a contractor to do the work and ended up being completely heart-broken and in tears over the final product. The project looked awful, bringing out every imperfection and turning the cement from gray to poop-brown. We were now back to square one and realized we would have to do a vinyl plank, floating floor which we originally had not wanted to do.
After hours once more of searching and debating we finally settled on a terrazzo plank floor from Alure. We went with this look rather than a wood or stone floor that looked “fake”. Living in a home that is all original wood flooring, it is hard to not judge a vinyl wood floor that doesn’t look like wood at all. We ended up being really happy with this floor, which all arrived safely without any broken tiles. With this we had enough left over (10%) that we decided to carry the floor all the way into the private bathroom. For the public bathroom we went with a different, sturdier floor that was marketed for garages. This tile ended up working fine but the shipping was terrible. We had so many tiles show up broken that we complained and got another free box that allowed us to finish the project there.
With the floor, cabinet, painting, carpeting, and trim all complete we were now ready to do the sinks and shower. For the sinks Flannery had found two, one green and one white, vintage sinks on FB Marketplace. The green sink we picked up for $20 in Wisconsin on our way back from Duluth in June. The owners had removed it from their home and were currently using it as “bear bait”. Whatever that means? Adam installed the sinks and used steel piping for the leg supports. He used the same piping for the ladder and railing in the loft.
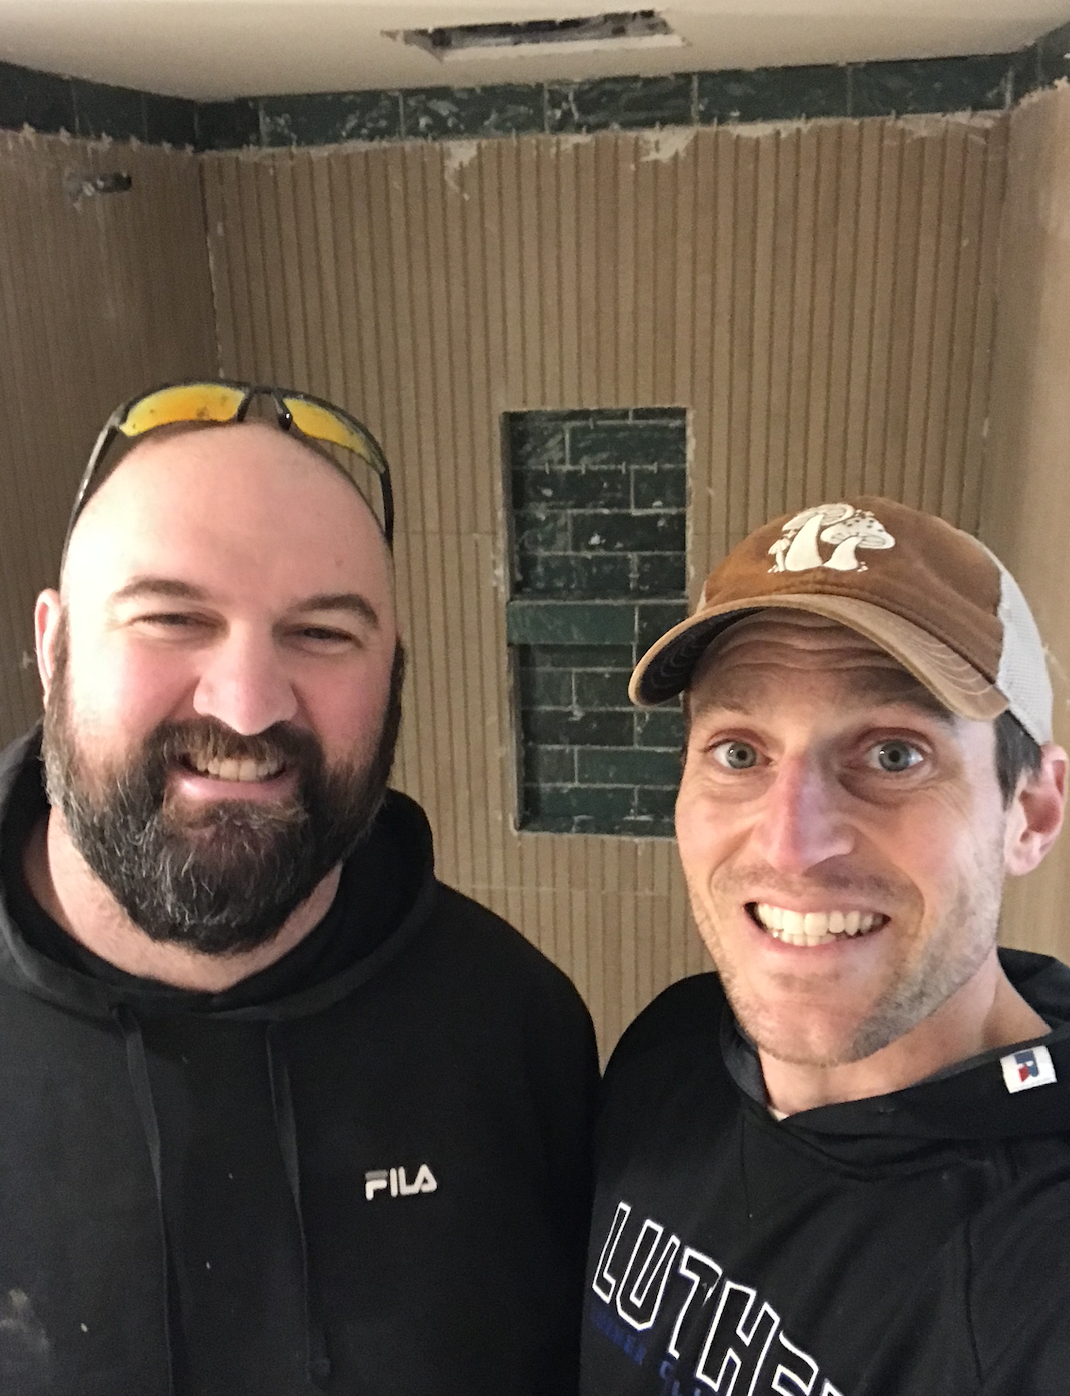
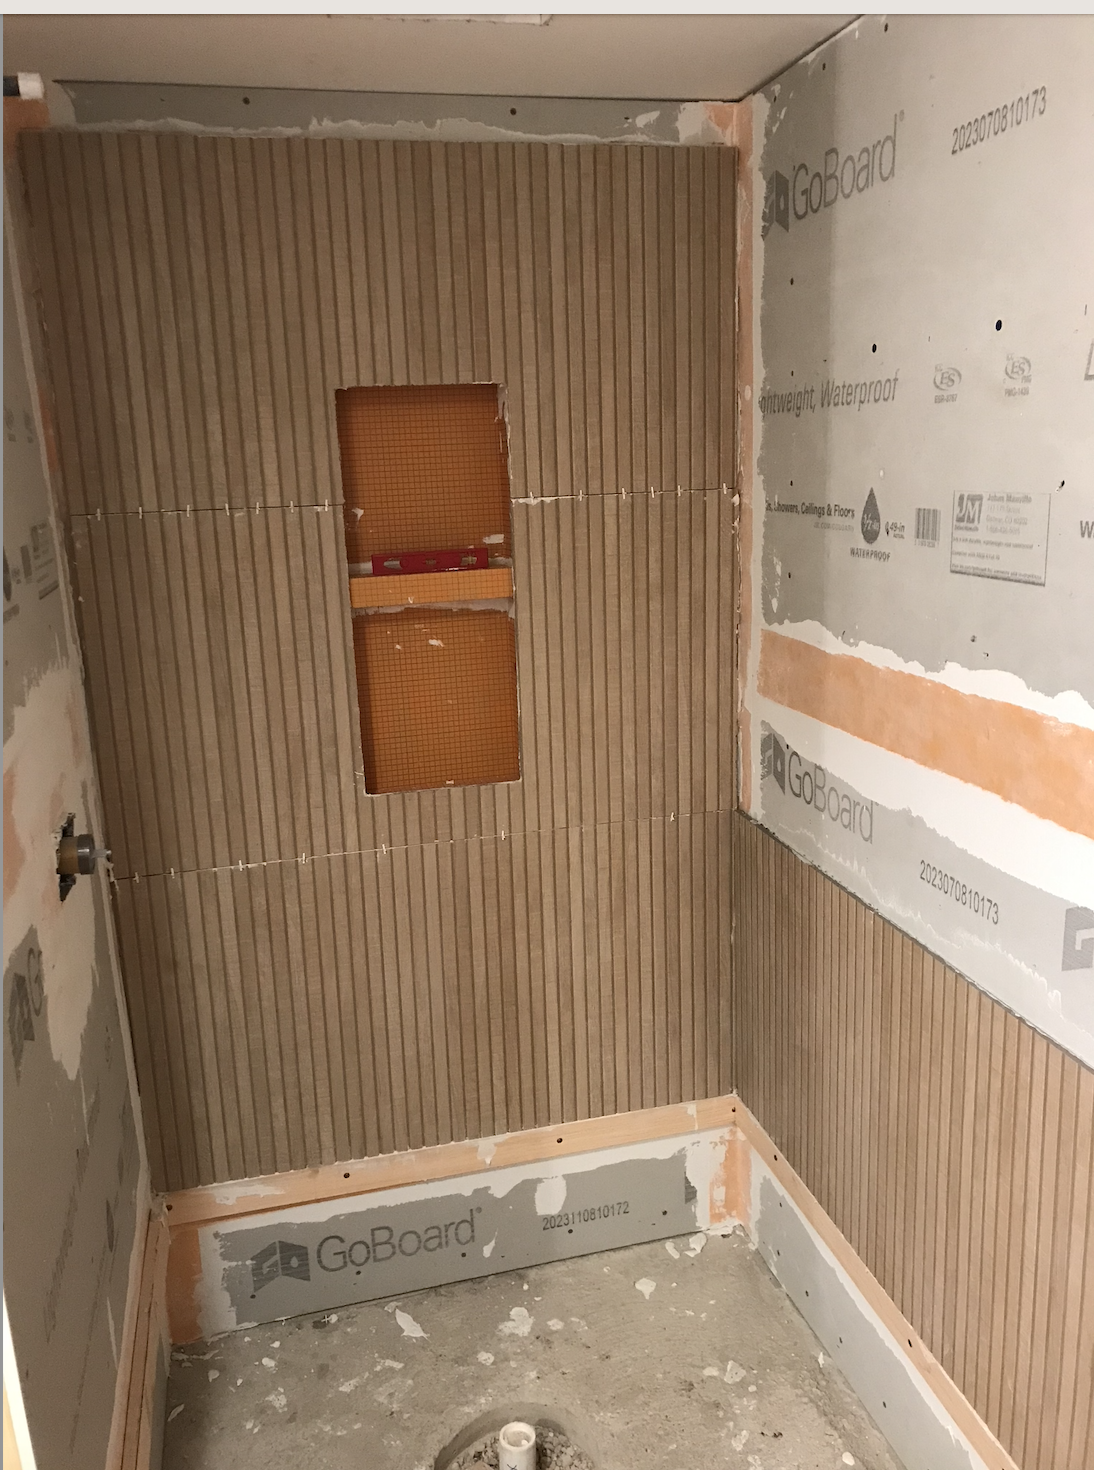
With most major projects now finished, the last hurdle was the shower. This was the last thing and Adam had been fearing it all along. The tile Flannery chose were porcelain sheets, 3/4” thick and 2x4’ large, from Home Depot. For the niche she had selected a green subway tile from Wayfair. Adam had never done any tiling before and these tiles were very intimidating to work with. With such large sheets there was no room for error and a wet saw would not work. Adam reached out to his good friend and handyman Erik Miller.
Adam and Erik had lived together for 2 years in Clinton, Iowa when both started their teaching careers in the same school district. Erik was never afraid to learn and take on a project. Having been blessed with common sense he had taught himself how to tile showers, having done at least four of them over the last 10 years. He happily agreed to come up over a long weekend in February to assist. Fortunately we had a record warm winter and the weather cooperated for working and cutting tile outside.
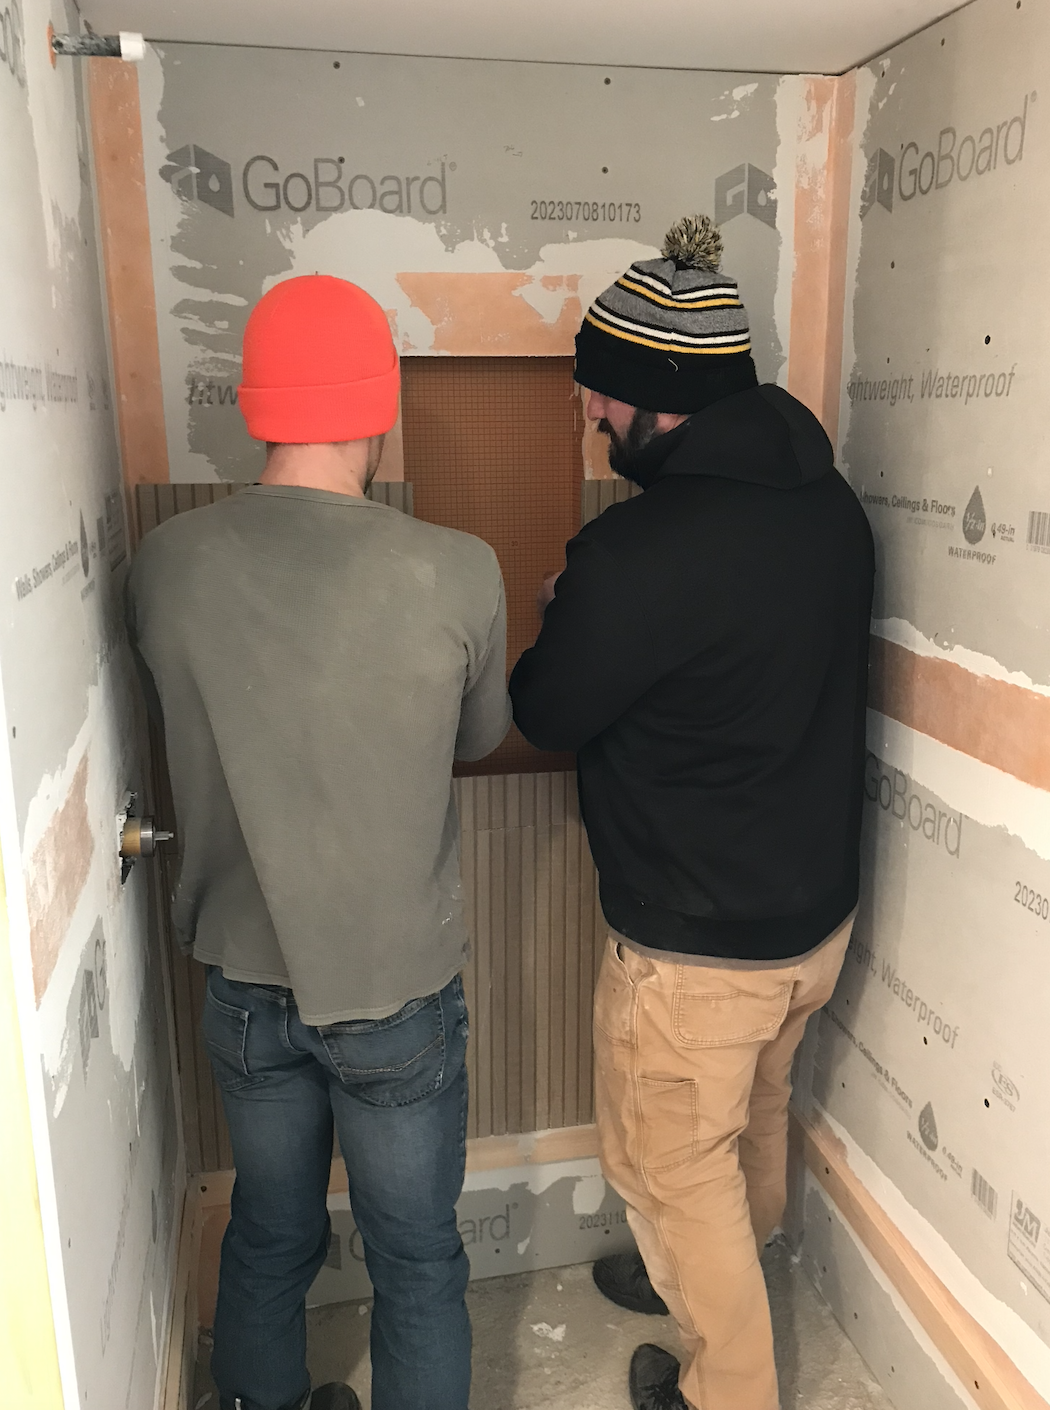
With his guidance over the phone, Erik told Adam what he needed to buy to prep the work and make sure it was waterproof before tiling. On his own, Adam finished framing the walls of the shower to ensure they were all level. He then installed a waterproof, foam backer board called GoBoard from Menards. Using backer board screws he installed these first. Using Schluter-Kerdi products from Home Depot, Adam also installed the niche, taped all the seams using thinset mortar and custom cut the floor pan, which tapered down to a center drain.
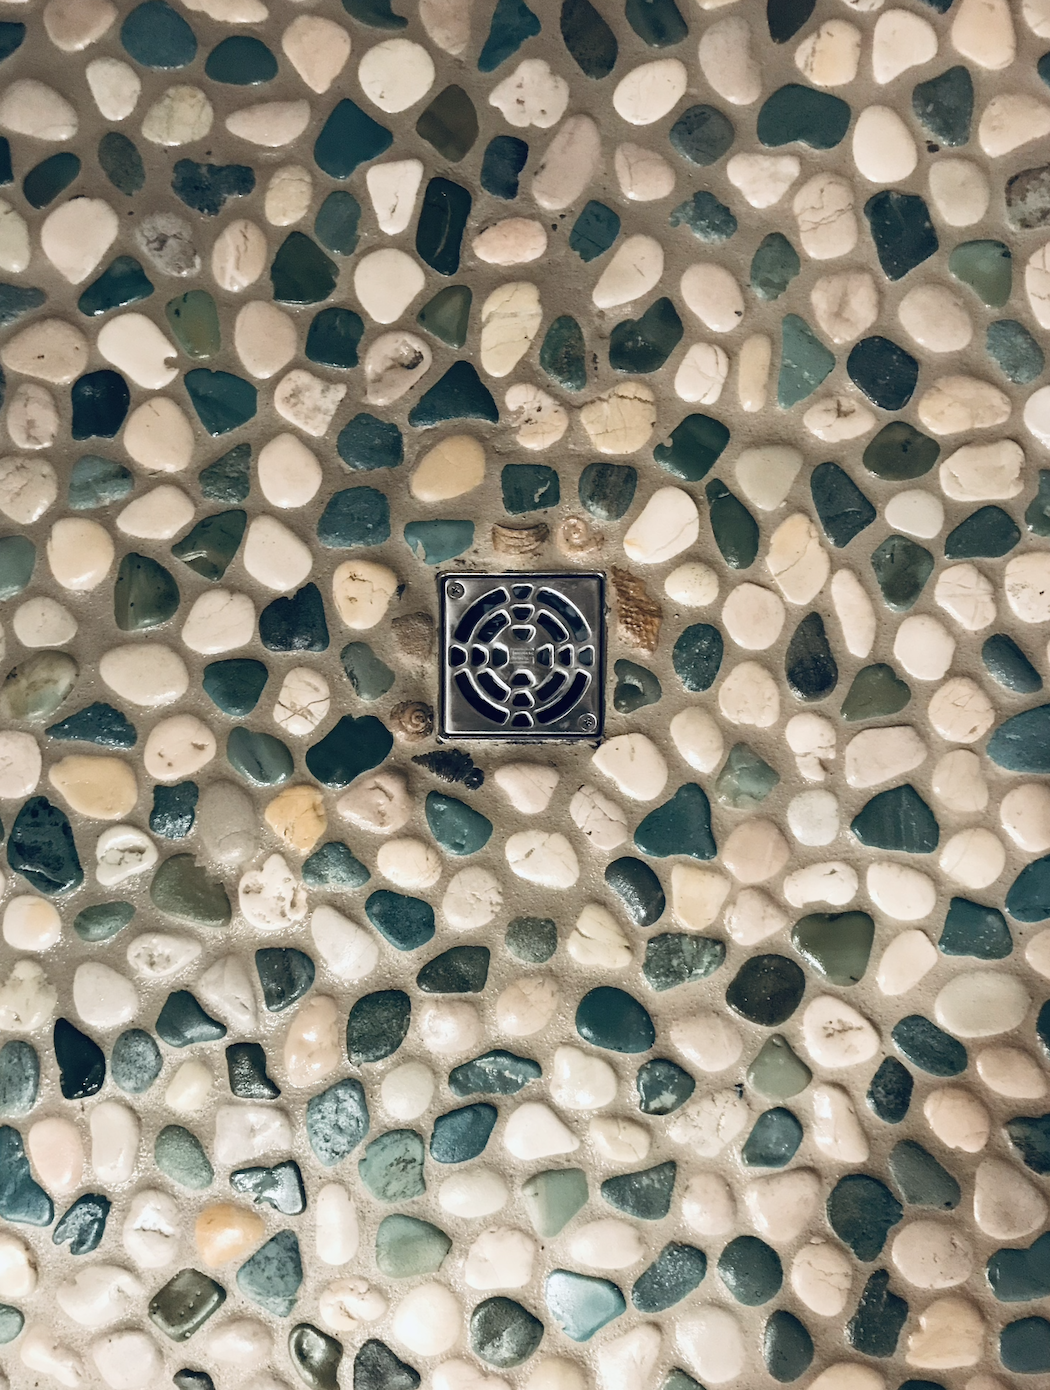
The weekend Erik came up with this family, he and Adam installed most of the large brown ceramic tiles, the stone floor and the green subway tiles for the top border and niche. The bottom pieces they cut but would have to wait until a later time when Adam would finish it himself. A week or two later Adam finished grouting the floor, then installed the bottom border of subway tile, then the last few pieces of ceramic tile and finally finished it off with grout and caulk. Once finished, Adam installed the Delta shower fixture and trim and it was done.


One last major hurdle was the construction of the Murphy Bed. To save on money we purchased a Murphy Bed kit from Amazon ($250) that included all the metal hardware, pistons and detailed instructions on how to cut the wood. Adam carefully cut all the wood pieces and started to assemble. The process was rather easy as long as you read everything five times and measured five times. Thankfully, with the attention to detail in cutting the pieces went together with little difficulty and the bed was finished. The reason we decided to use a Murphy Bed was to alternatively use the space for massages or a private, climate controlled space for a bride or groom to use on a wedding day.
With the exterior work finished, there still remained some work on the outside, particularly the 8x10” porch overhang. To finish this area off we installed cedar (1x8”) boards around the beams and stained car siding and bead board for the ceiling and soffits.
From the time it took to get our first estimate until completion, this project took about one year to complete. The transformation is astounding. When we slept in the guest house a few weeks ago to try it out for the first time, we both stared up at the ceiling, amazed that we had once parked our cars in here and we had done most of the work ourselves.

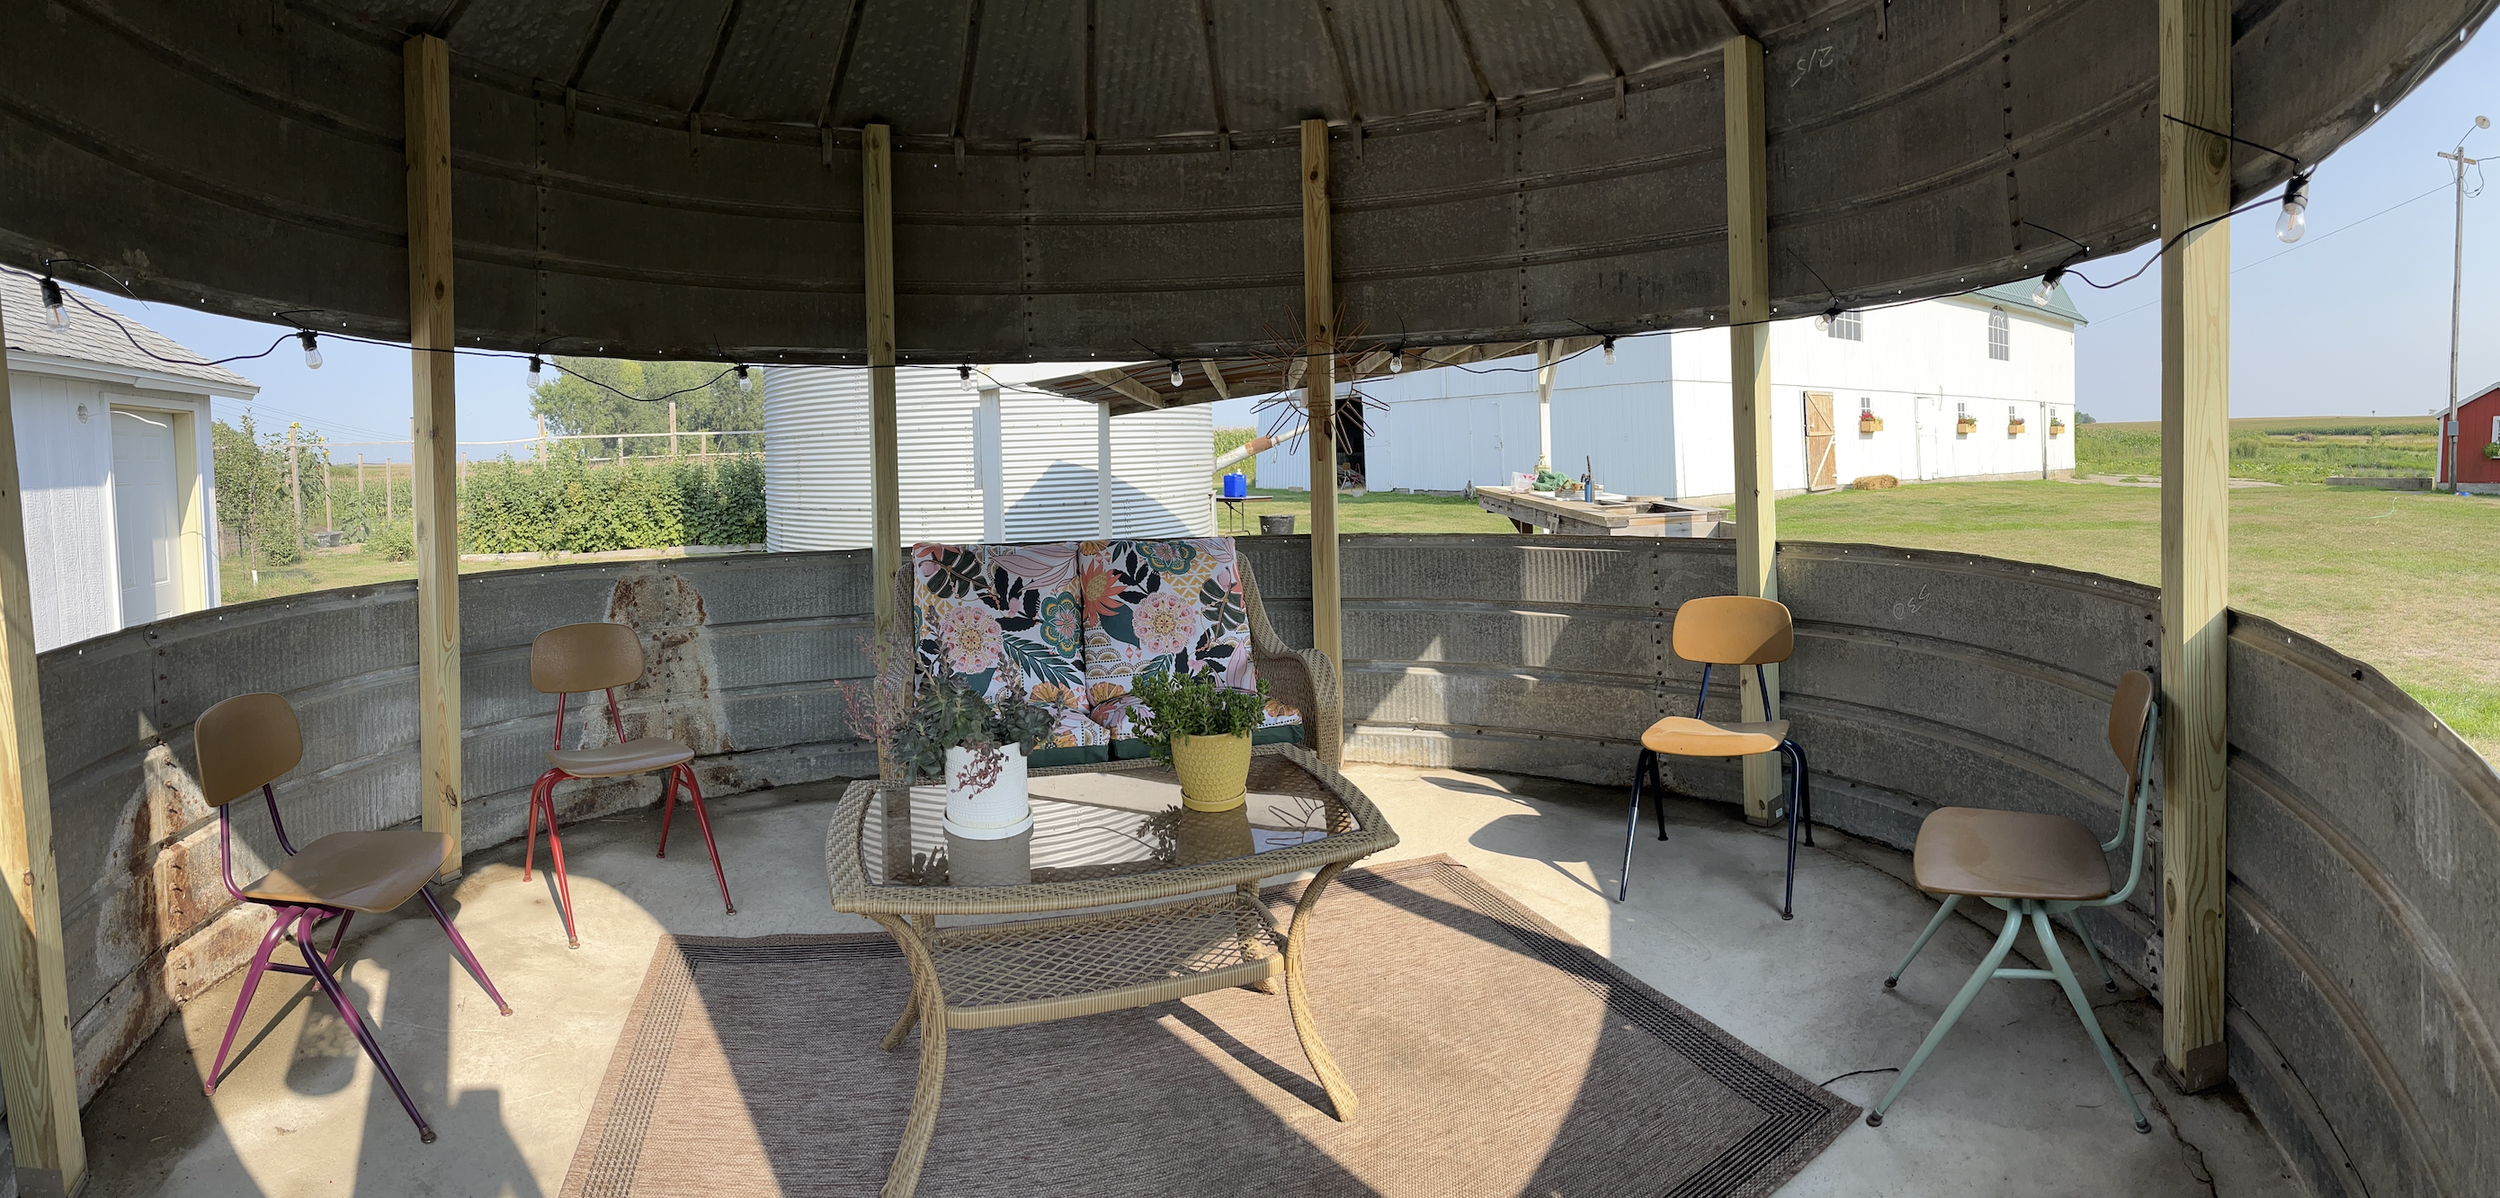
DIY Grain Bin Gazebo
For quite some time we have been learning about DIY grain bin projects. We have two existing bins on our farm, one of which was small enough to make a perfect “binzebo.” The Columbian 501 Red Top Bin (Kansas City, MO) was installed in 1979 to originally hold oats for farm animals. It measured 52’ in diameter with 8’ side walls and 14’ to the peak. The bin was in great condition and fortunately stood on top of a slab of cement. This meant we would not have to pour new concrete and move the bin, but could leave it right where it originally stood. Our hope was to create an additional outside sitting and dining area for visitors and guests who stay in the cottage AirBnB.
The project ultimately took just one day to complete. A rather simple DIY project that quickly created a new space for us to enjoy that otherwise was going unused.
Before I could begin the project I made a trip to Menards to get supplies.
4 x 4” x 8’ treated @ $16.27/pc - 8 total
4 x 4” base plate @ 13.89/pc - 8 total
1/2” hex nut expansion anchors @ $2.80/pc - 8 total
2-1/2” joist hanger nails 1lb @ 20.78/pc -1 total
3” 1/4” hex drive pole barn screw 1lb @ $28.44/pc - 2 total
For the tools I used the following:
Dewalt 20V power driver
Dewalt 20V grinder
Dewalt 20V sawsall
Bosch hammer drill + masonry bit
Level
Hammer, socket wrench, screw driver
Miscellaneous
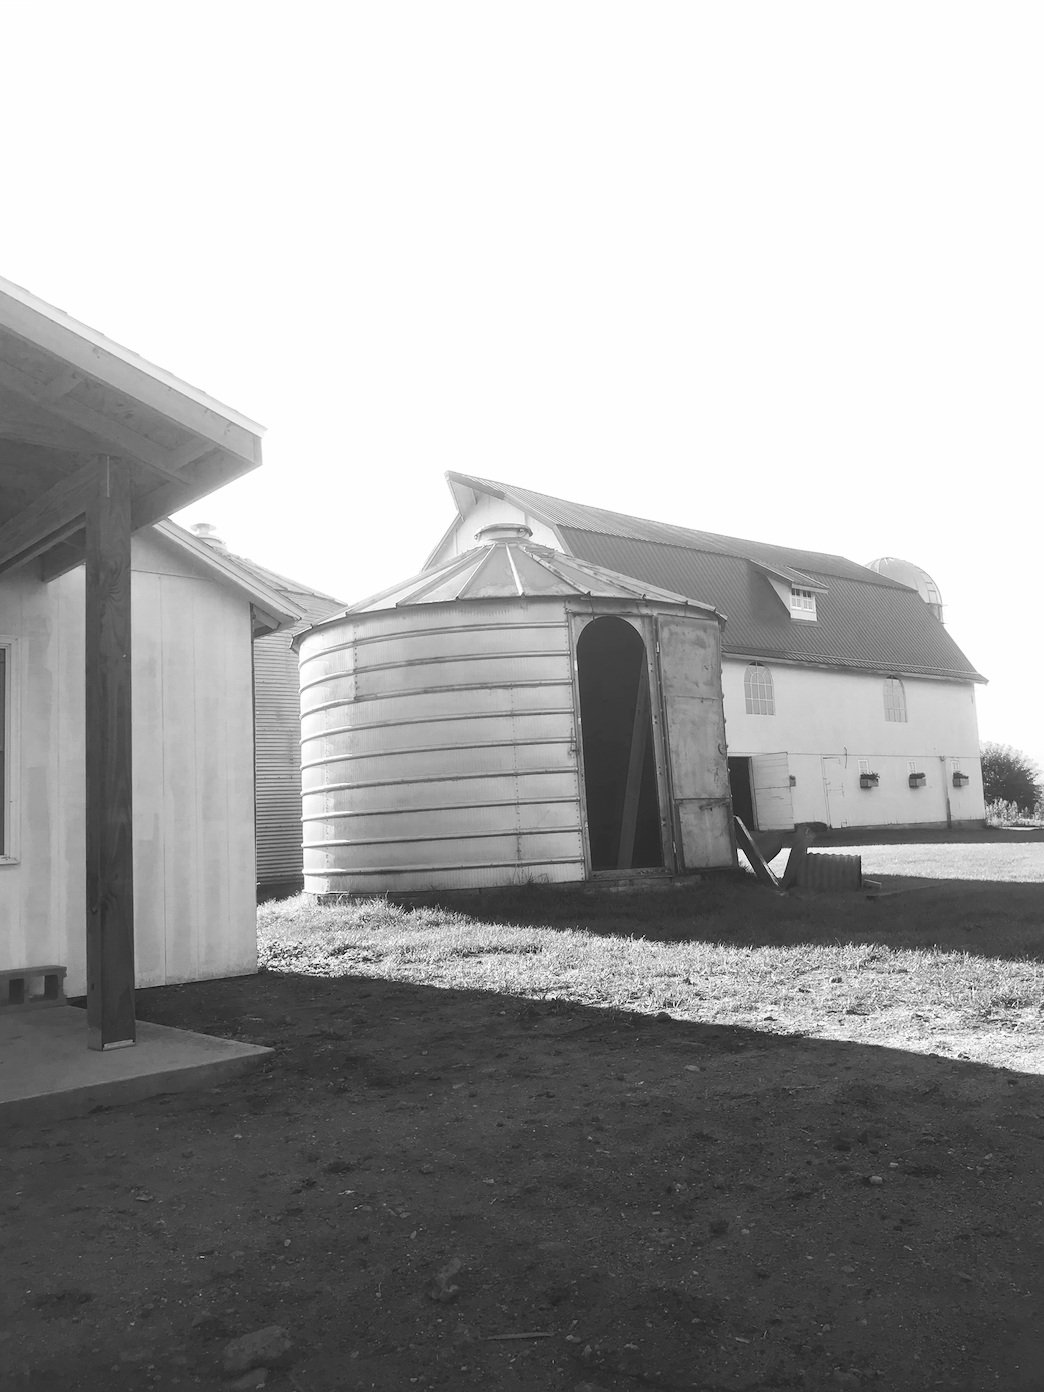
The grain bin before starting the project

Bin door - “TANKS FOR THE WORLD” - 1979
The first thing I had to decide was where to put the door/entrance to the binzebo. This was easy because a full length door already existed on the bin. I decided to keep the door on the bin to preserve the history of the structure even more. I also liked the quote on the bin door - “TANKS FOR THE WORLD.” I decided to position two of my eight posts directly on either side of the door. This meant I had six more posts to use over the span of 48ft. Simple math meant that I would space my posts ever 6ft.
Carefully measuring I positioned the eight metal base plates on the floor where they would eventually go. Using a sharpie marker, I traced around each base plate and marked where I would need to drill. Once I had my holes marked I started to drill the holes using my grandfather’s steel drill, which has been used for drilling through masonry many times before. However, even with Flannery’s help we could hardly puncture the 1979 concrete. After spending over an hour drilling only three of the eight holes, Flannery suggested I go to Ace Hardware and rent a hammer drill. While I wanted to be stubborn, which is one of my qualities, I opted to drive to town. In the end it still saved a ton of time. Within just five minutes I had the rest of the holes drilled.
Positioning the base plates and posts before drilling

What I started with, but eventually rented a hammer drill.
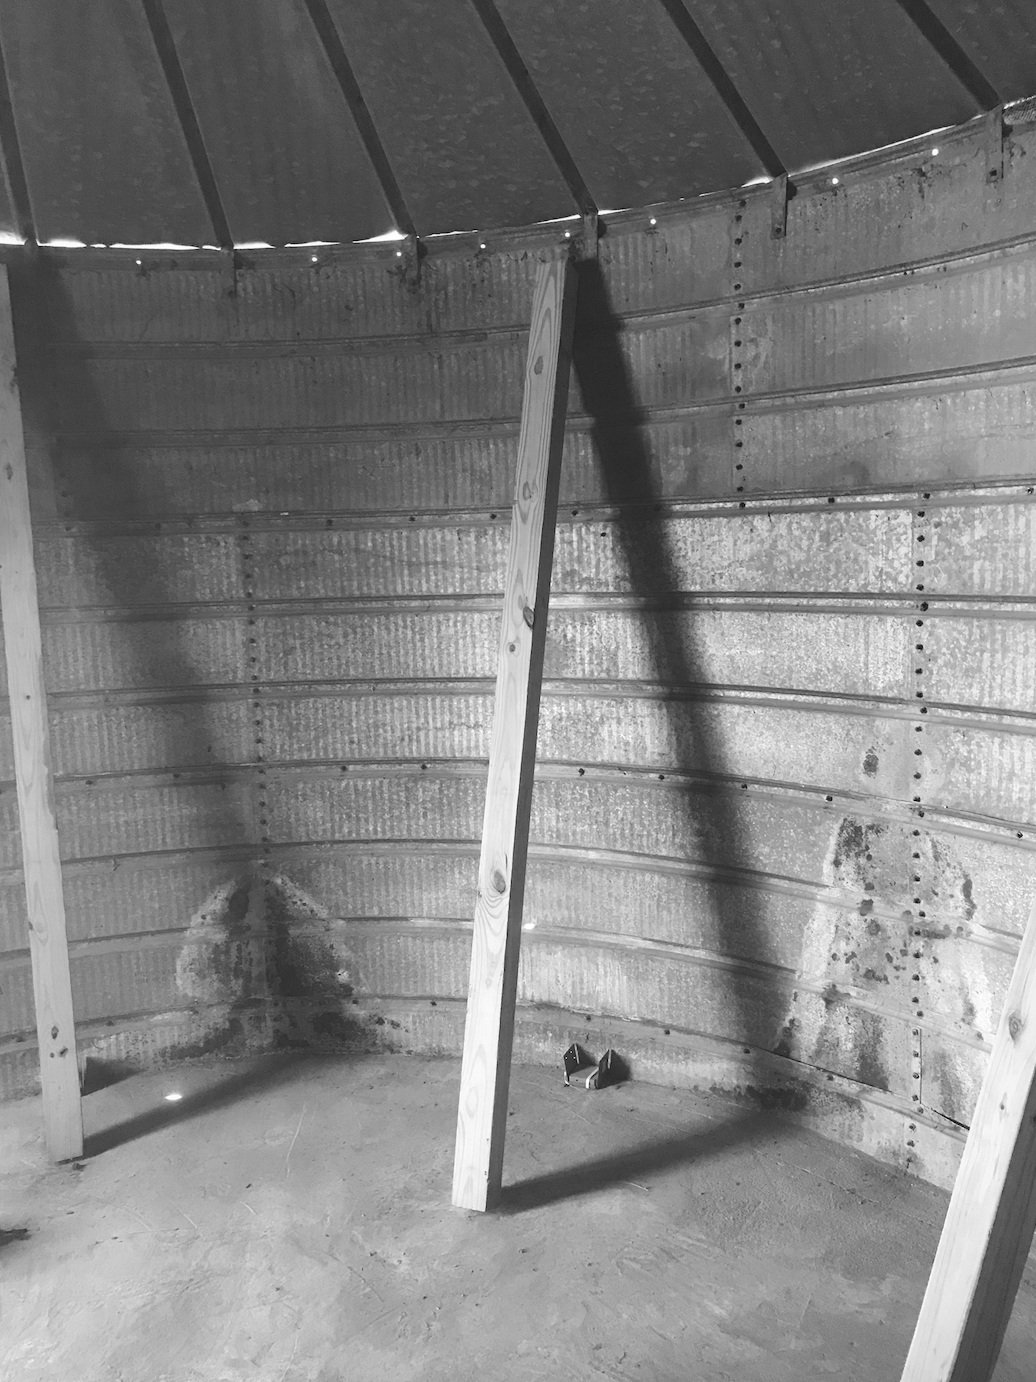
With the holes cleaned out I fastened the 4 x 4” metal base plates to the floor using the expansion anchors. With the base plates now firmly fastened to the concrete, I positioned the posts along the interior wall of the bin. Using a level I made sure the posts were straight and then drilled and screwed them from the outside of the bin. I did this with all eight posts around the inside of the bin.

With the posts firmly secured to the bottom and top rings, the middle ring gets removed.
Removing the middle bin ring - view from the inside
With the bottom and top rings of the bin now firmly fastened to the eight posts, it was time to start removing the middle ring. The rings were securely fastened together using small bolts and square nuts. Over the past 44 years, however, the bolts and nuts had rusted making it impossible to get some of them apart. I would estimate 40-50% of the bolts could not be undone with just a socket wrench and screwdriver. For those I had to grind off the heads of the bolts.
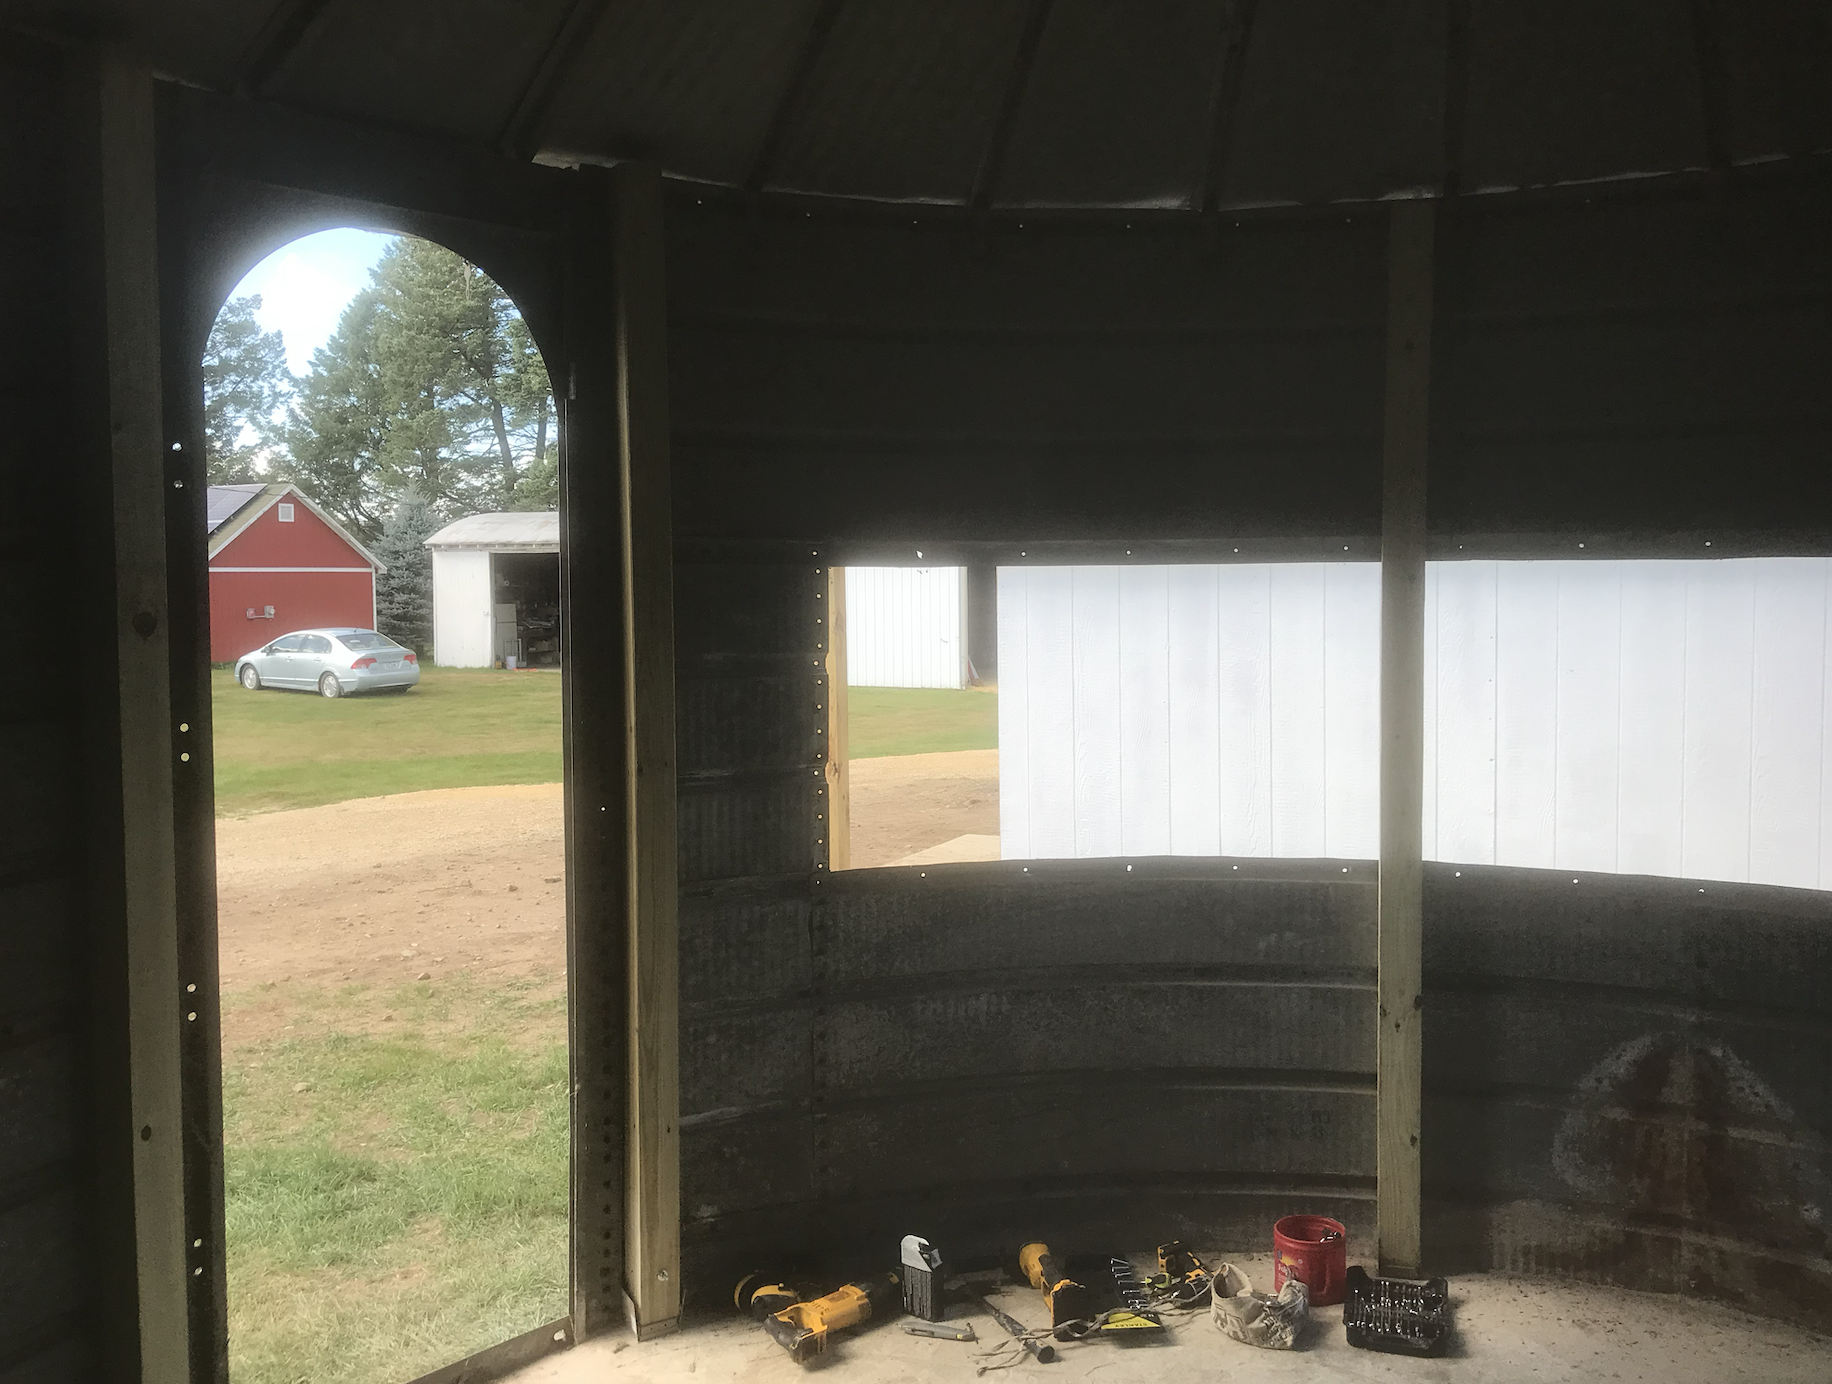
Working on one ring at a time, I made my way around the entire frame of the bin until the entire middle ring was removed.

The rest was purely cosmetic at that point. Once I was finished, Flannery stepped in to do her part and attached a 48ft strand of bistro lights (also from Menards), along with some patio furniture. Viola, the grain bin was now a full on binzebo! That evening we ate dinner and enjoyed the benefits it provided - open air, shade and even a barrier to keep the cat from climbing onto the dining table.
The Barn Renovation
Aside from marrying Flannery and having two beautiful children, renovating this barn may be one of the greatest achievements of my life. I am not entirely sure how it happened, but over the past year I found myself painstakingly transforming our 1950s dairy barn into something almost magical. Without having any formal education in carpentry, this project taught me a lot more than any textbook and it was certainly more fun than reading one. With minimal risk involved, I kept telling myself that no matter what I do, I certainly can’t make it worse than it already is. With a set of power tools, Youtube, and a lot of muscle I decided to set to work in May 2022.


It all started when large sections of shingles started peeling off the roof after a wind storm. We first attempted to patch the shingles ourselves and that only lasted a few months. We didn’t seriously consider tearing down the barn, which is often the fate of other dairy barns. However, we weren’t really sure what we would use it for. We just knew it was worth preserving.


We first secured the roof with steel. Without a protected roof there would be no sense in putting any work or money into it. After a few phone calls and text messages we had two estimates out of Granger, Iowa. We hired a crew of Amish to do the work (563-547-5971). With the roof set to be finished in July, we started working on the exterior of the barn over Memorial Day weekend. Now that we had invested the money into the building, we wanted to get some use out of it!
Our second child, Neely, was born on May 6. My family decided to come visit and not only see the new baby, but help pressure wash the outside of the barn. I rented a pressure washer and Nifty Lift 4x4 Boom from Decorah Rental. Within just a day, we had stripped most of the paint from the barn that could be removed.
The next step was the paint. I used five 5-gallons pails of Behr white barn and fence paint from Home Depot. I also rented the Nifty Lift a second time along with a paint sprayer. Over the course of just two days, I hand scrapped and applied two coats of fresh paint to the barn. Additionally, I tacked down loose boards with new nails and replaced the old windows from Recycled Products out of Monticello, Iowa. This company was so good to work with. They had excellent customer service, customized every window we needed (not all original barn windows are the same size) and used all recycled products to construct these built to last windows.
With a new roof and paint job, the barn had an entirely new face-lift. The difference was shocking to say the least.

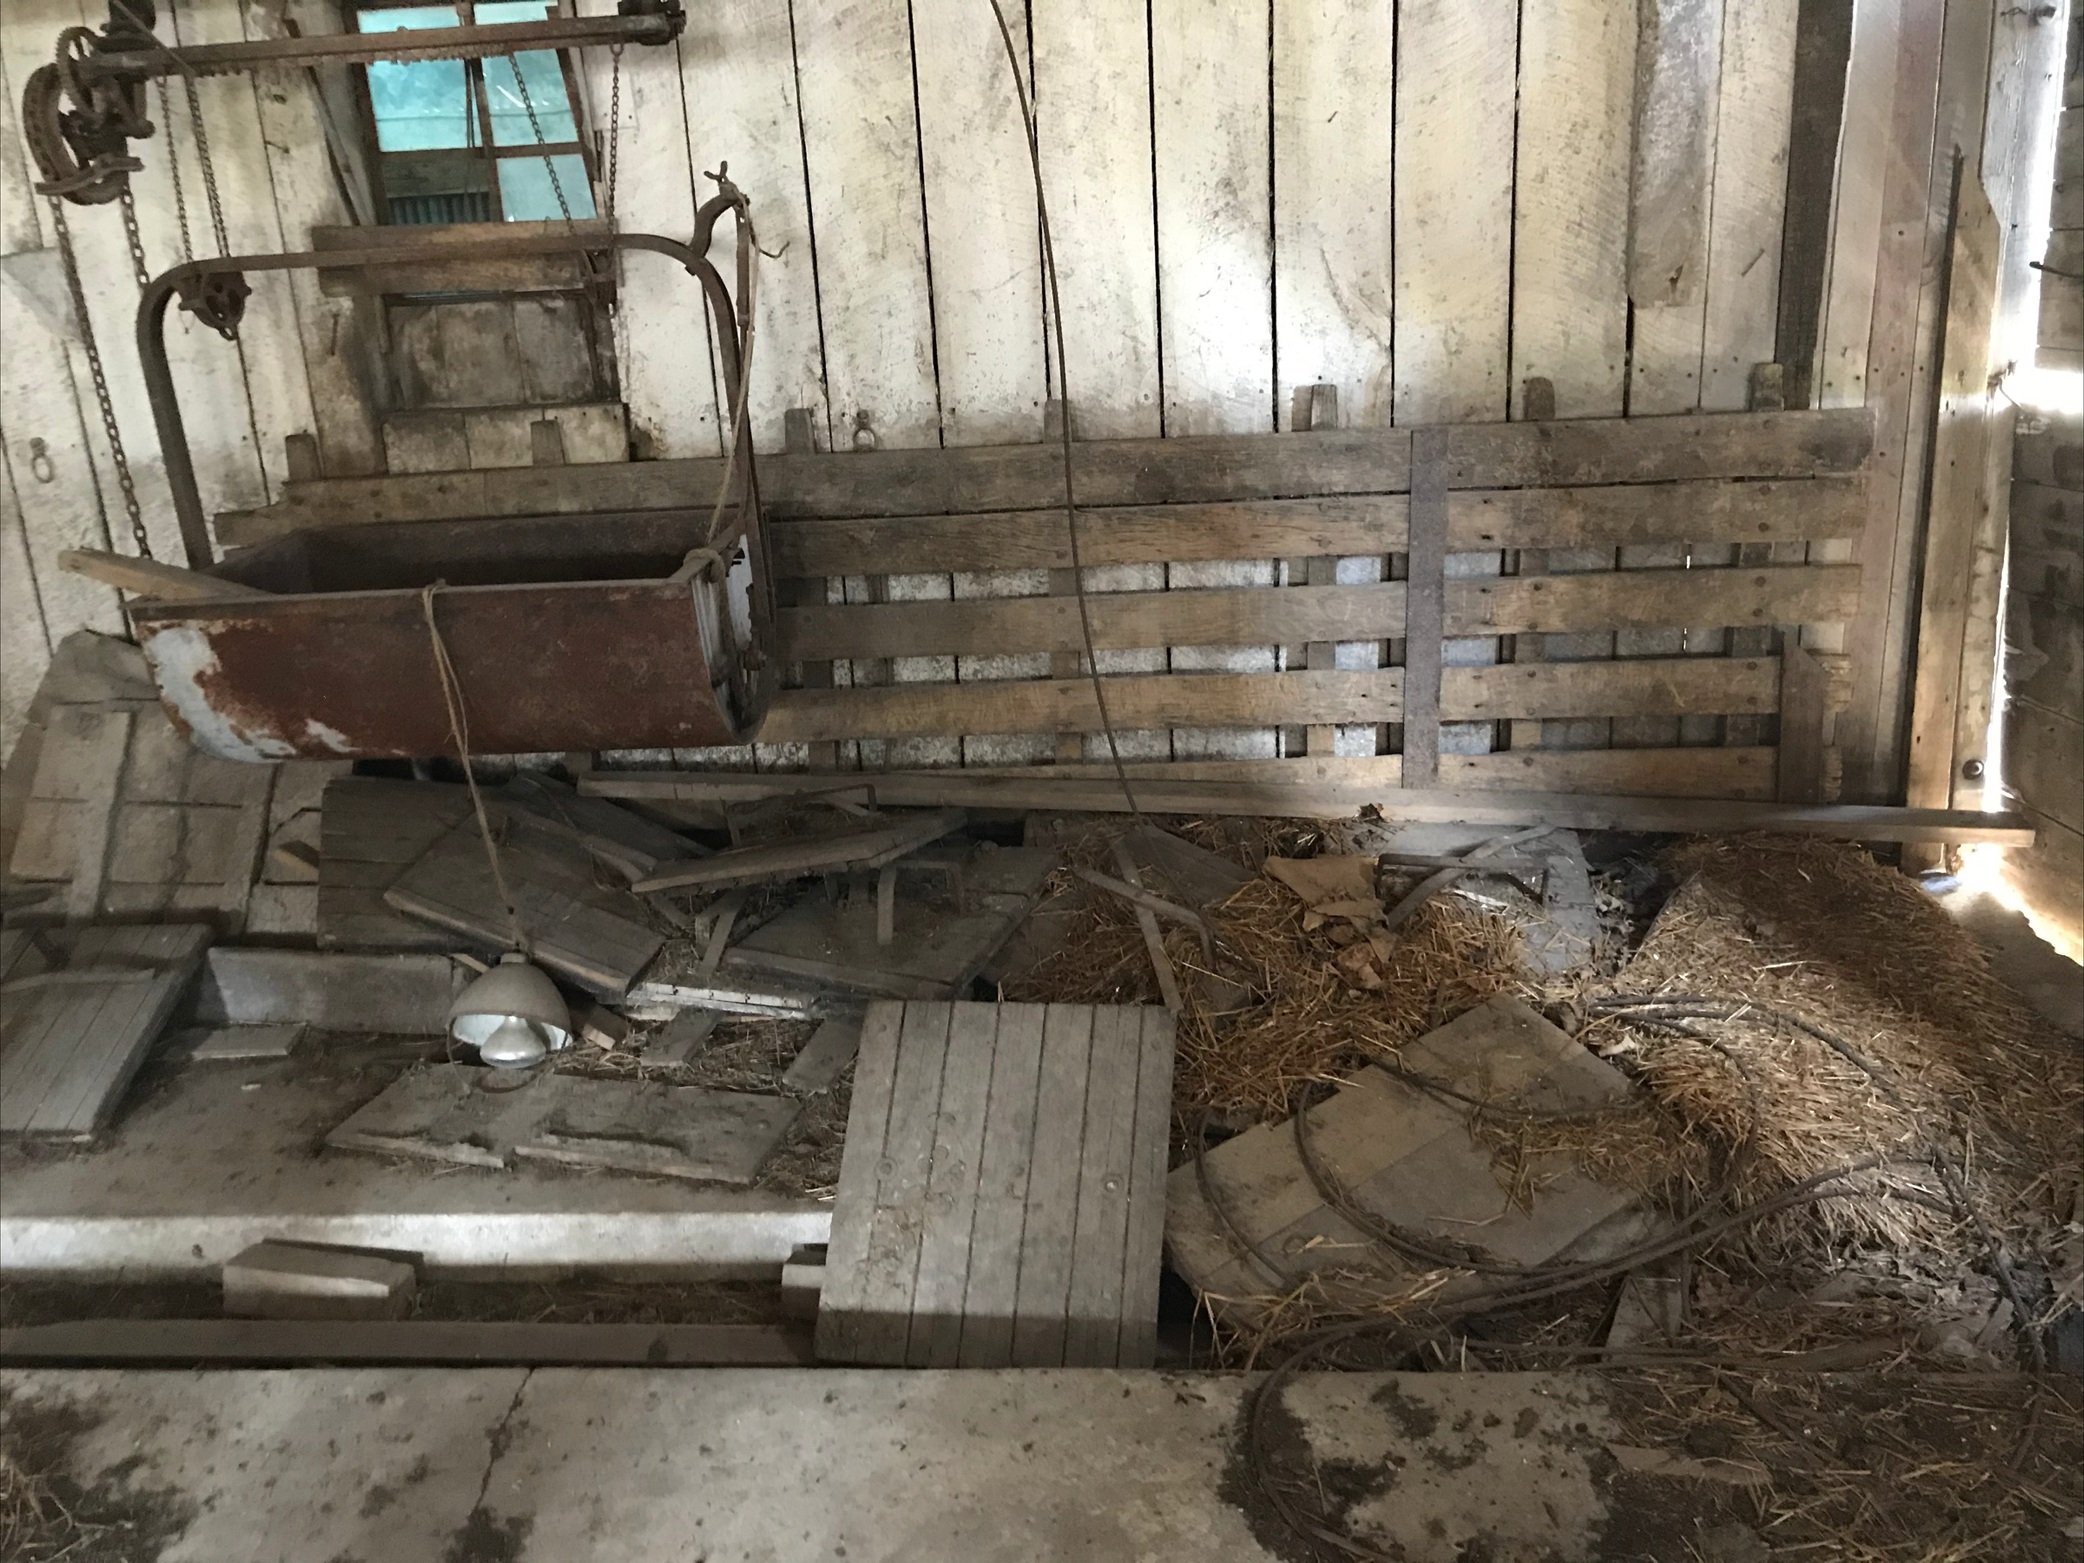
Yet, that was just the outside. The inside was still in rough shape. Structurally the barn was fine, but the years of neglect had left six inches of straw and raccoon skat in the hay loft. Where rain had managed to leak into the barn, that straw was molding and rotting through he hay loft floor. The downstairs was just as disgusting and still retained the original milking stanchions and feeding stalls.
To start the cleaning process I decided to start up high and work down. This meant starting to remove the straw, skat and dust from the loft. The challenge was that I could not see the sub-floor to know where it was safe to stand or where I’d potentially fall through. I also could not wear both a N-95 face mask and goggles at the same time because the goggles would fog. I opted to protect my lungs over my eyes. Laying down a 4x4ft sheet of plywood to safely stand on, I started broom and shovel the debris toward the bale chutes located on either side of the barn. Afterward, my eyes were puffy and red for days, but the loft was looking much better already. I continued to do the same on the ground floor until the bulk of the debris was taken out of the barn.


Now that I could see the entire hay loft floor I discovered large sections that were completely rotted away along with the joists underneath. Before I could even start laying down a new floor on top, I had to replace and add new 2x10” joists underneath and 3/4” plywood on top. With a 20V Dewalt reciprocating saw, I cut out the joists and flooring that were unusable. I then screwed the plywood down and patched any other rotten areas in the same way.
While I was working on the barn a few hours a day when time allowed for it, Flannery was relentlessly searching for used flooring on Facebook Marketplace. The challenge we had was finding enough flooring to cover the 2,200 square feet we needed. At one point we even considered just buying new CDX plywood from Home Depot, which would have been a shame. At last, Flannery found a post about used bleacher boards from Winona State University. With the help of my Dad and his truck and trailer we hauled the entire load in a day and stored it in the barn. My brother, Garrett, then helped lift each board up through the rotten floor where then I then stacked the wood piece-by-piece.

Before laying down the new flooring I asked a few local carpenters for their opinion. Both Todd Neal and Paul Cutting agreed that I should use a moisture barrier. I opted for #30 tar roof underlayment from Home Depot. They also recommended running the new boards perpendicular to the existing floor boards. This would add strength and prevent any warped or uneven sections of the floor from being visible. To nail the floor, they recommended using a nail gun, set to recess the nails 1-2mm. This way, if I ever decided to resand the floor I wouldn’t have to worry about the nails. The nails I used were Grip-Rite collated ring shanked from Home Depot. As bleacher boards, they were not tongue and grooved and that left me with no choice but to face nail them down.

Over the winter break of 2022 I finished preparing the sub floor and began laying down the felt moisture barrier with 1/2” staples. Once the barrier was down, I started laying down the new boards beginning in the middle of the barn. I made sure to randomize the boards so that no two identical boards were adjacent to one another. Piece-by-piece the barn started to transform itself into something greater than we had imagined.

Old Armory BBQ restaurant (Decorah ,IA) with arched windows now installed in the barn
During this time Flannery happened to see a post on Facebook Marketplace for a pair of arched windows for sale in Decorah, Iowa. We discovered the windows were from the original post office in Decorah, now the public library. There were originally four windows in the early 1900s when first installed. One of the original windows is still located in the library. The other three were installed at a restaurant located on Water Street in downtown Decorah. When the restaurant closed and the building was being remodeled, one of the other windows broke during removal. The other two were now in our possession and while we weren’t entirely sure where to put them, we knew they were so special that they were too hard to pass up.

While laying down the floor was going faster than expected, everything came to an abrupt stand still when I got to the north and south ends of the barn. Here I had to close off the two existing bale chutes. For those who have never been in a barn, this was where the farmer would throw down bales for the cows. It was also the only way to access the upstairs from inside the barn. That meant, once I sealed off the chutes I would have to make a staircase with a new access point. We opted not to add a staircase on the exterior of the barn where it would weather from sun, rain and snow. Instead, I removed two joists on the NW corner of the barn creating a 6x16ft hole in the floor.
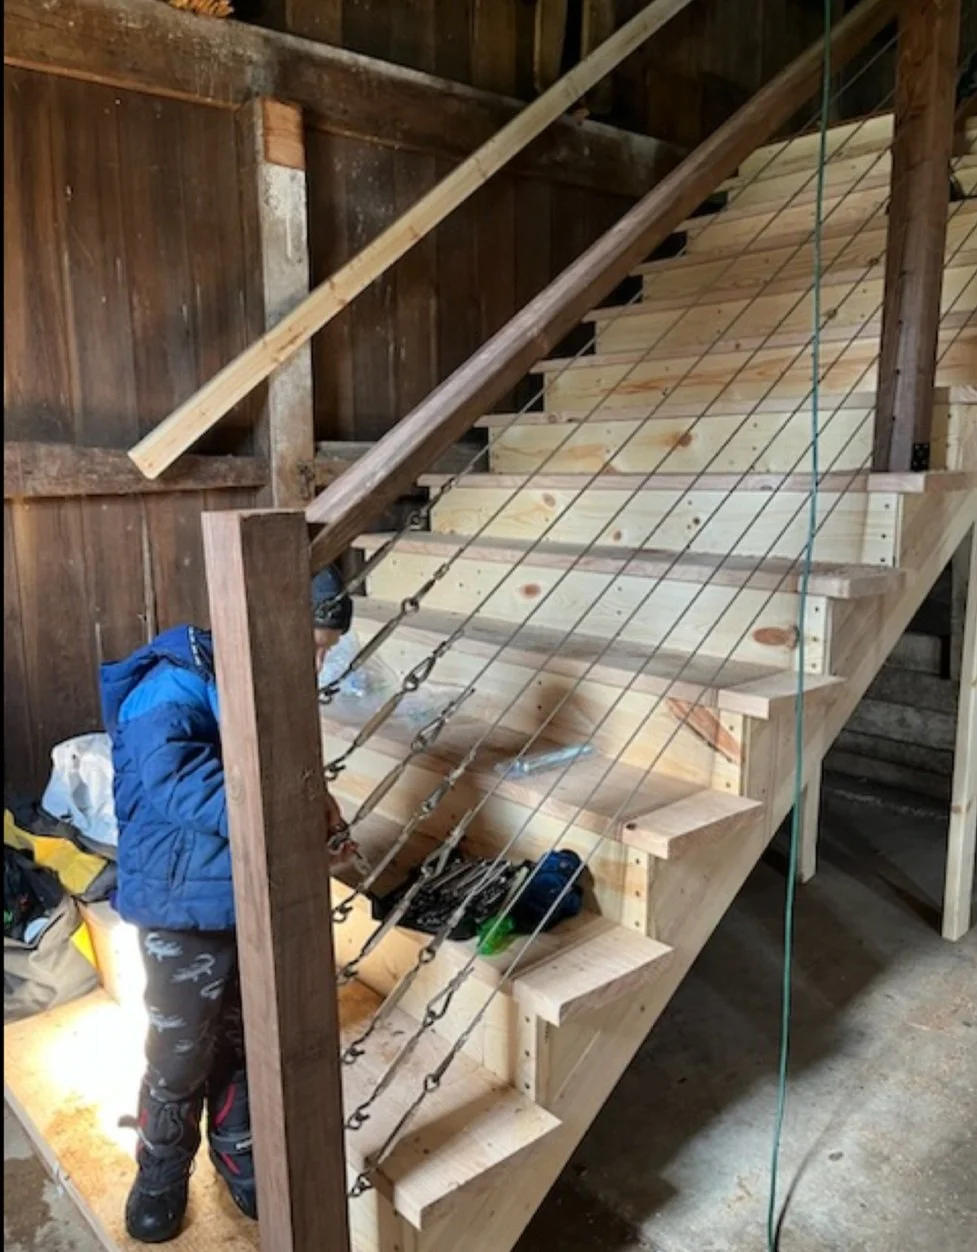
Going into this project I would have never imagined the stairs to be the most challenging “step” in the process. If I ever have to teach geometry class, I would make my students build a staircase. The complexity of angles and math made my head spin. Without my Dad’s knowledge and steady hand I would have probably had to call SOS when so close to the finish. Instead, we now have a set of stairs that aren’t only functional, but a memory I’ll always share with my Father. Thanks, Dad.

At last, the stairs were installed and now we could continue with the railing and banister. We opted for galvanized steel uncoated wire rope with turnbuckles for the railing. For the upstairs banister we used rebar, which Flannery painted black and I cut down to 30” with a 20V DeWalt Speed Grinder. For the framing we used cedar tone pressure treated lumbar because the color best matched the interior wood.

Everything was now finished except the arched windows. After sitting on the idea for many months we finally decided where to put them. The west wall of the barn made the most sense. The barn beams were already framed nearly to size, which required very little framing on my end. It also meant more daylight exposure, providing lots of natural light during the day and provide a sunset view in the evening. Over the weekend of July 4, 2023, Flannery and I made the last few measurements and held our breaths when we cut two huge holes in the side of the barn. As soon as the boards fell out and the light shone in, we knew we had made the right decision.

Flannery finished the final touches and together we set the windows into their, hopefully, final resting place. Without a doubt, the two windows transformed the barn into something beyond comprehension. We now have a lovely space for the kids to run and bike indoors on rainy days, to host gatherings on the farm, and of course, I am already envisioning a new gym for winter training.
Even weeks after completing this project, we still look out at the barn now and wonder if it is really ours to own. What was not long ago just a big building to block the east wind, is now so much more. I hope this feeling of appreciation never fades and that our visitors share this feeling with us.

Written by Adam Bohach
Farm Updates

One of six chicks hatched at Tailwind this Spring.
Greetings Earthlings!
It’s finally June! Wow. The end of May was rough with a spell of low 50s for a few days and very rainy and windy. There was a hard frost on May 27 even. We had all our transplants in the ground. Like many area gardeners I was anxious about doing everything within reason to protect all plant babies. We covered and managed to come away with only some damage to our potato crop. We feel very fortunate. Every year there are challenges with the weather and climate change is only exacerbating the extremes.
Like usual Spring is one of the busiest times of year on the farm. We let a broody hen incubate 6 eggs. All of them have survived so far and are quickly morphing into their teenage feathers. We anticipate having to cull some roosters this year. At first the chicks were agreeable to Linden, but now are wild and the Mama Hen is very, very protective. Linden learned his lesson not to get in-between Mama Hen and her babies. We all steer clear.
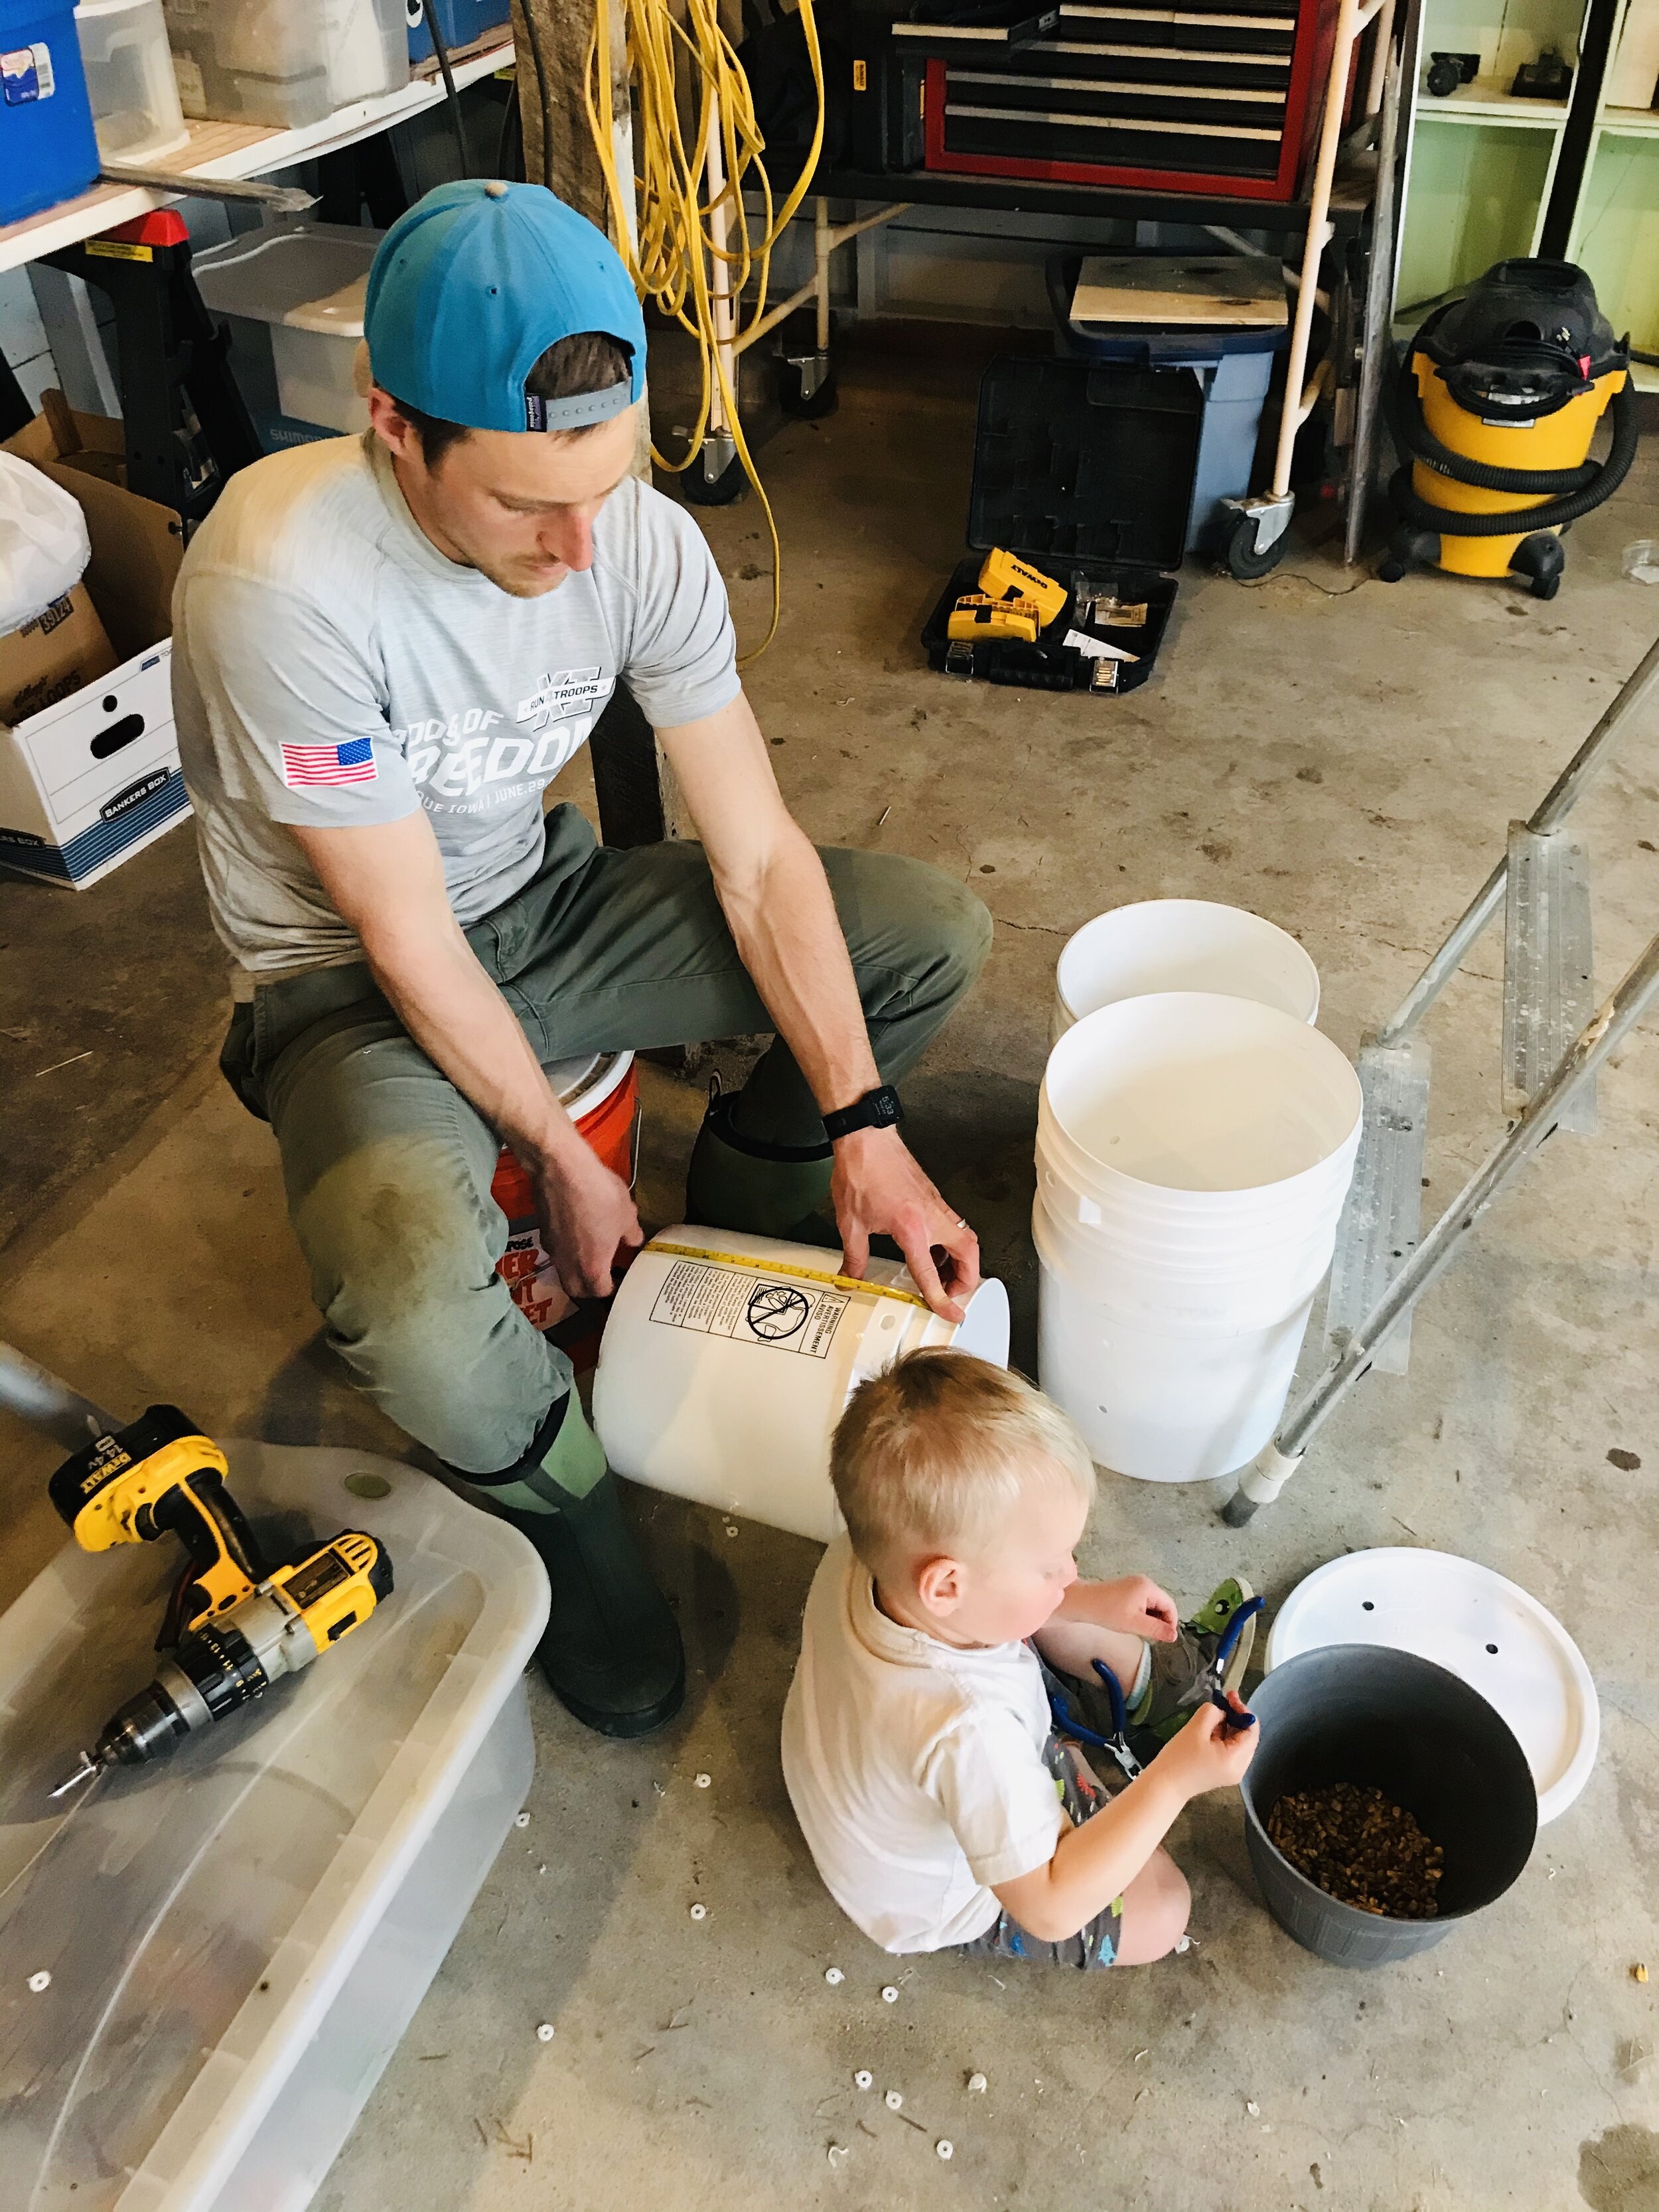
We currently have 5 rounds of grey dove and black pearl oyster mushrooms started for a total of 35 buckets. Each bucket will likely produce somewhere in the range of 2.5 to 3 pounds of oysters over the course of its lifespan… so that leaves us with about 87.5 pounds of oyster mushrooms.
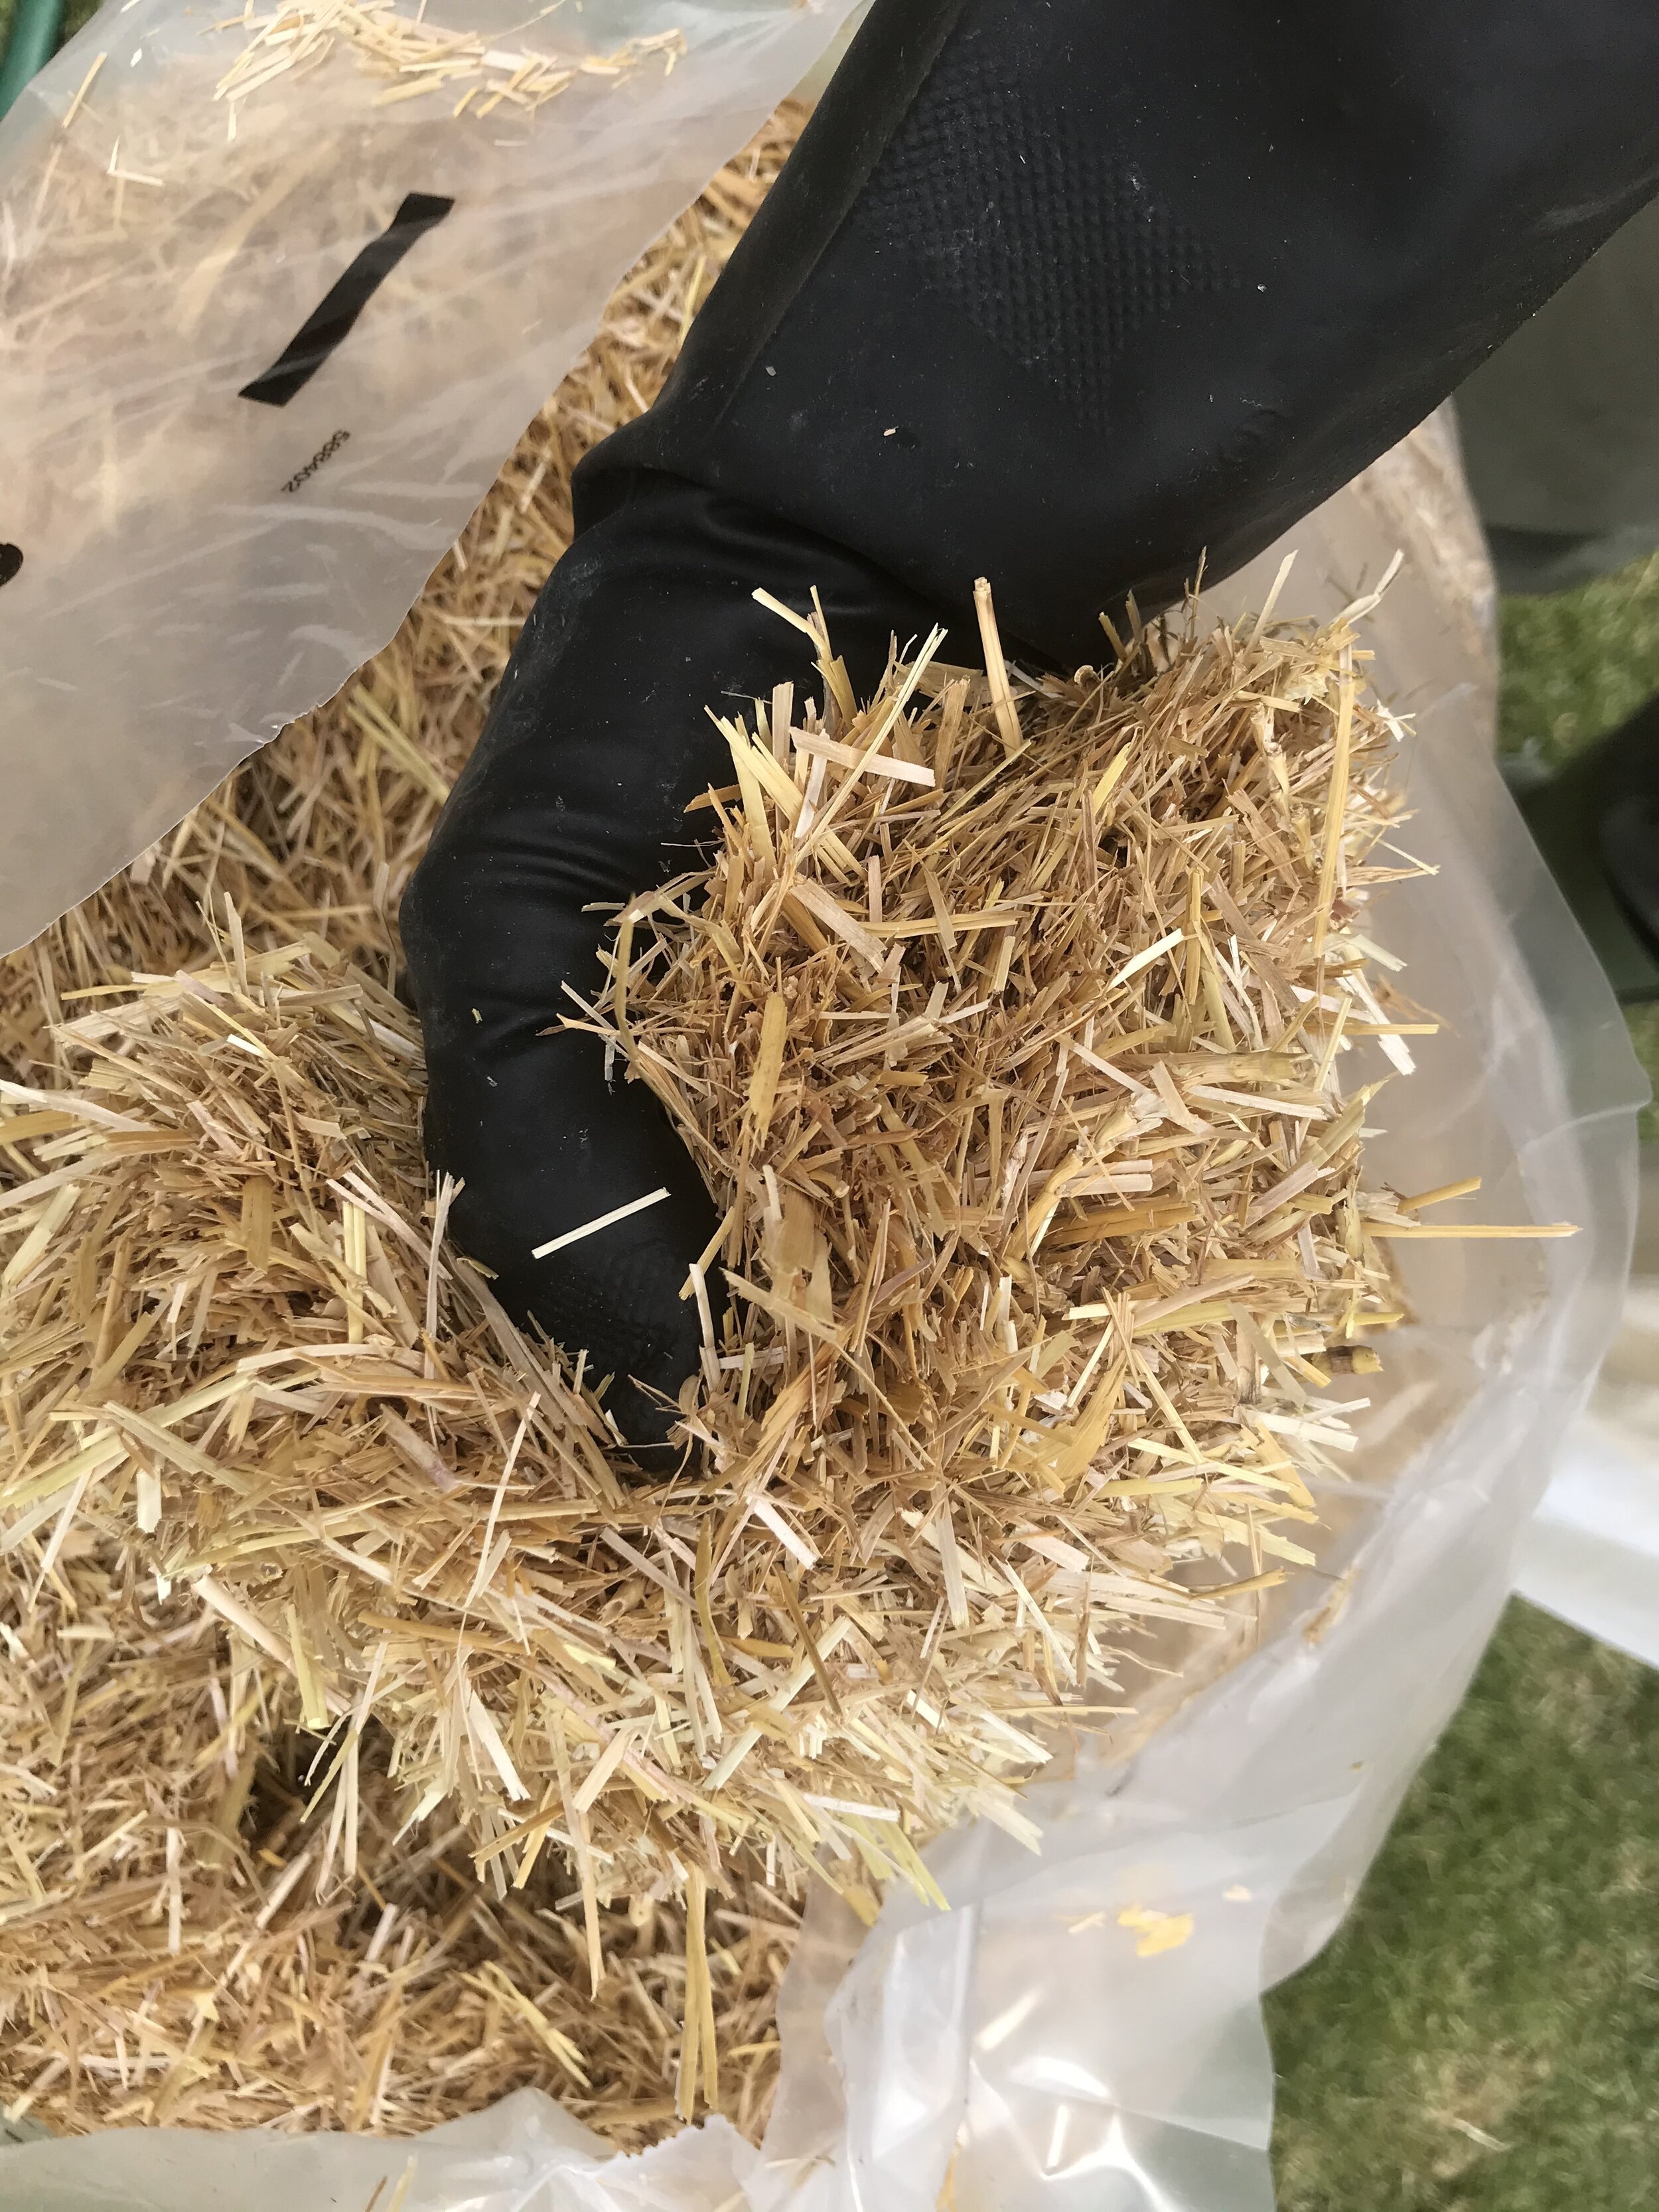
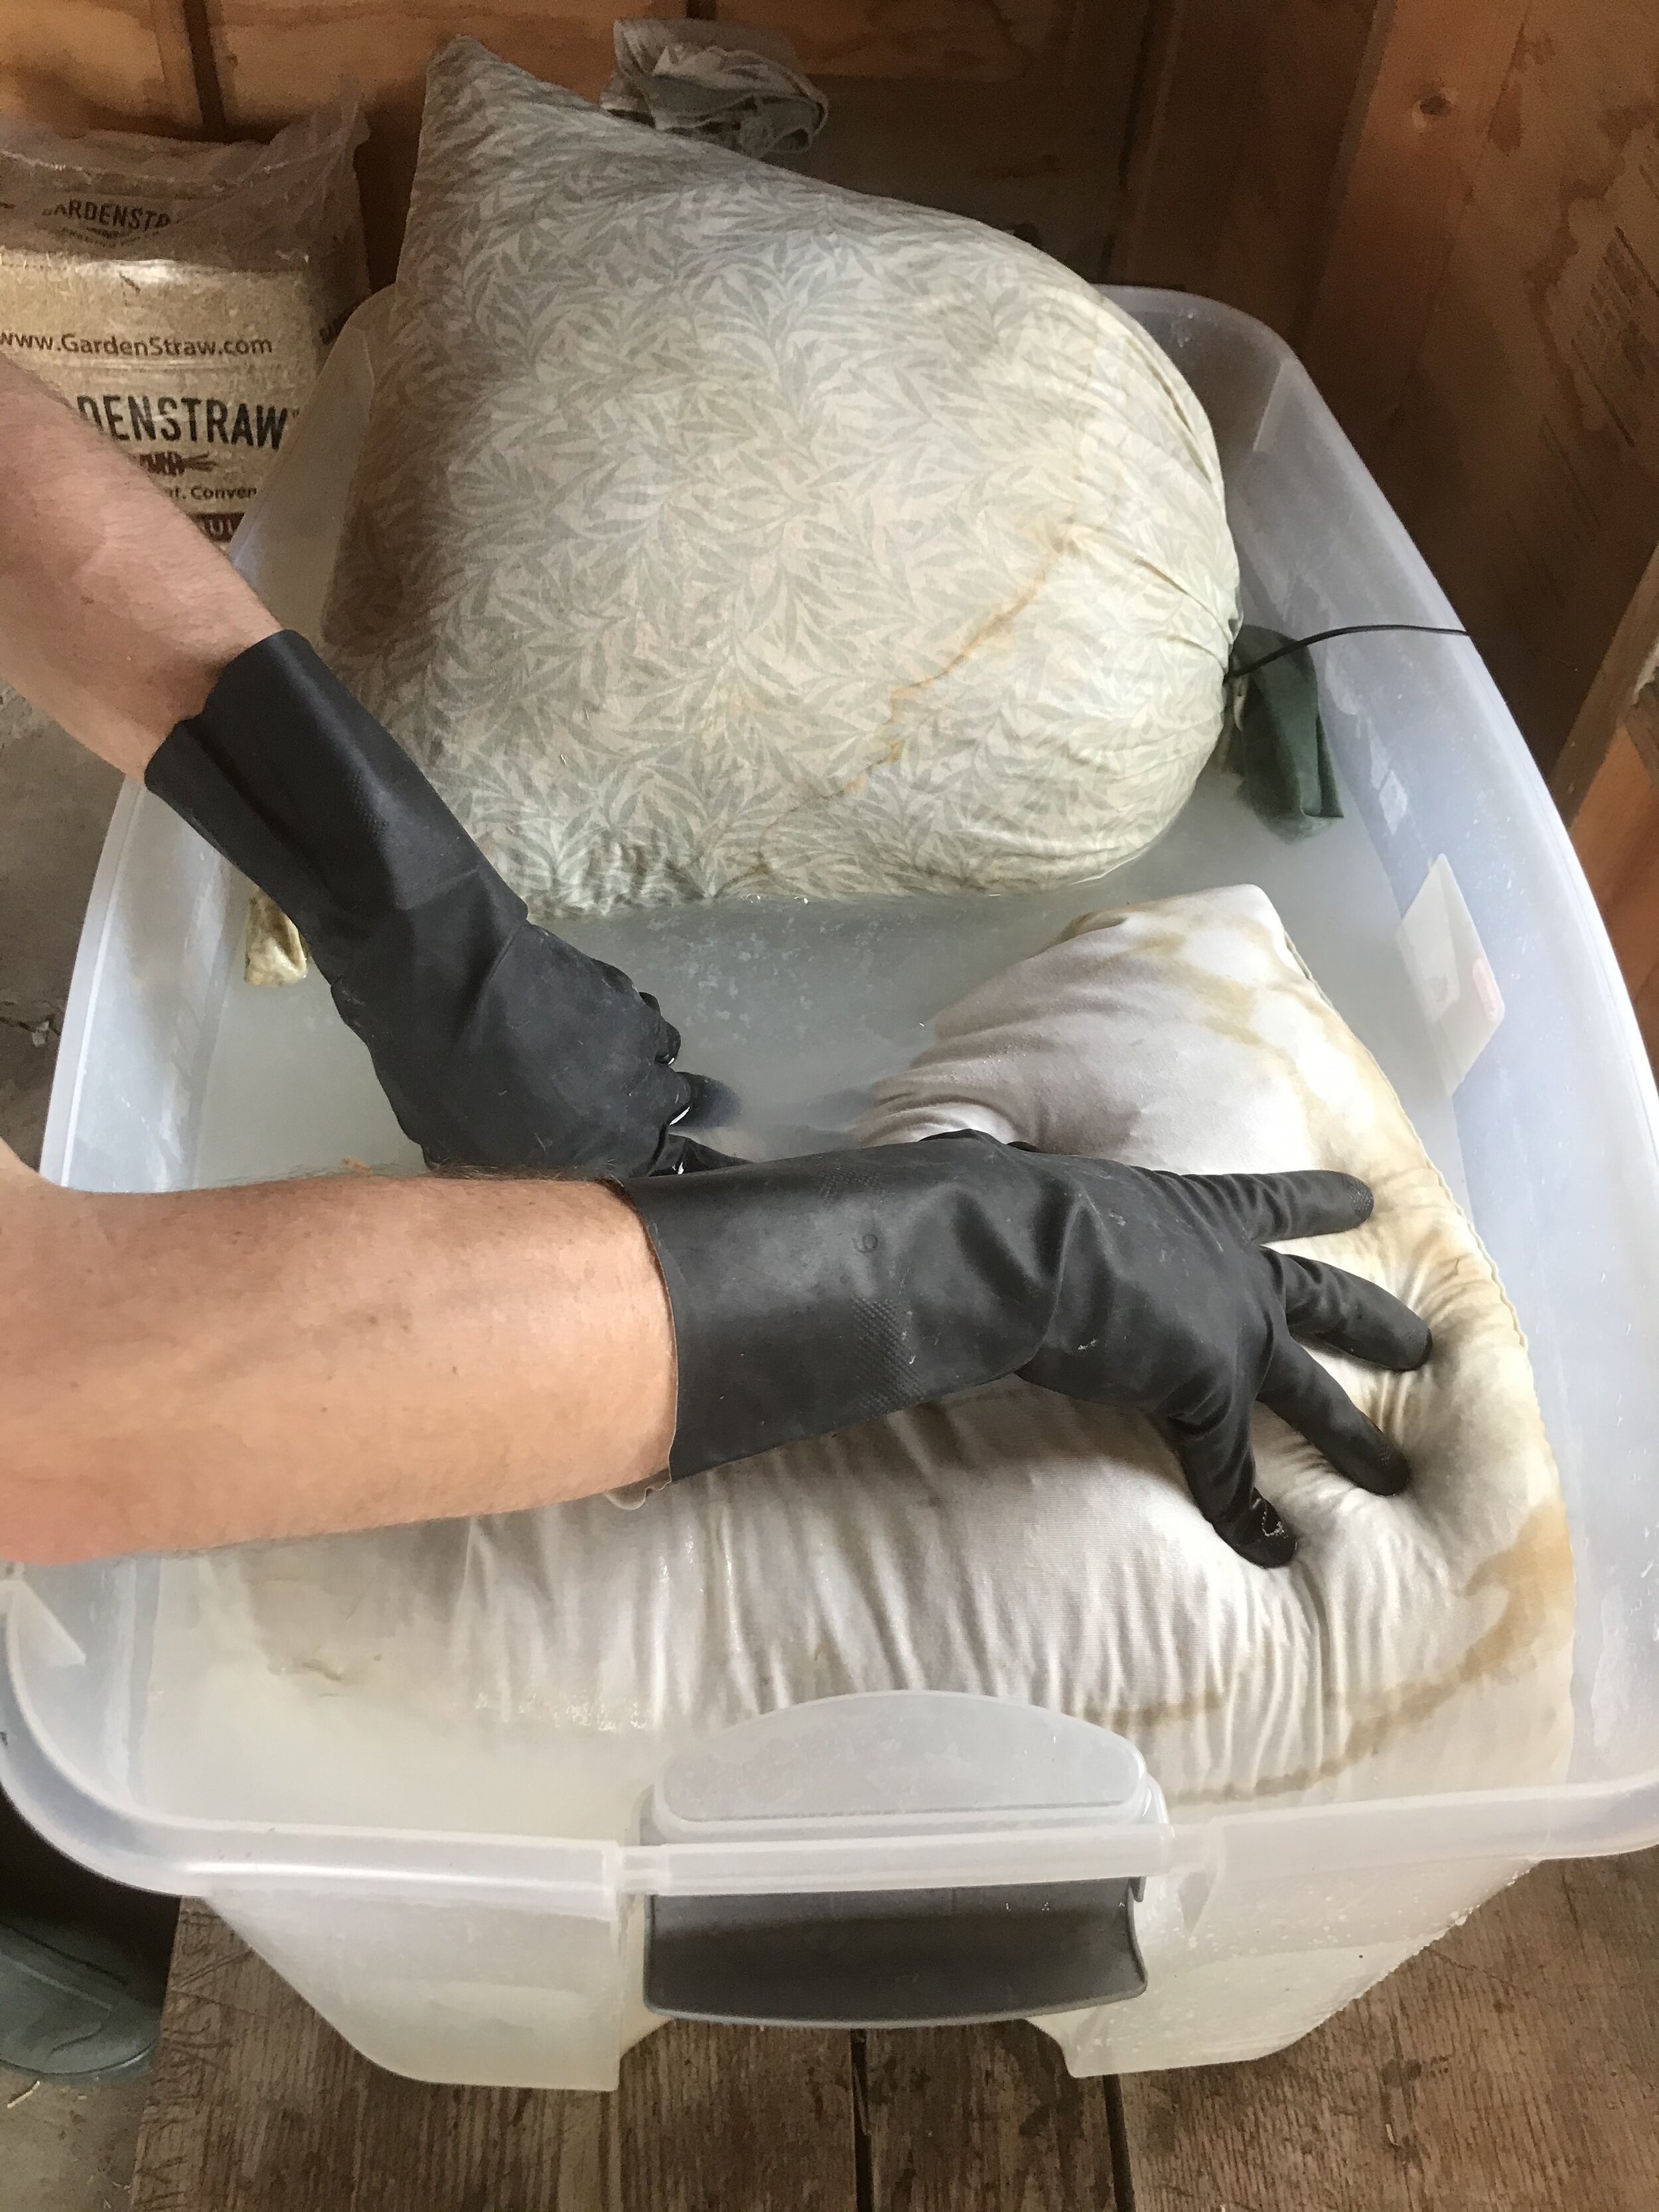
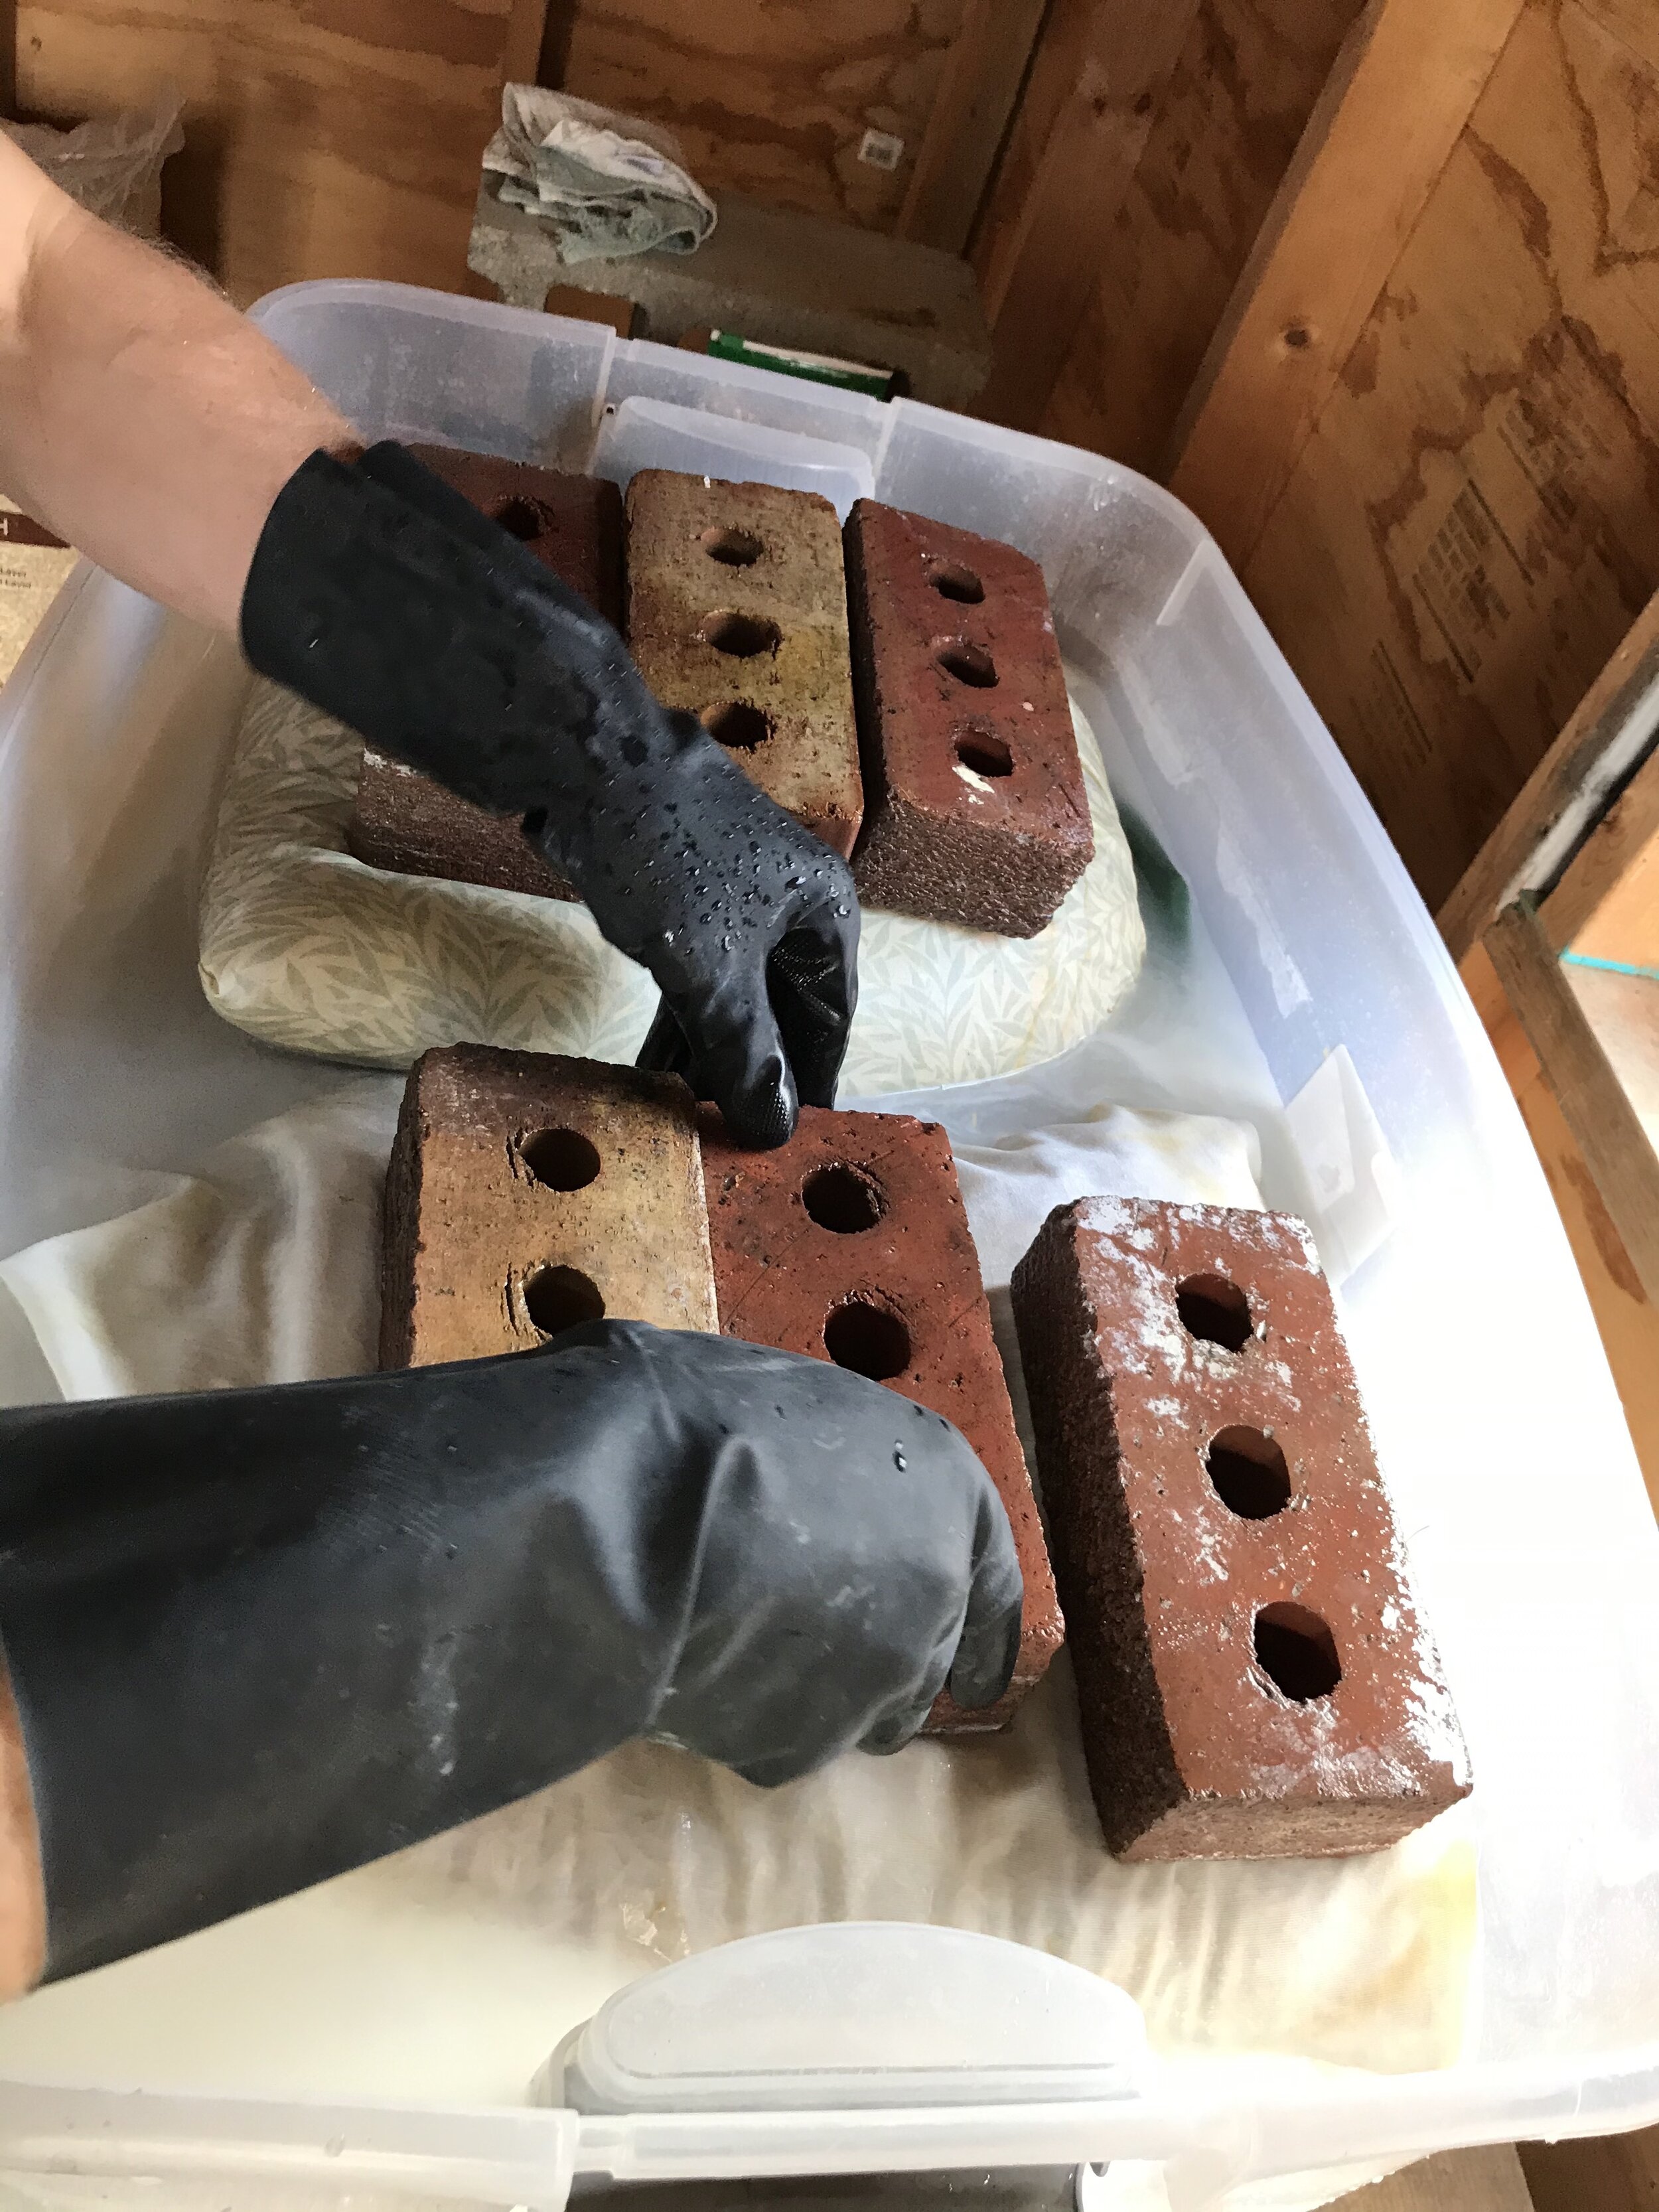
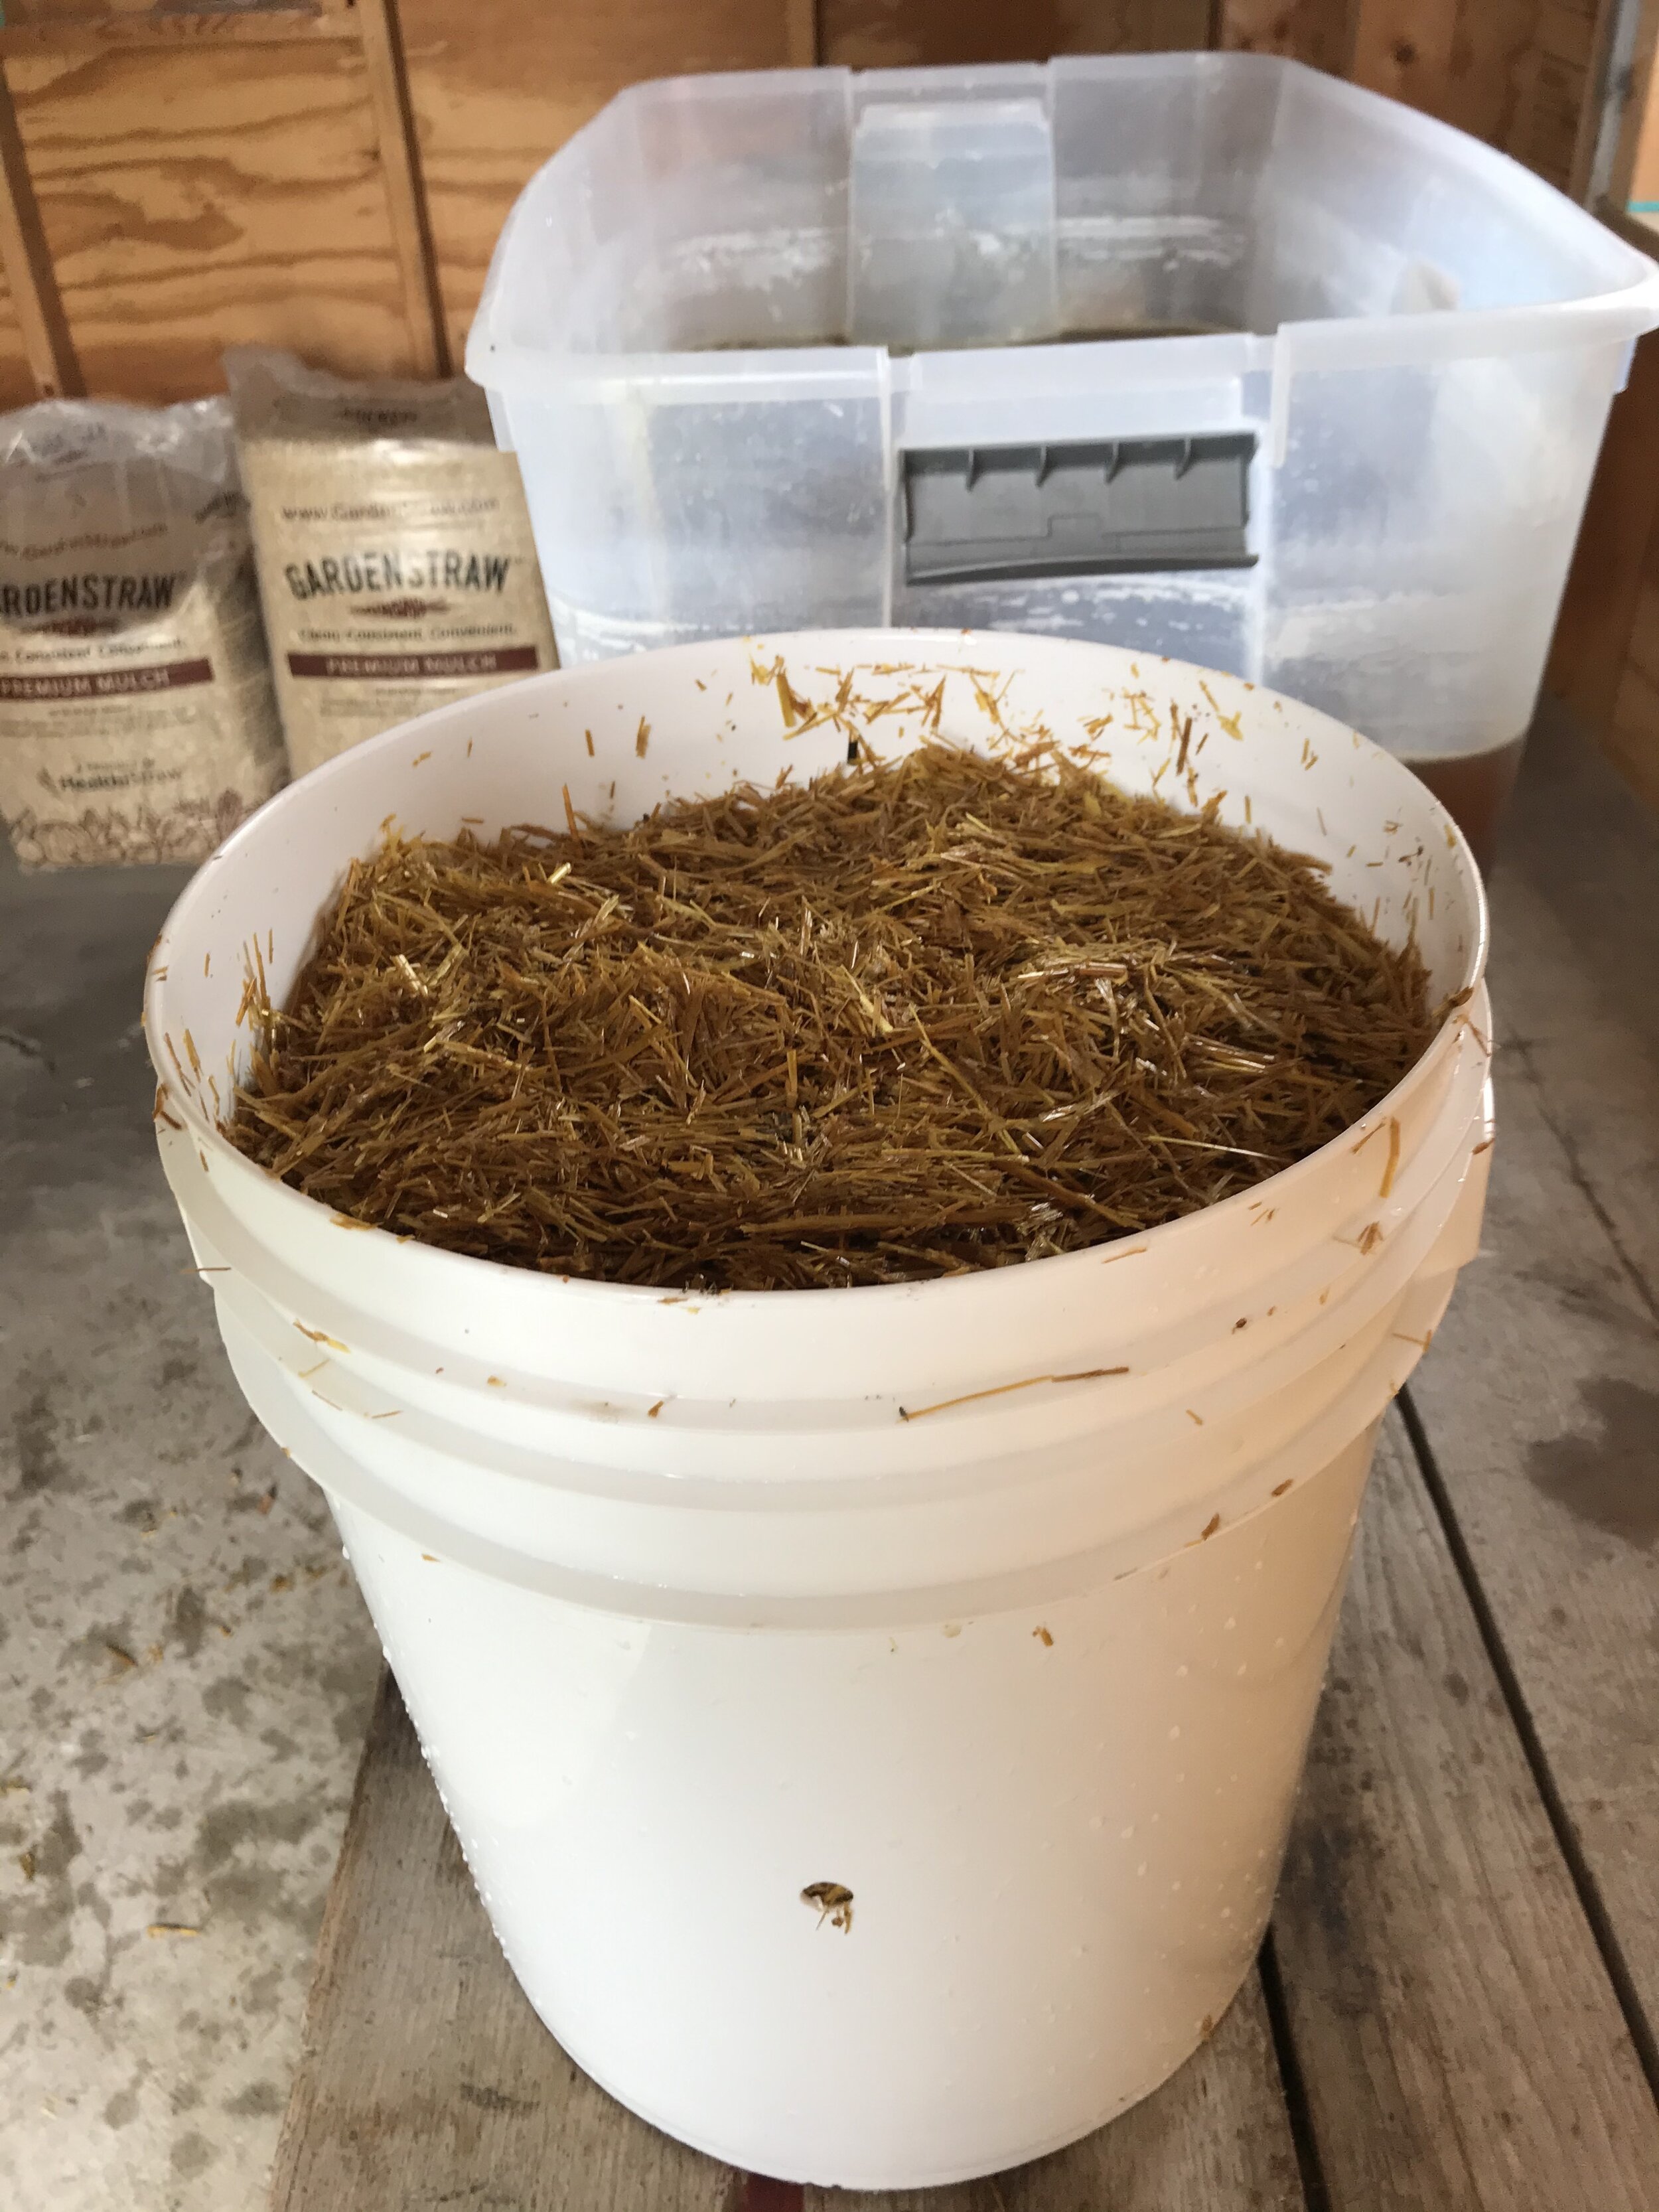
I asked Adam to invest in a more ergonomic set up in the inoculation chamber, so he invested in a $35 pulley. We are able to soak straw in a lime bathe to sterilize much more efficiency. Work smarter, not harder! See photo below of the operation. We have also been experimenting with a new substrate (food) cocoa bean hulls, which leaves the shed smelling like a chocolate factory!

We invested in a pulley system to save our backs and the struggle of lifting bags of wet, sterilized straw out this 55 gallon drum.

A flush of grey dove oyster mushrooms. We like grey doves because they have excellent flavor and store well compared to other varieties of oysters.
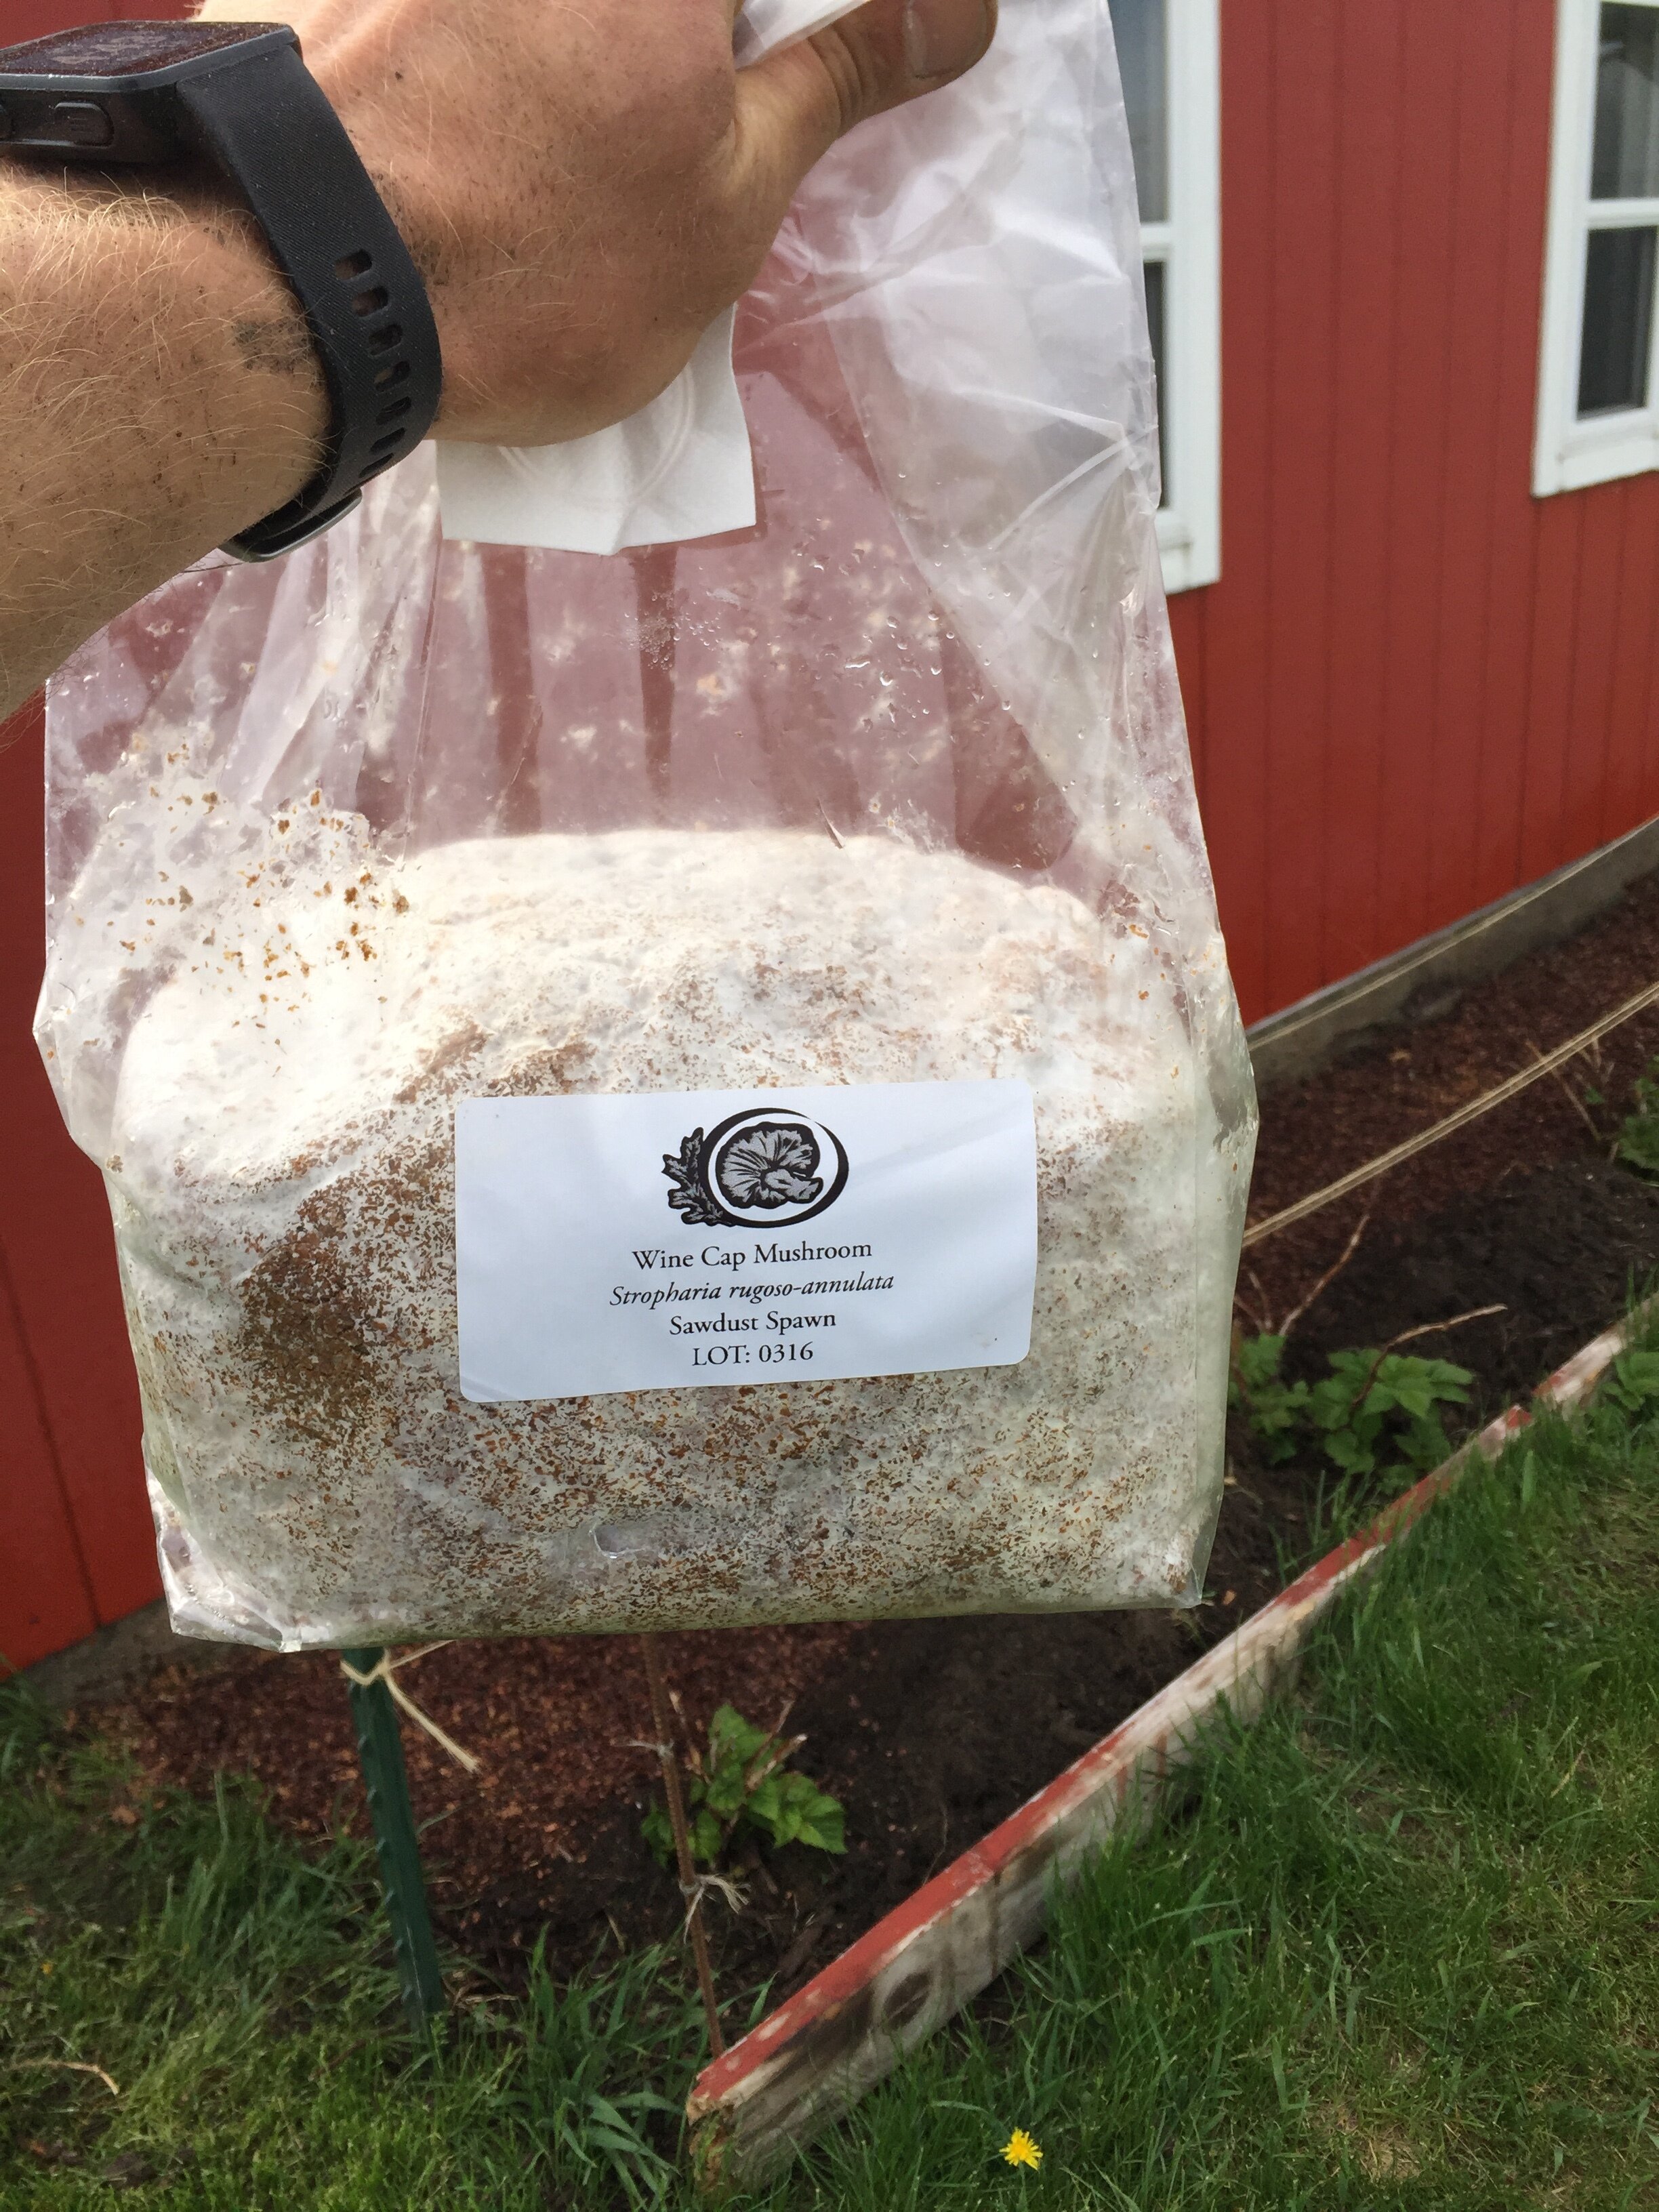
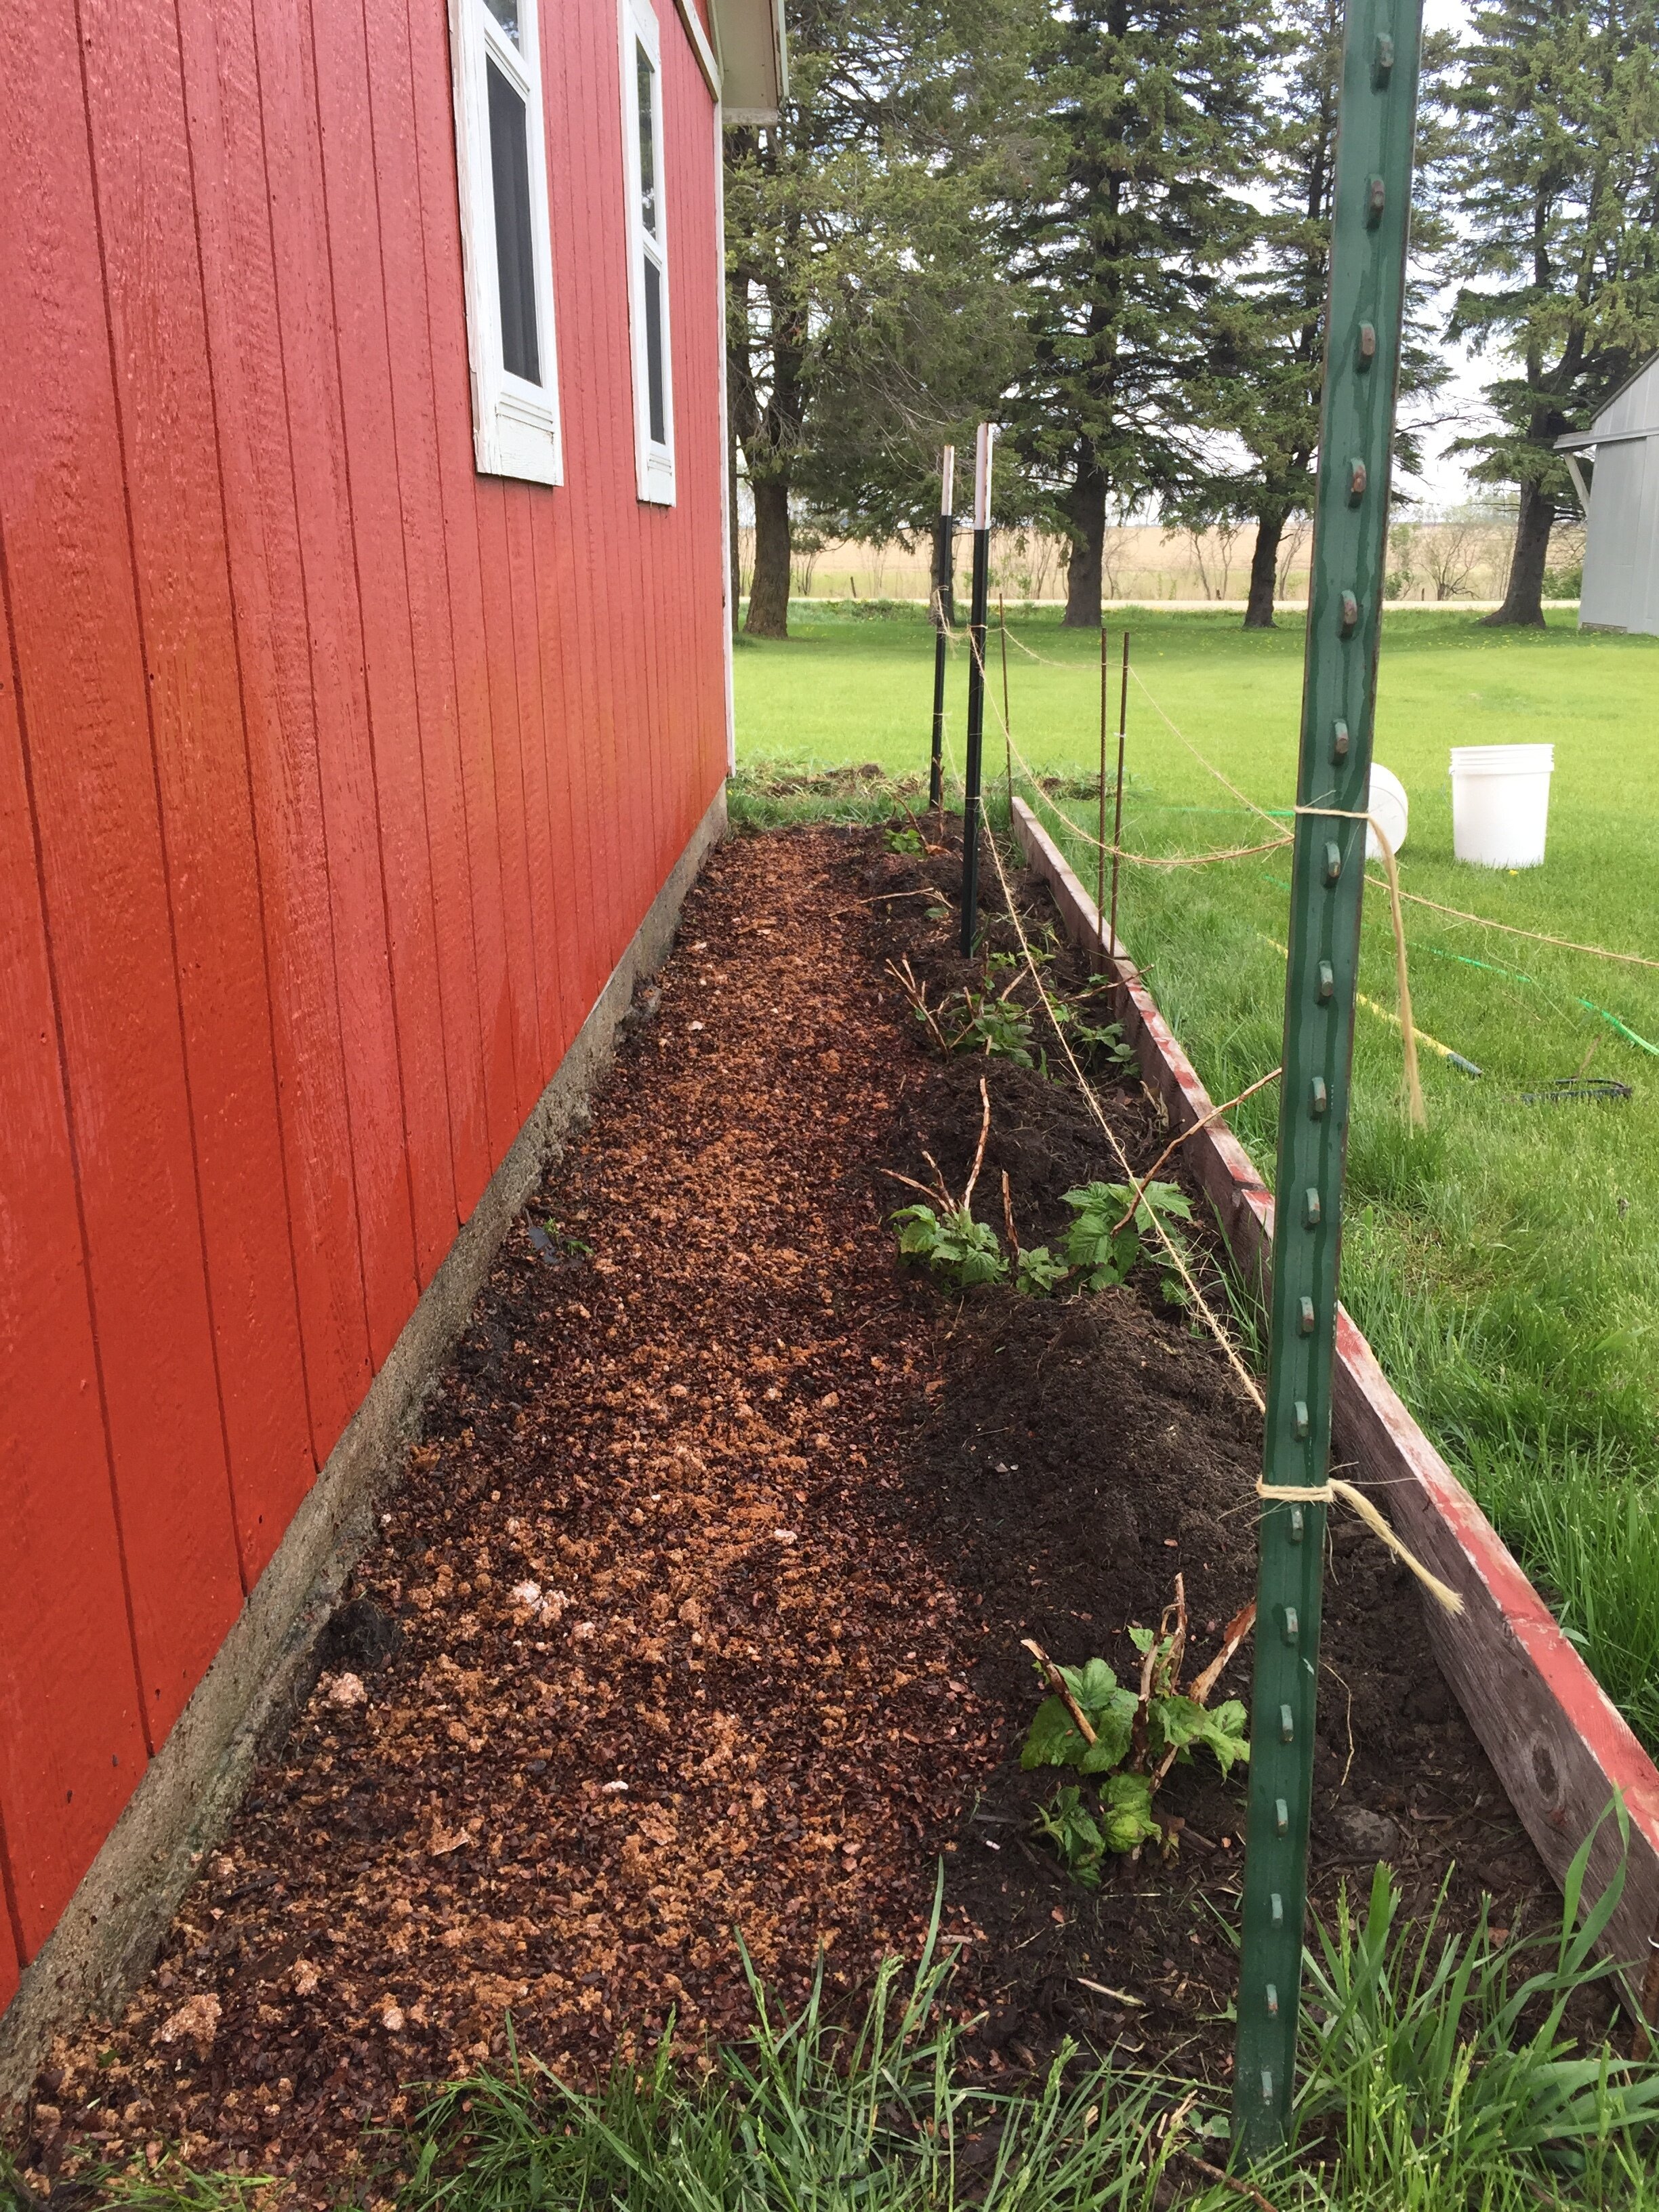
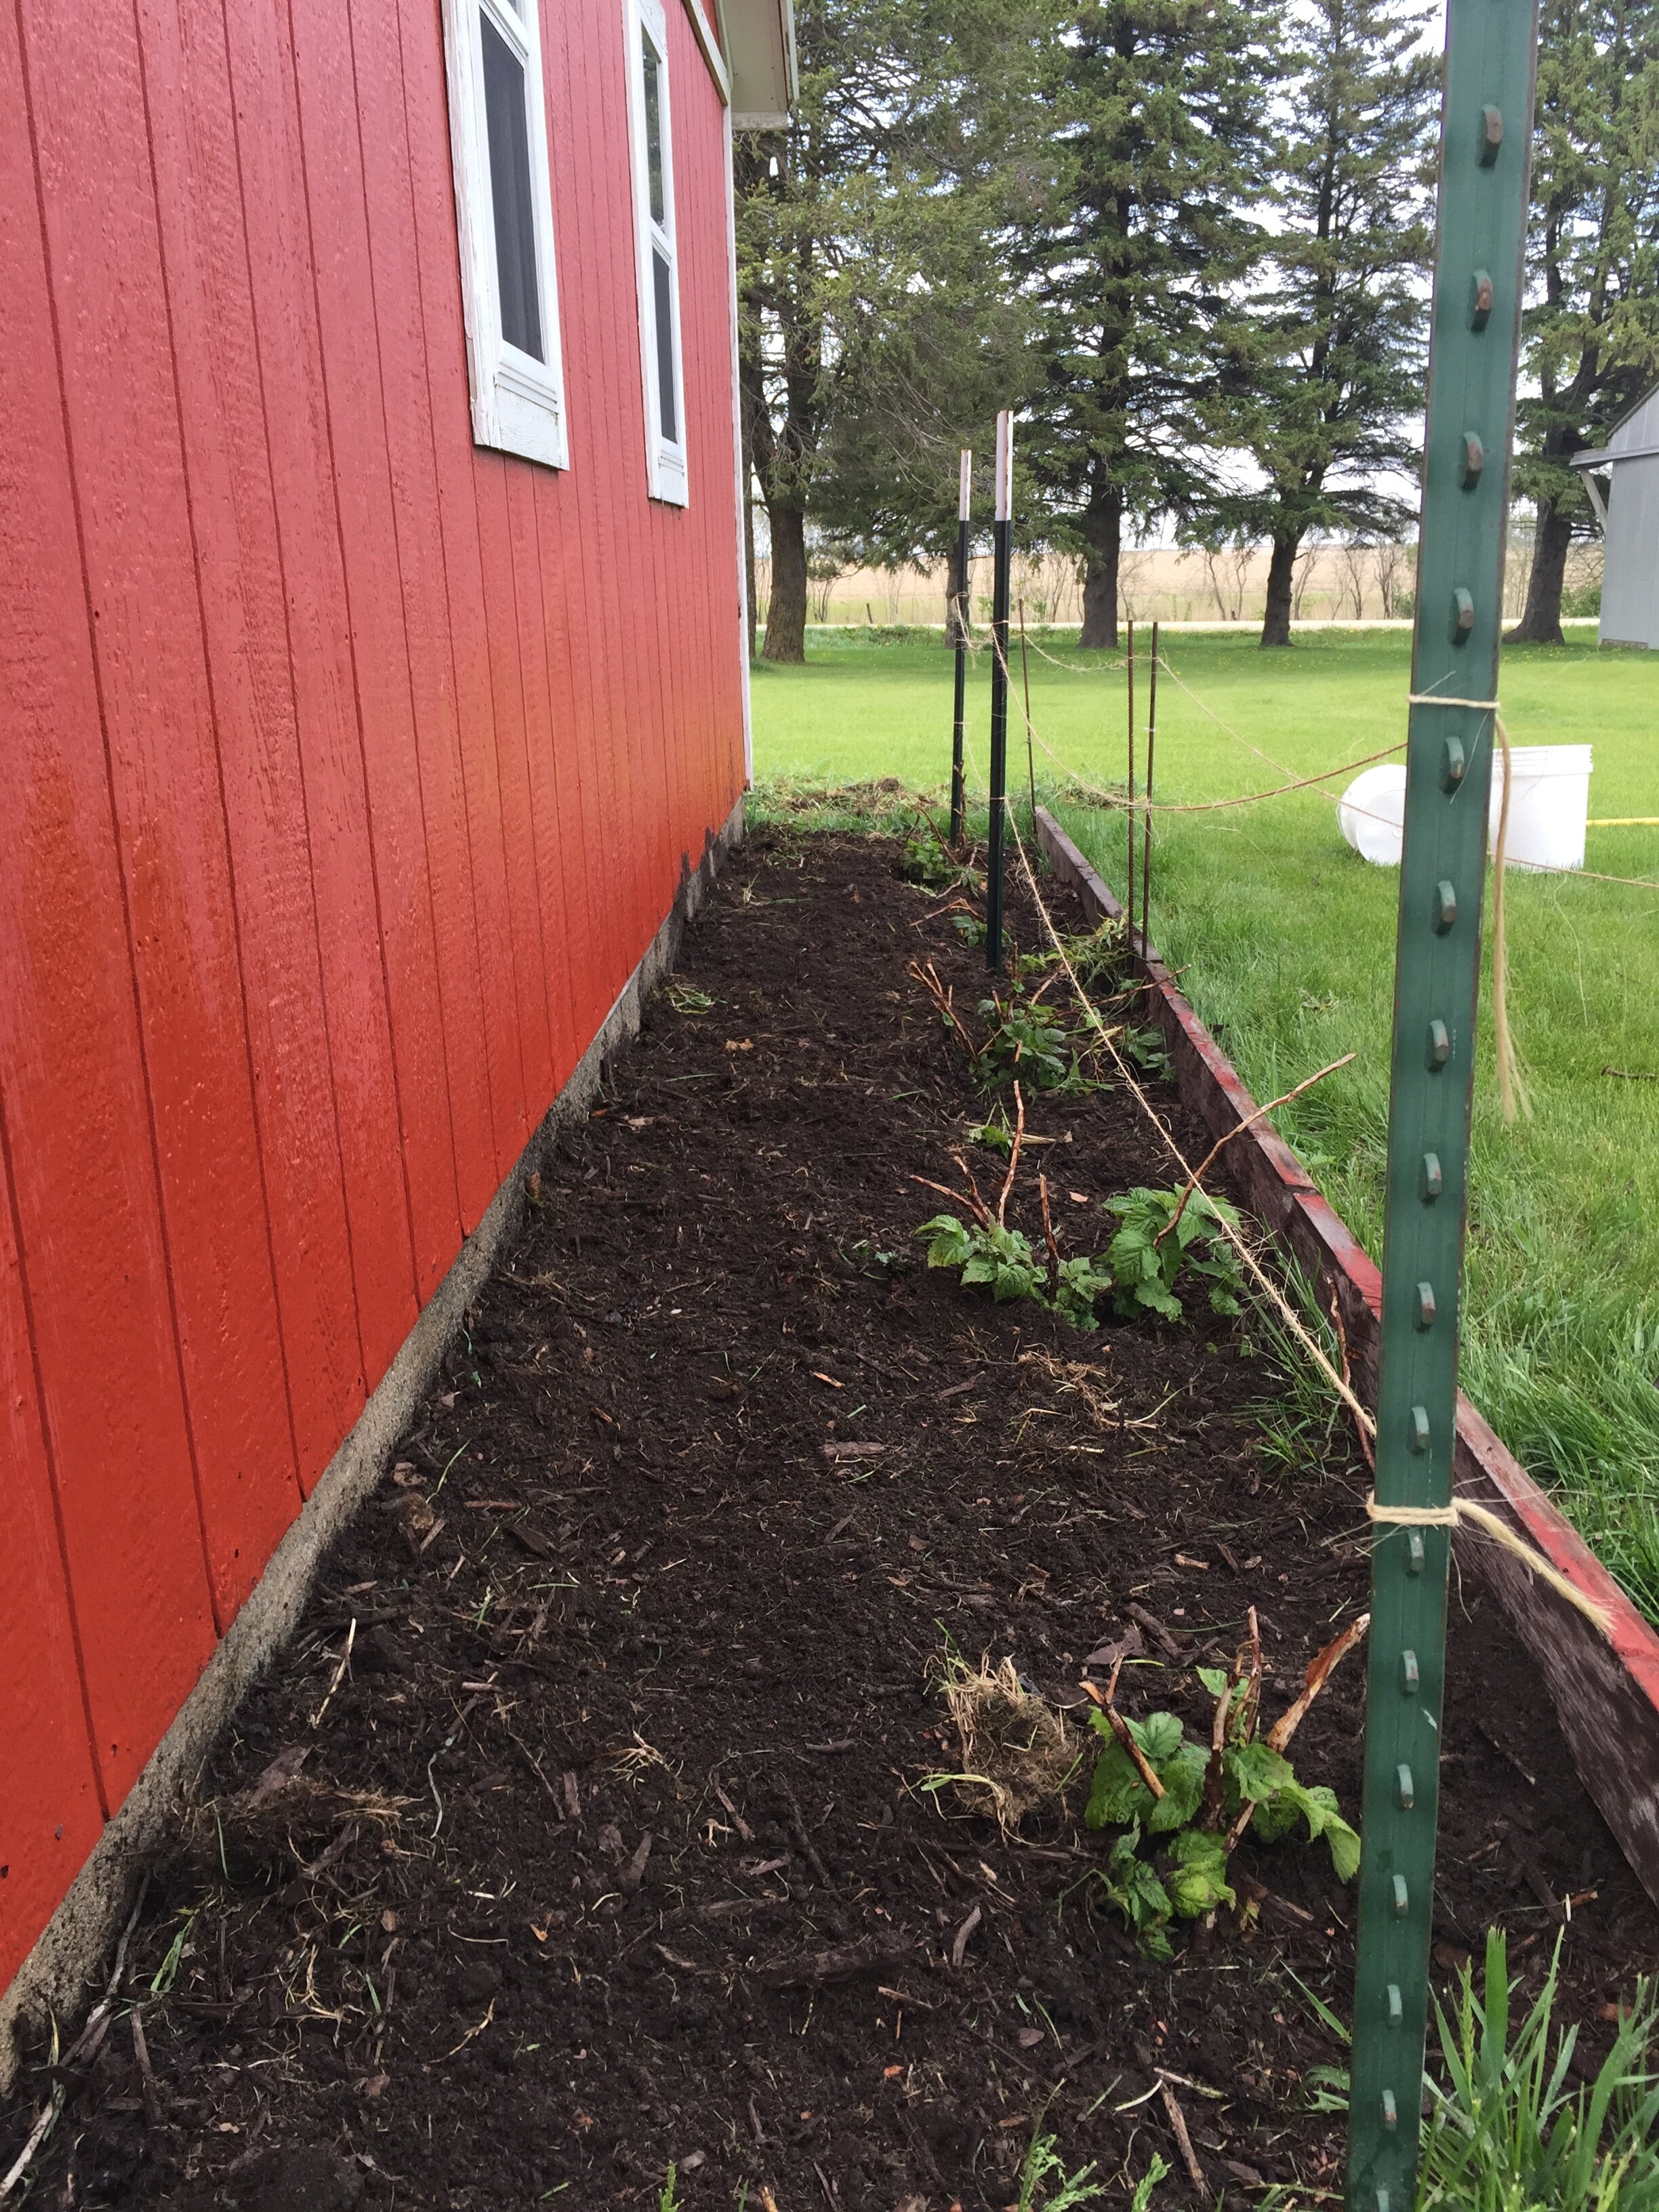
We are intercropping with wine cap mushrooms and almond agaricus, as well. We have never tried either of these mushroom varieties but loved the idea of growing for weed control, soil health and to enjoy a new variety.

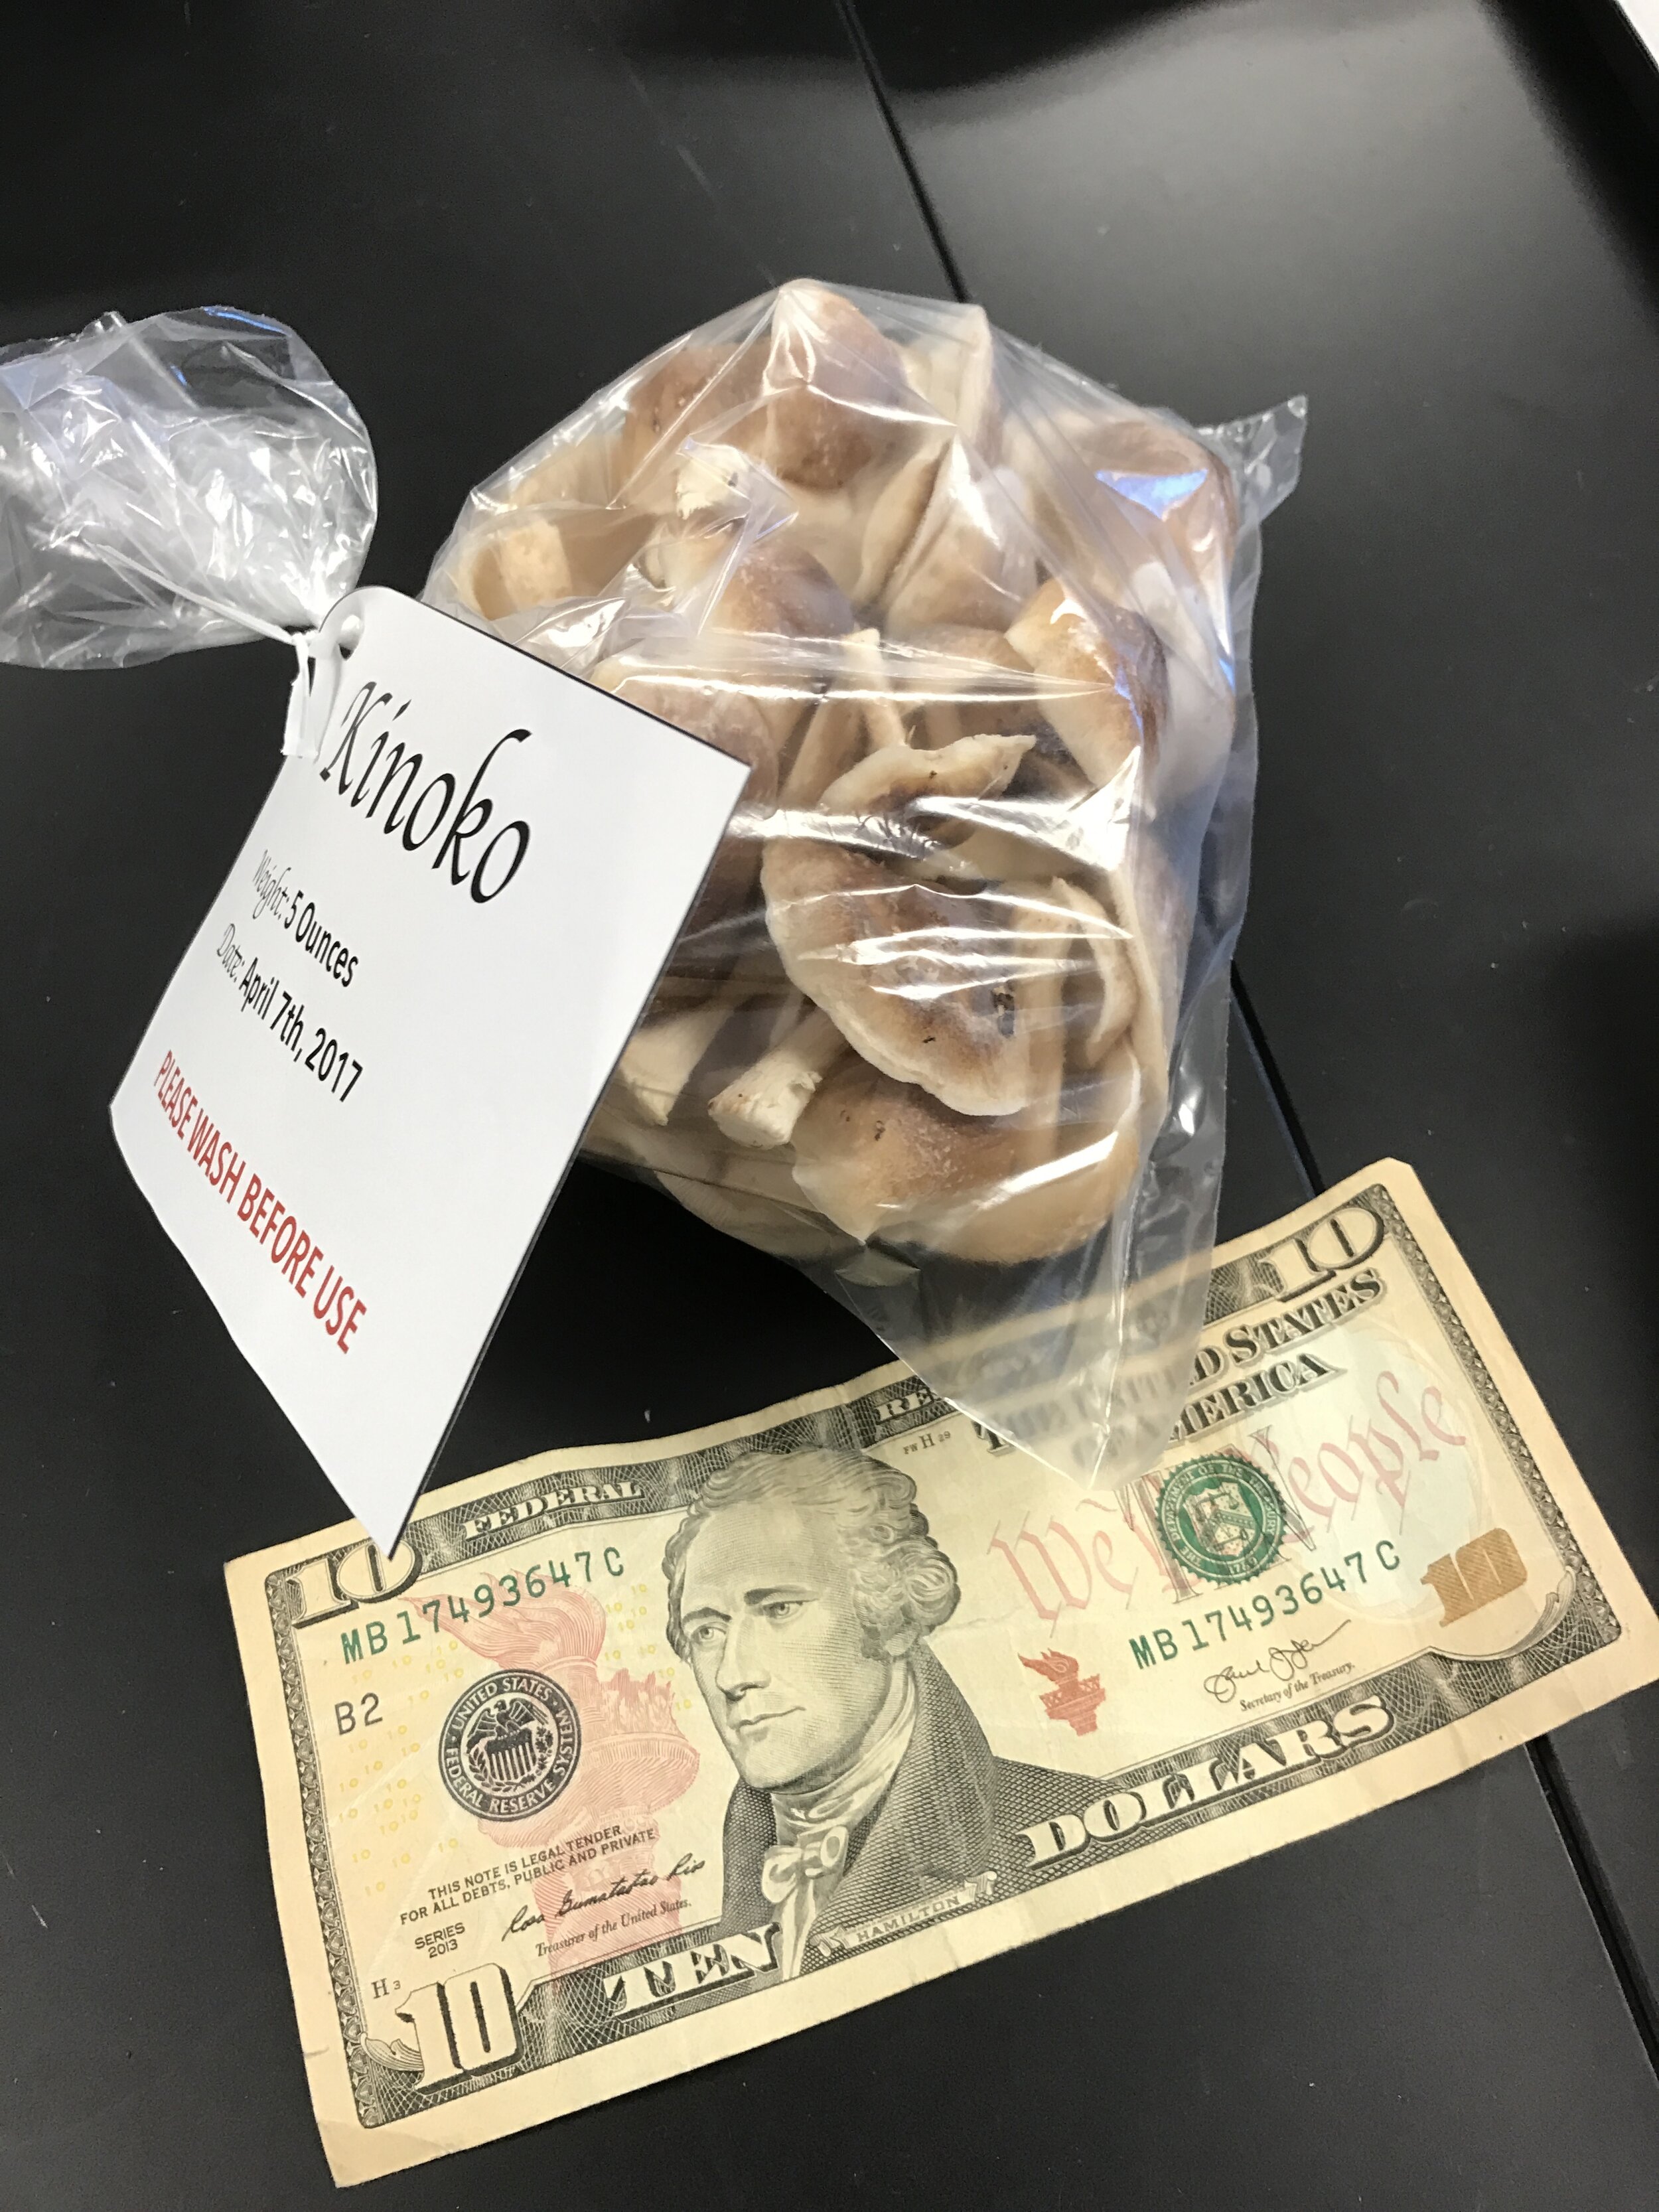
We have also marketed some mixed boxes of oyster mushrooms and shiitakes and the have gone over well! We will have mushrooms until probably late June and then again in the fall. Let us know if you’re interested!
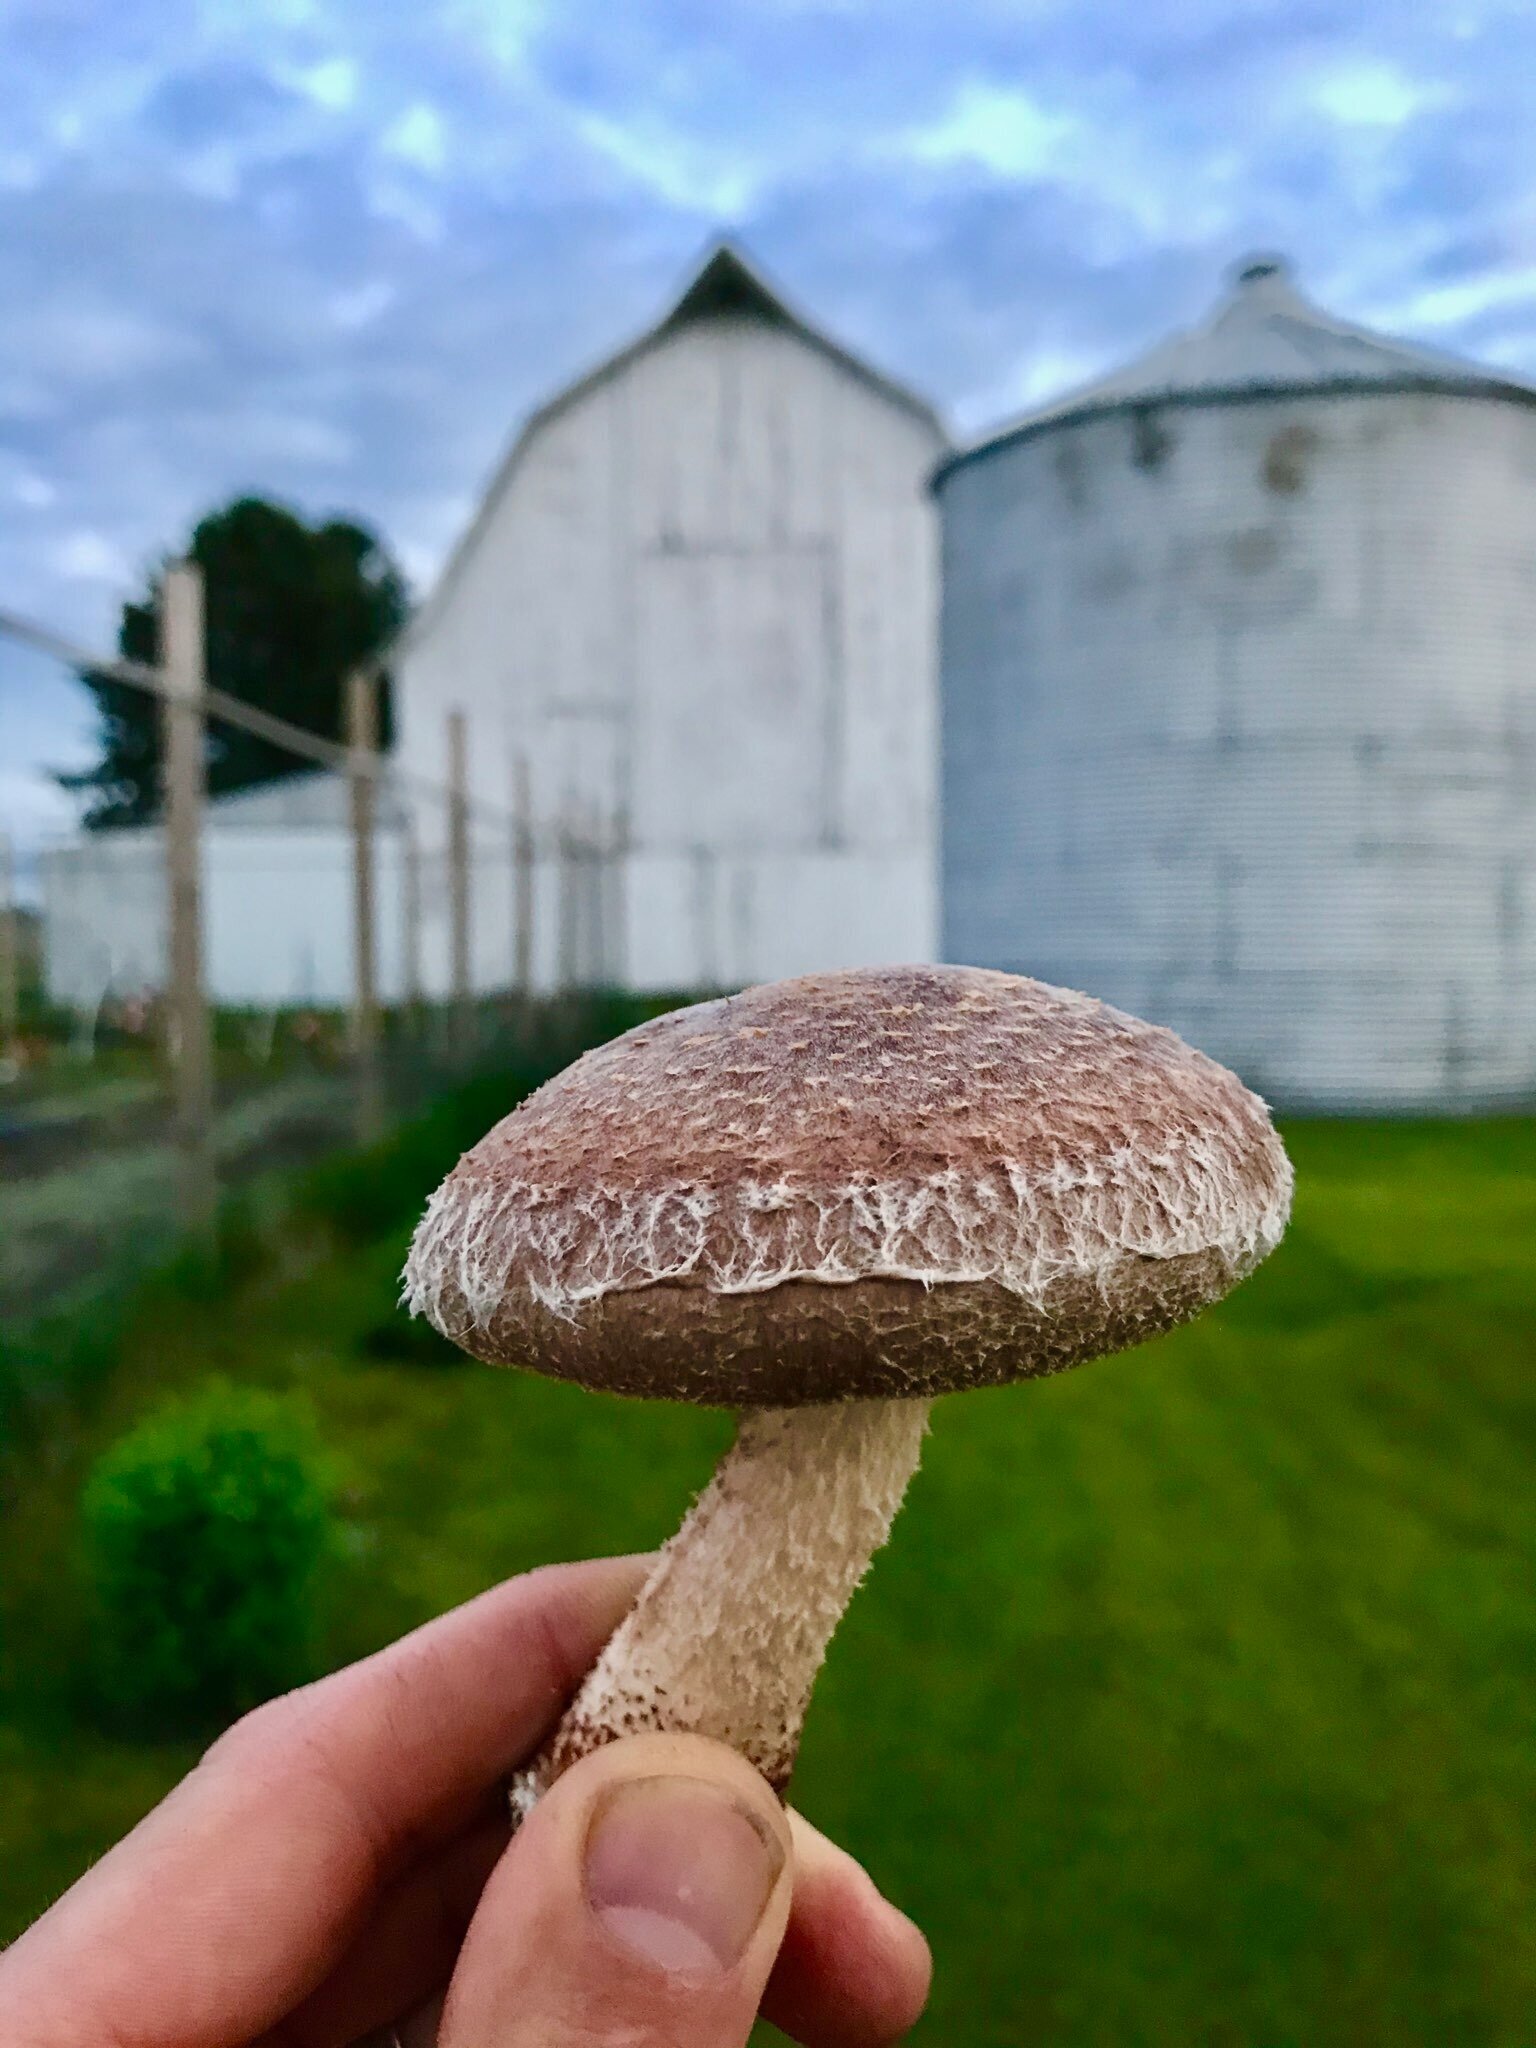
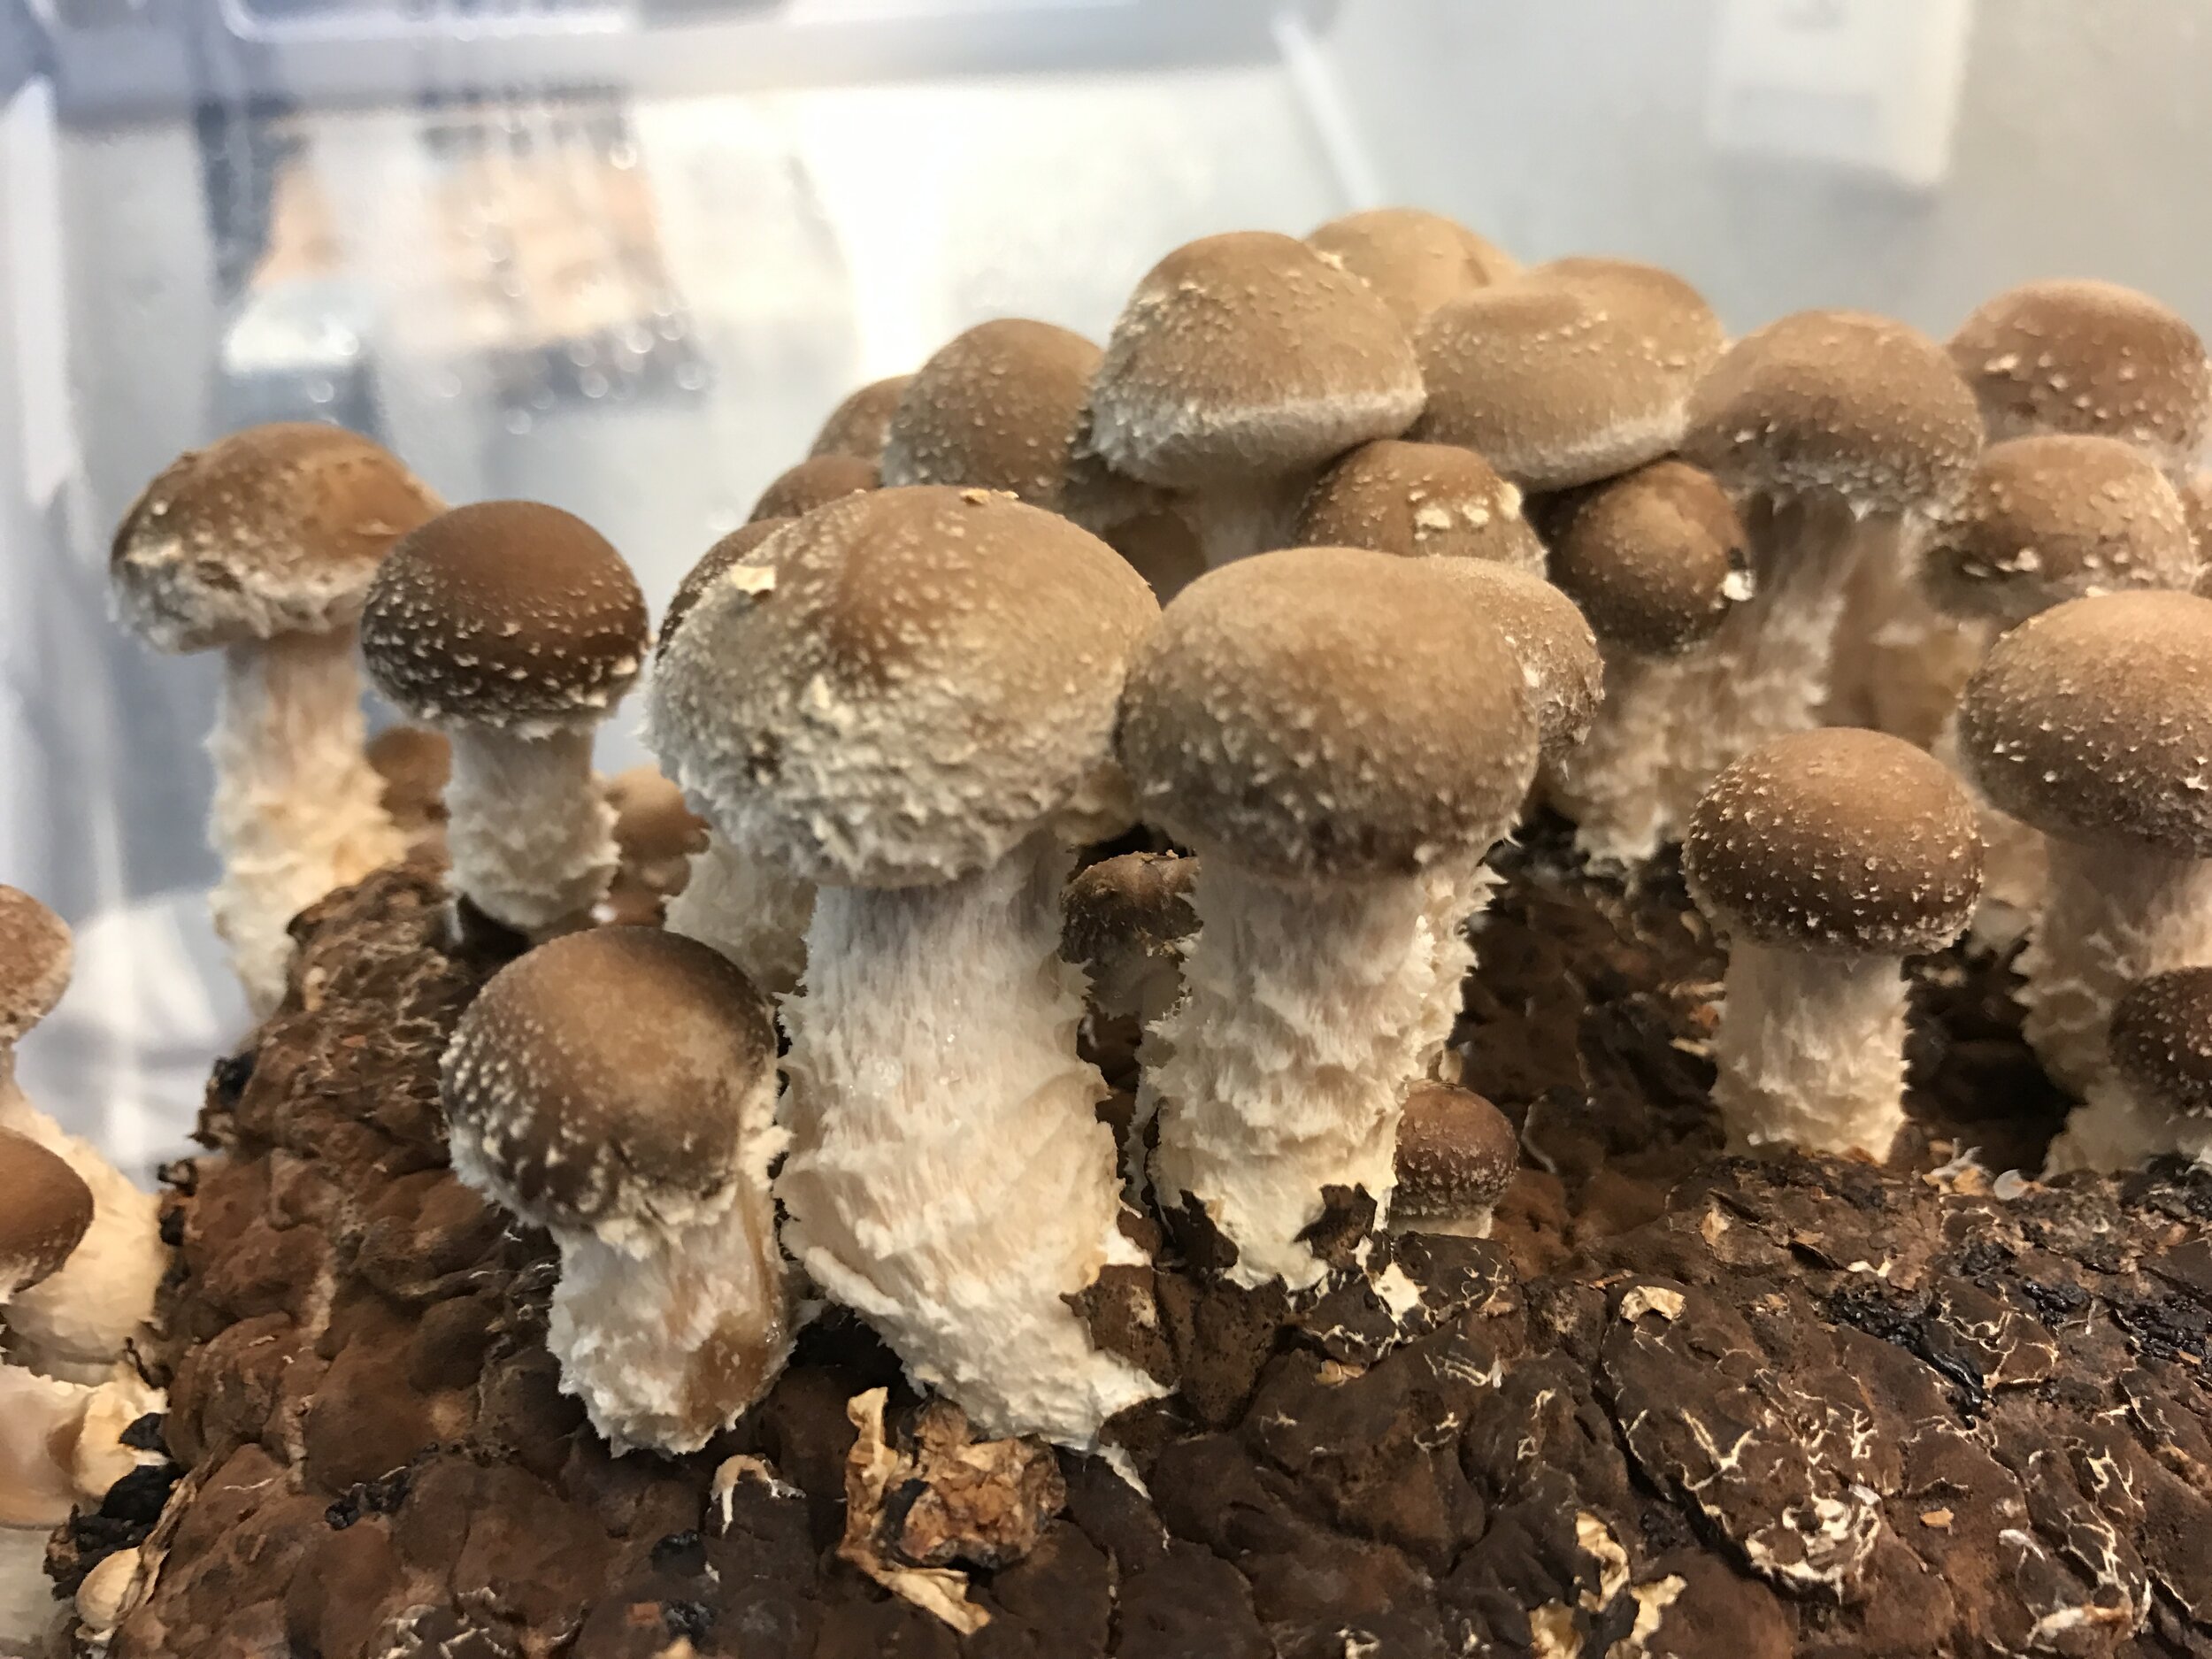
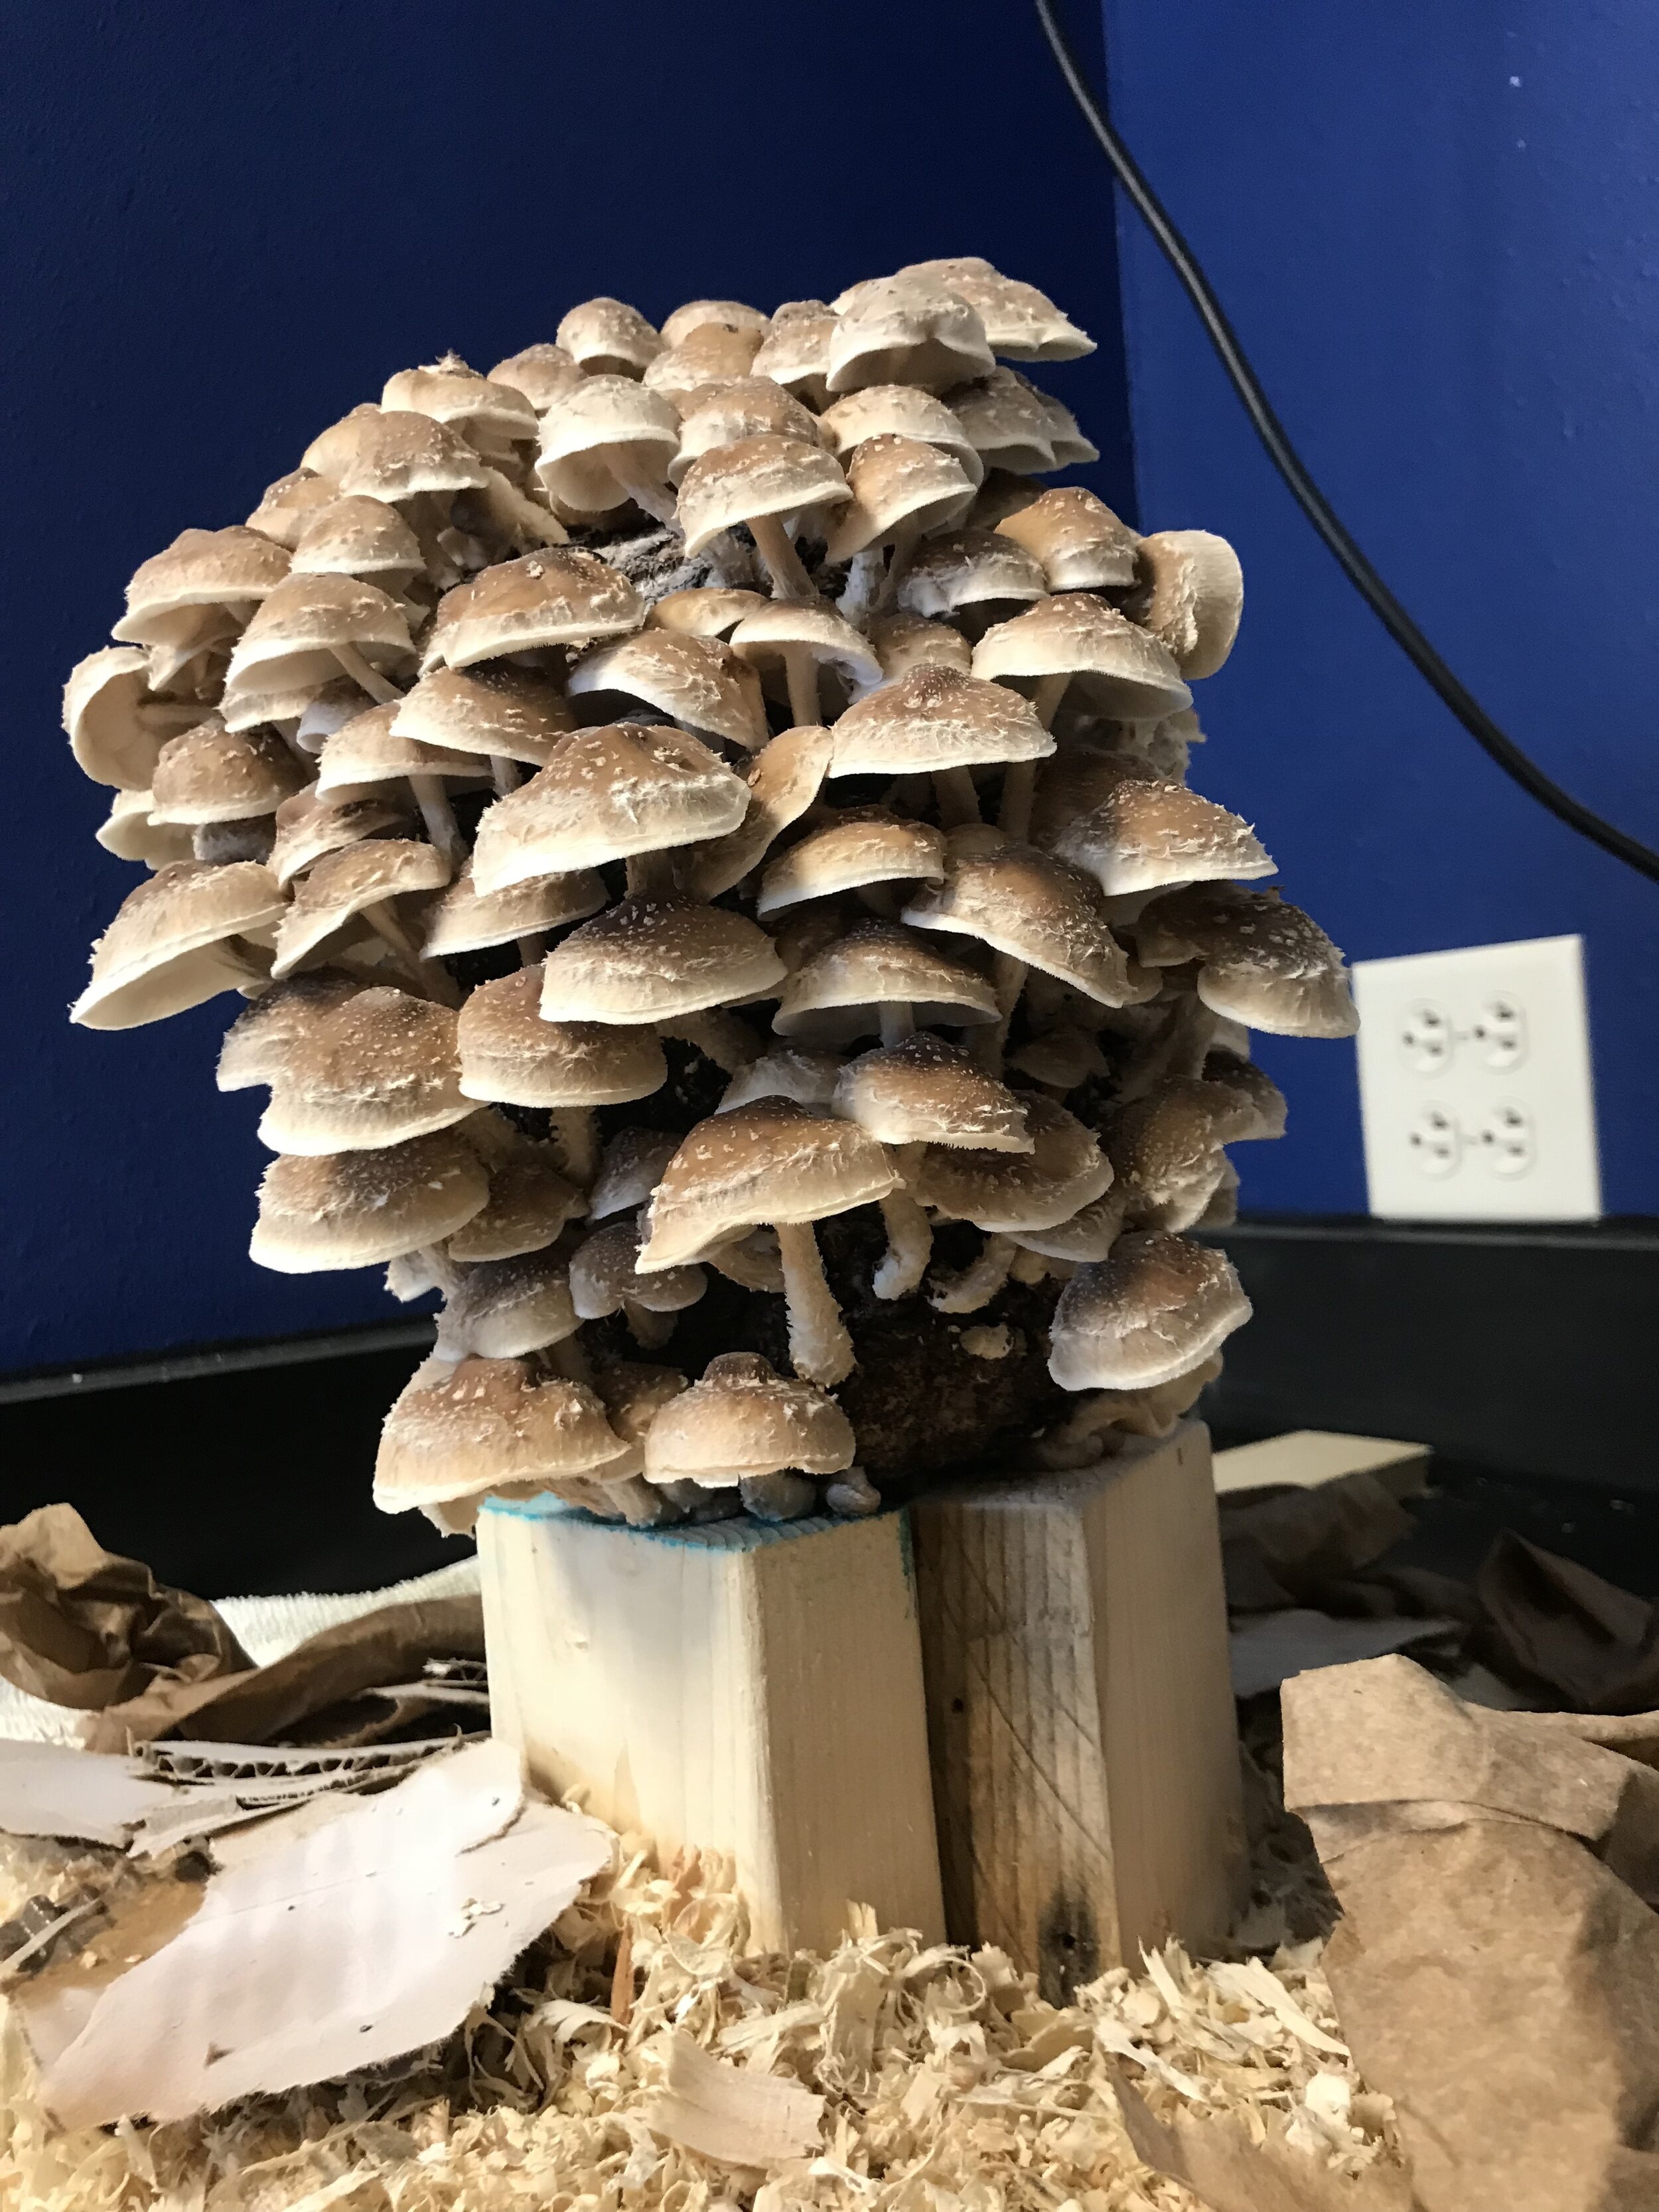
We’ve had some luck with our shiitake crop so far. They are certainly more unpredictable and difficult than oyster mushrooms!

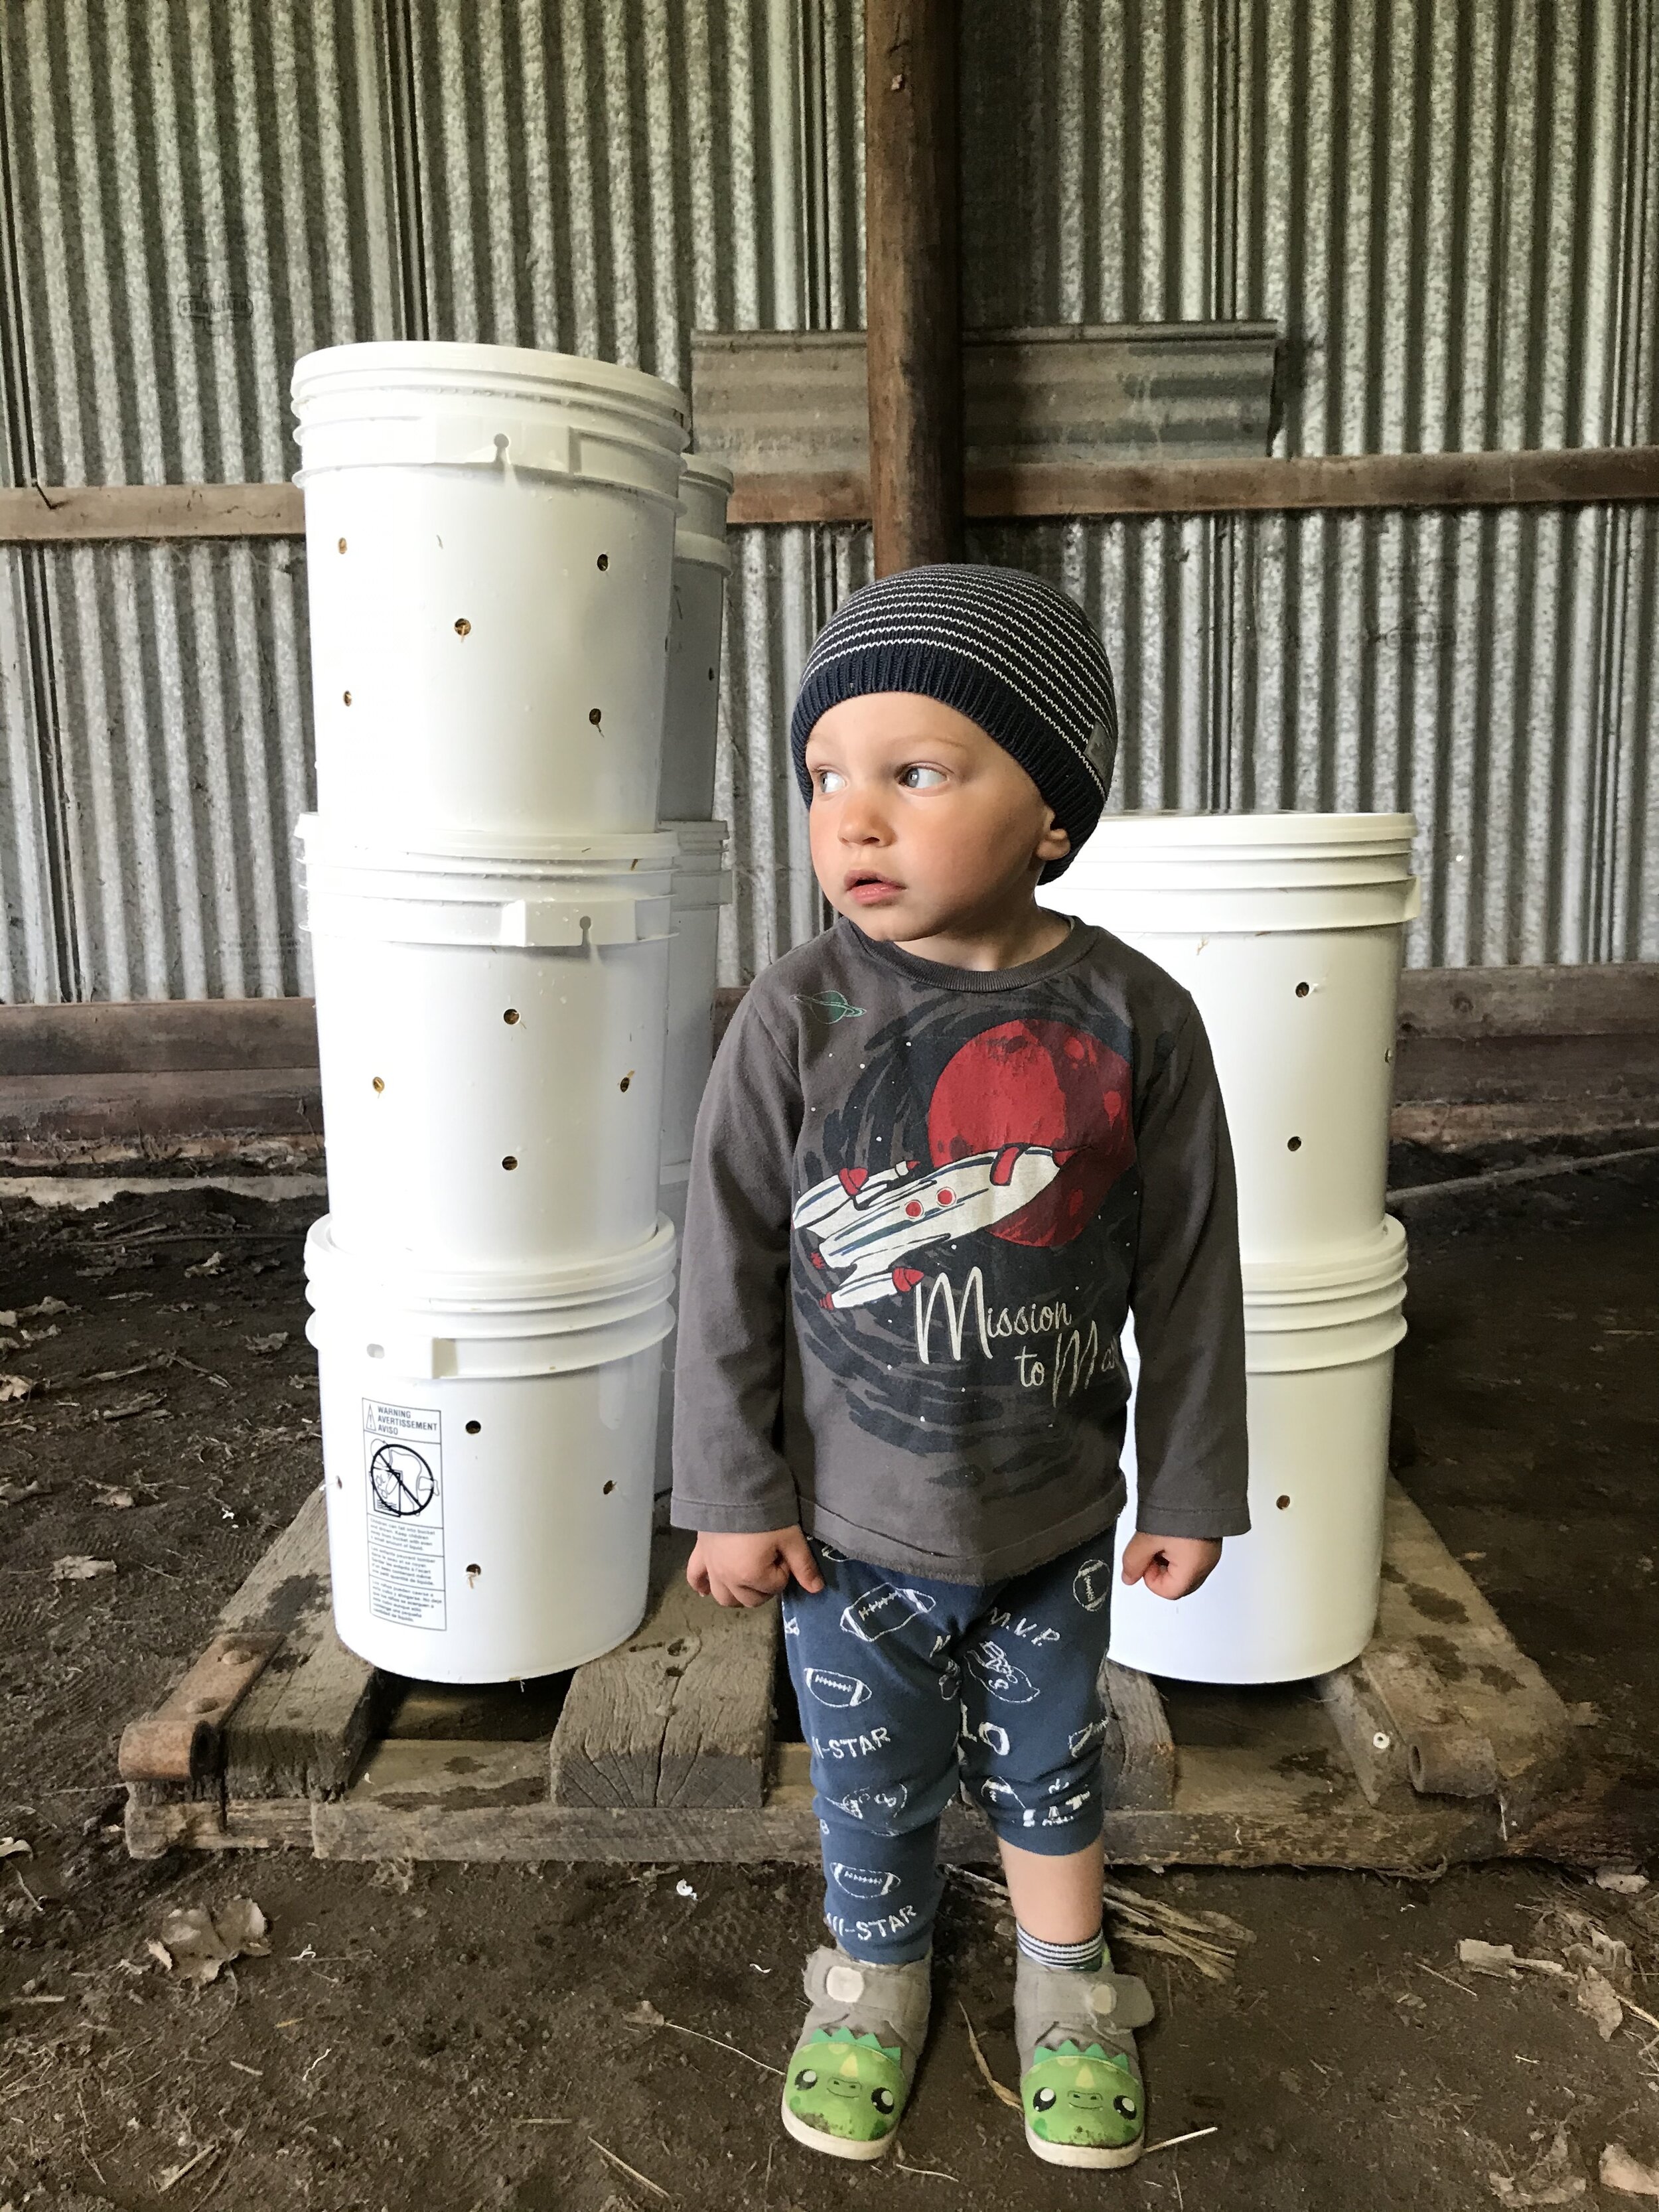
Some of the grey dove crop. To cut down on waste, we use food grade buckets rather than plastic bags

Greenhouse finished. It only took 3 people (2 with a masters degree and 1 with a doctoral degree) a day of tinkering and assembling.

Plant babies in the greenhouse
Adam, Flannery’s Dad (Bill) and Flannery put up a greenhouse during a nice weekend in March. We hemmed and hawed about what made the most financial sense either retrofitting one of our existing sheds or purchasing a mail-order kit. We decided with the later!
The goal is to be able to start seeds out in the greenhouse rather than on racks of grow lights in the house. We’ve never had a ton of luck with transplants started in our spare bedroom or kitchen and feel like a designated space will help. Historically, I start seeds too early and the seedlings get so overgrown in their containers.
So far there has been a rookie learning curve with using the greenhouse, but the space is cozy and happy. It will be nice to visit in February, March, April and May when Iowa weather is grey and temperamental (who knows I might even grab a lawn chair). We installed a computer fan and an automatic window opener than opens at 80F and a mini space heater, but need to do more research on how to try to keep the temperature steady.
Our seedlings looked pretty good to start, but after several weeks seemed to stop growing. I’m not sure if this is related to potting mix, air flow or something else. We transplanted everything into the garden despite the majority being puny!
As mentioned we have everything in the garden. Flannery convinced Adam to till up more sod. We put onions, potatoes and leeks outside of our 12 foot fenced area and near our garlic. It seems less likely critters would bother these. This made room for Flannery’s flowers. She’s dabbling in cut flowers more seriously this season. I guess let’s define “serious” as the square footage of space devoted to crops, currently there’s about 1200 square feet devoted to flowers. We’ve been taking notes from Floret Farm, the Slow Flower industry standard. We purchased an irrigation system from DripWorks and rolls of Sunbelt Woven Ground Cover. Now stuff just needs to groooooowwwwwww.

An Ode to the Historical

Sometimes you just know. Think about the last time you trusted your gut and were right about the feeling. I bet it happens more often than not or at least I bet you have the perception it’s right more often than not.
Adam and I had looked at a LOT of farmhouses and properties before we found our current home. We looked at way-over budget ones. We looked at decaying ones. We extensively researched what it would take to purchase and move a historical home to an acreage (if anyone needs a leg up on the research, contact us). I bet we looked at 20 houses and strongly considered around five.
Farmhouse hunting started as a thrill, but morphed into, what felt like going on a bunch of causal dates. There were a lot of misfits. There were a few times, when we really had our hopes up only to be disappointed that it wasn’t going to materialize. We actually threw in the towel shortly before touring our place.

Us on the day we first visited Tailwind (not named this at the time)
And then this place happened, on a typical mid-summer day after we said NO MORE, in one of the last places we expected to look for love. About 5-6 years earlier, biking on the Prairie Farmer Trail outside of Cresco, I told Adam’s family I could never move to Cresco. My really (stupid) flimsy rationale… Cresco sounded too much like Crisco (sorry to be hatin’ on the Crisco, fans). Never say never.
What drew us in about our home? Well, pretty much everything. We feel like it’s a rare gem. We knew pretty much upon opening the front door it was for us.
The previous owners were such meticulous caretakers annually servicing the furnace, AC unit, dryer, iron curtain, lawn mower. I’ve never seen such a tidy and dust-free home. Although, we try to keep it neat and appliances in good working order, we don’t give it as much attention as the previous owners.
We valued the upgrades and the care and attention to detail. They used quality products like Bertch cabinets, cork flooring in the kitchen, fully tiled shower, upgraded windows, and resurfaced wood floors without compromising the historical integrity of the home. They kept all the original hardwood, the built-ins and the French doors.
One of the biggest perks was a a clean, dry basement. We’d looked at plenty of straight up horror movie basements. This basement has high ceilings, plenty of windows, is dry and we could’ve eaten off the floor on move-in day. We now have storage, a pain cave (treadmill, weights and a shrine to all-things running), and a root cellar. The attic is also potentially usable space with windows, spray foam insulation and part of an exposed chimney.

Photo from the 1970s of the homestead. From https://vintageaerial.com/photos/iowa
Lately, I’ve been intrigued to know the history of this home. We are only the third owners. The previous owners purchased in 2005 from the original bride and did all that extensive upgrading. We know a little about its construction. It was built in 1932, as a wedding present from the bride’s family. They were immigrants from Bohemia. A Google search for “1930s farmhouses” yielded photos of a lot of shanties. I recalled pouring over Grapes of Wrath in high school captivated by how dire and hard the Great Depression hit midwest farming communities. Farmers didn’t have a lot of money; yet here is an immigrant family that built such an elegant farmhouse.
When I was in elementary school, I became obsessed with sketching floor plans. In fact, if it hadn’t been for my pathetic math skills (and general distain for the subject), I might have considered architecture. I had piles of oddly shaped manilla scratch paper with makeshift plans for houses all with skewed proportions and the misspelled room titles. It was around the time my parents embarked on building their current house, so I guess you could say it was on the forefront of my mind. I recall multiple trips to the architect’s office staring at the oversized prints of our soon-to-be house. Then, as if by a miracle (my parents would say a drawn out, expensive miracle), those blue prints translated into an actual structure!
Naturally, I was really giddy to discover the original blue prints to this house tucked away in the attic. I’m still yearning to learn more. When we moved in, we made it a goal of reaching out to the original homeowner. Unfortunately, we didn’t have a sense of urgency and she passed away before we could get the chance to meet. I feel a connection with this woman and this family, who I’ve never even met.


Blueprints of our house, so much like the ones I poured over as a little girl.
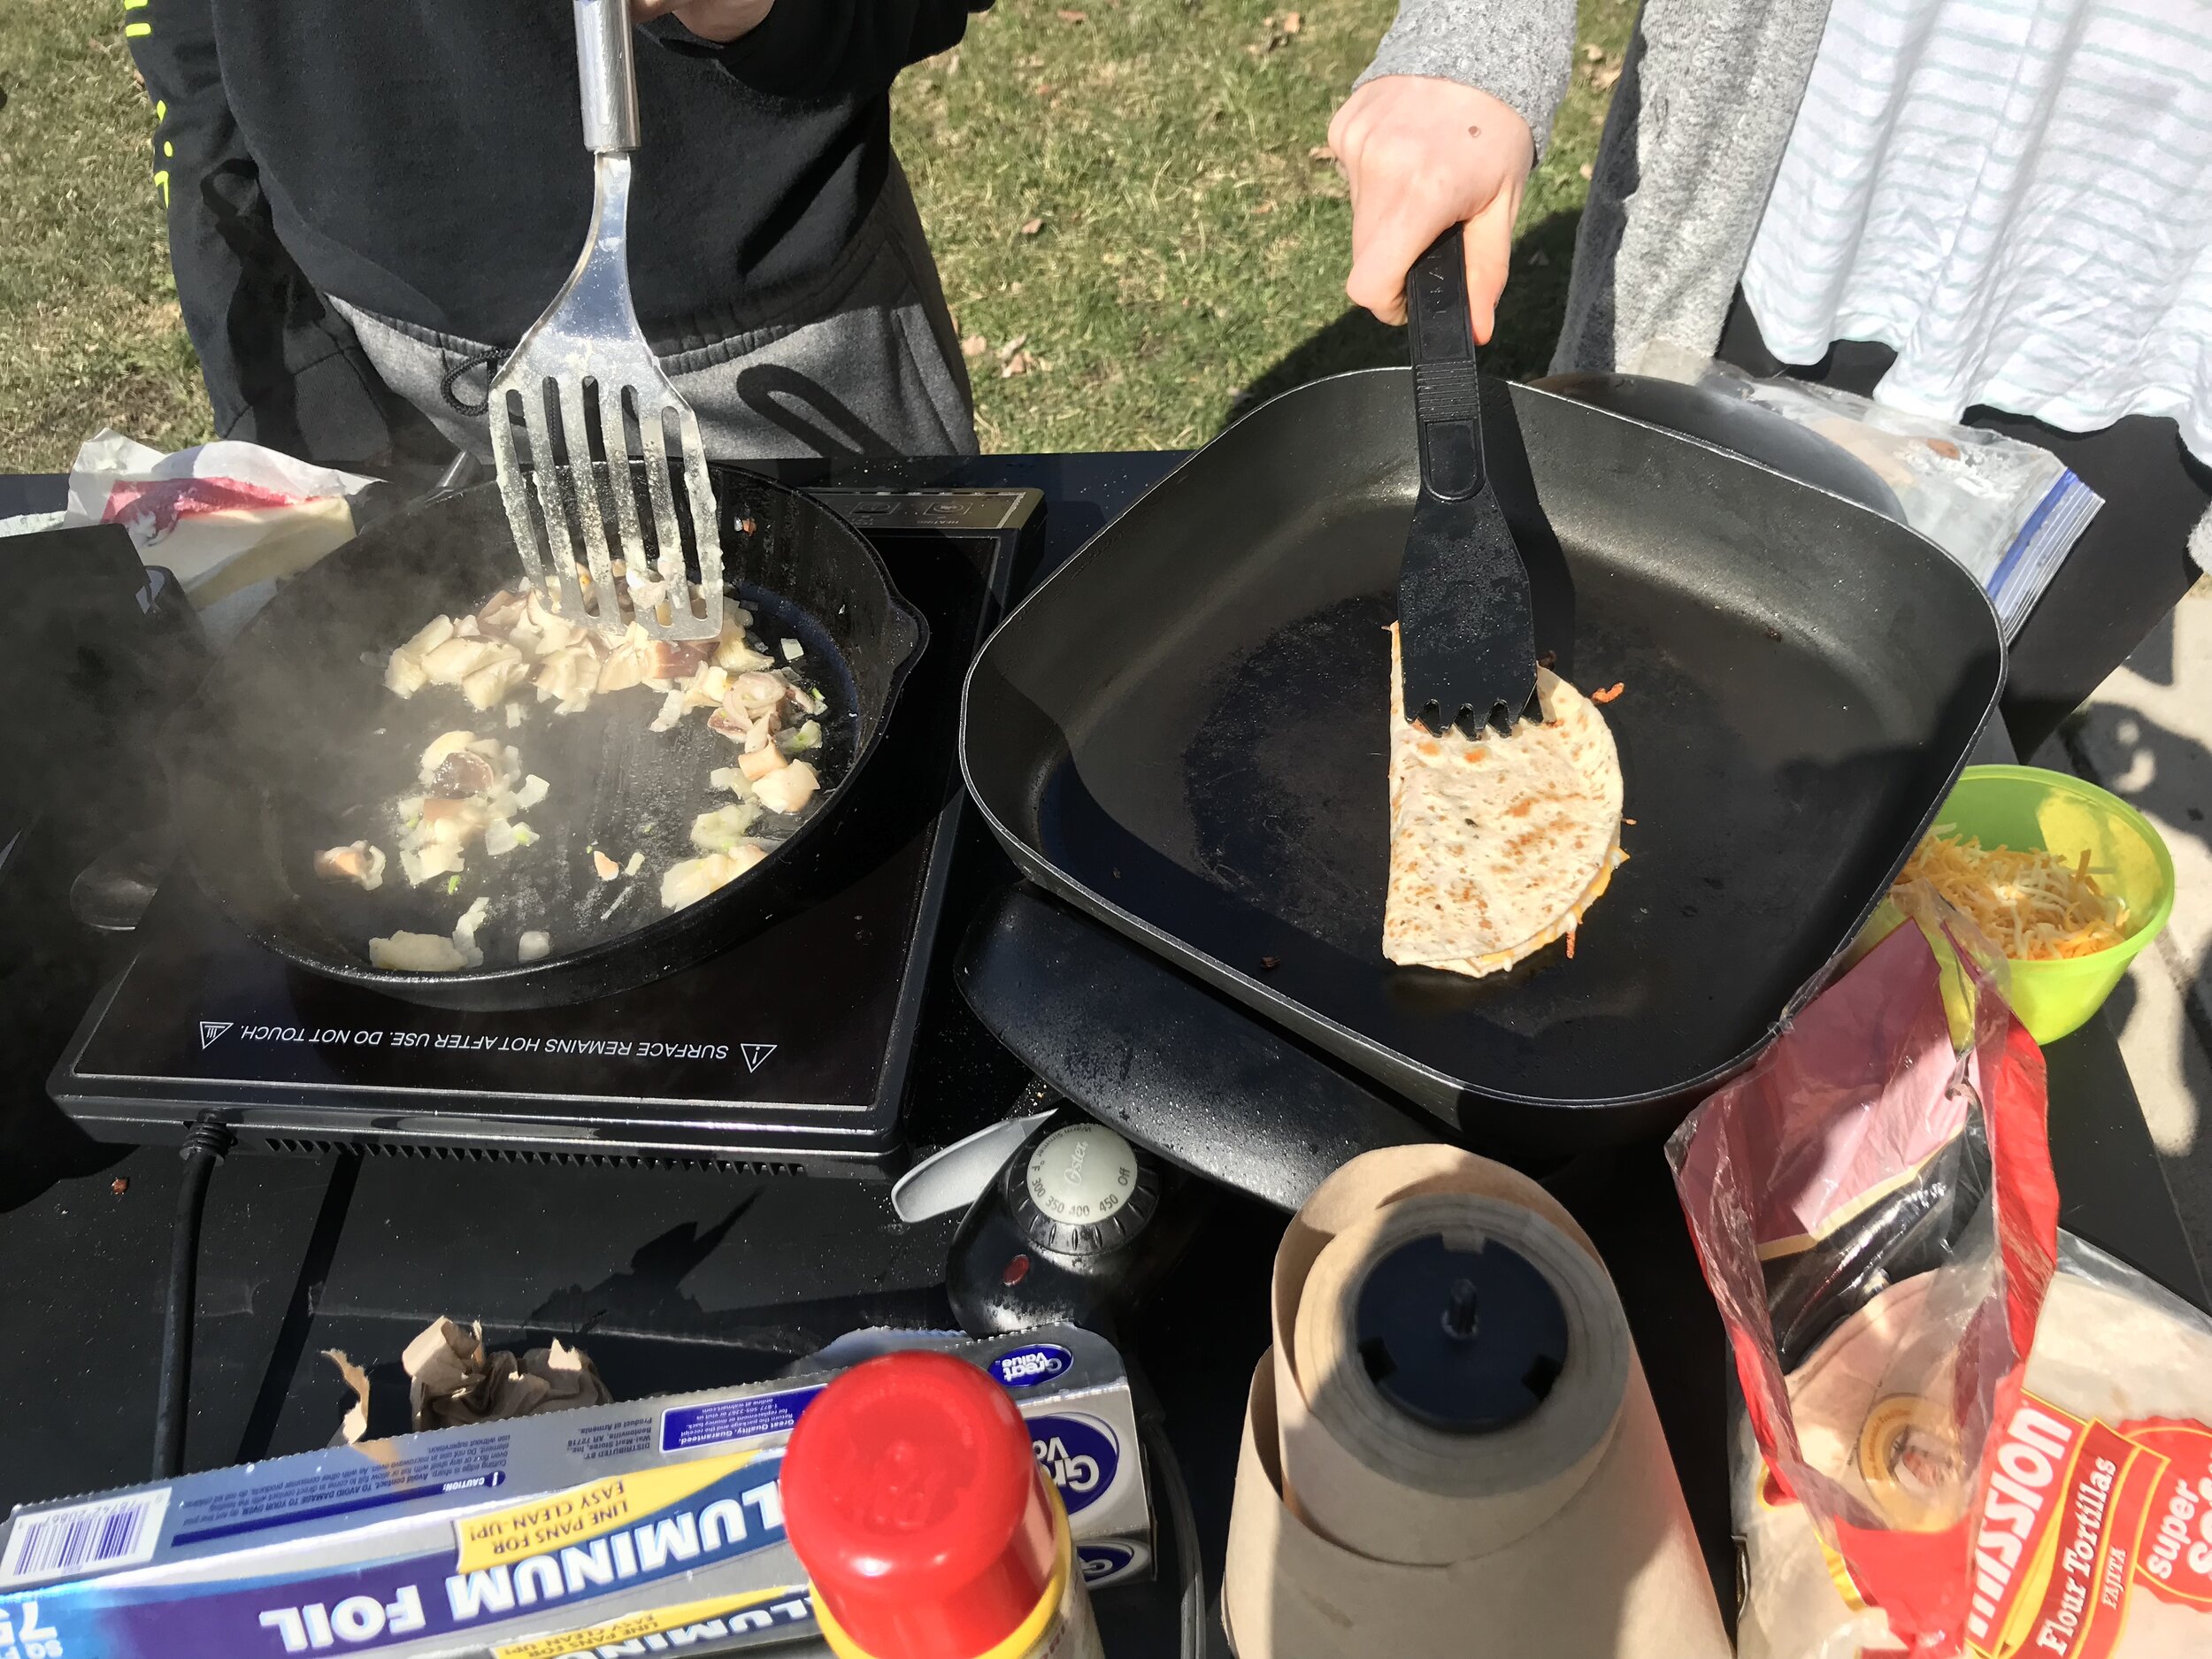
3 Game-Changers in the Kitchen: Insta, Vita & French
The right tool for the job. That’s quite a remarkable discovery. A tiller verses a spade, a corkscrew verses a screw and hammer... the right tool for the job saves time, money, and headaches. Today, I'm going to explain how our lives have been made simpler by 3 gadgets (yes, I would take these with me on a deserted island).
I promise you I’m not endorsed or getting kickbacks from any of the following products
1.) Instant Pot - purchased a 6-quart Deluxe Instant Pot off Facebook Marketplace for $90. From the photos, the IP looked nearly brand new and the gentleman selling it was upgrading to some sort of Air Frier/Instant Pot combo that I genuinely hope no one here tries to talk me into. The thought of parting with the beloved Instant Pot? Unthinkable.
It was a gift for Adam’s 35th birthday. He was headed to Des Moines to teach a sports massage course and I said, “Happy Birthday. Go to this address and your present will be waiting for you.” I masked in a fun scavenger hunt theme, but thankfully no serial killer. I had no way of knowing.
Adam raves about the Instant Pot being the best gift I’ve ever purchased. Truth be told, one of us uses it EVERY day. It has become such a part of kitchen function that I find myself asking what was life like before…?
Here are the staples we make in it on the regular:
Yogurt - Yes, we make our own yogurt. It’s easy and pretty much FOOL proof doing it in the IP. We buy a gallon of WW Homestead Dairy Whole Milk, retain about a cup of yogurt weekly to act as the starter. You even heat the milk in the IP, so literally everything is done in the pot. Before IP we used a cooler and boiled the milk on the stove… it worked but occasionally we’d botch a batch. This has yet to happen in the IP.
Dried Beans - We grew pintos, kidneys, black beans and cattle beans this year. So cool to eat our own legumes and protein. The best part about the IP is there’s no need to soak the beans before hand. It’s as easy as rinsing beans, putting it in IP, adding water and cooking on high pressure for 35-40 minutes.
Grains - no more watching the stove. It makes perfect rice- it’s like having a rice cooker except this is better because it’s not another single use appliance.
Soups & Chilis - One pot wonder and a glorified slow cooker.
** I even made 1 pot potato salad with potatoes on the bottom and perfectly done deviled eggs on top.
2.) Vitamix - When I served as the Iowa FoodCorps Fellow, all FoodCorps members and fellows were awarded a Vitamix. It was the first and probably the only time in education I’ll come close to receiving a “bonus.” It was very much a spectacular $600 value holiday gift and a testament to Vitamix Corp. for honoring the hard work and efforts of service members across the country. The company also “threw in” afterwards a dry canister for grinding grains. We call it the boat engine because it’s LOUD. Linden knows to cover his ears when we get it out. I am amazed at its power and used to blow fuses in our old place if the Vitamix was on with a number of other appliances. We use the Vitamix extensively in the fall.

Before(!)
Tomatoes - So easy. Cut off tops, bruises, throw into Vitamix until the tomatoes are liquefied. Scoop into freezer bags. This is usually what we do when we’ve finished canning tomatoes, salsa, making enchilada sauce. It’s handy to have frozen tomato juice to toss into soups and chilis. Linden is into drinking pureed tomatoes plain… wait until he discovers Bloody Marys. :)
Pesto - The Vitamix does a stellar job at processing basil for copious amounts of pesto. We freeze all our pesto into 6oz. bags (actually, technically they are breast milk bags - perfect size and freezer safe).

After(!)
Smoothies - You guessed it. The Vitmaix serves as a traditional blender for us. A good friend once told me, always add a banana to every smoothie. And you just can’t make a smoothie without one.
Grains - The dry bin attachment is pretty awesome too. It’s smaller and as you probably could imply, not intended for liquids.
Coffee - Recently the dry bin attachment has been back up to grind our coffee. Our small electric grinder kicked the dust. Planned obsolescence?
3.) French Press - Lastly, coffee. Because who can’t start their day without it? For us, our hoity toity coffee addiction centers around sources ethically produced and flavorful beans rather than on the home brew production. So for use the trusted $25 French Press does the trick Monday-Sunday. For those of you who’ve never Frenched (hehe, I couldn’t help myself), the coffee is just much more rich.
Here’s our routine: Grind beans. Scoop 6 tablespoons. Boil water. Let about 1 cup of water sit with grounds for about 3 minutes. Pour the rest of the water into French Press and let it sit for another 3 minutes, at minimum. I allllways appreciate the AirBnB that has a French Press…usually the first thought, “Oh, these are my people.”

Of course, I like a little coffee with my cream.

Nature as a Compass
I started with gusto writing blog posts in the Spring, intending on their being a new one weekly but the realities set in of juggling distractions and work. I miss writing. Maybe you will hold me accountable. Ugh, I feel like a slacker.
Enter Fall. A season I adore for the smell and the harvest moon; a season I dread as a precursor to winter. I’m trying to get excited. Really. I even suggested to Adam that we invest in cross country skis so we can go up and down the gravels this winter when the footing is too rough for running.

New found trail in Cresco. Photo credit: Adam

Banks of the Turkey River. Photo credit: Adam
The other morning, the neighborhood Sandhill quartet flew right overhead, literally I could see their underbellies. They’ve been frequenting our unfinished shallow water wetland and likely will head south soon.

Our shallow water excavation after 6 inches+ of rain in one week.
The other evening, a herd of deer played at the water’s edge. Yes, I mean to anthropomorphize the deer, because there isn’t any other way to describe the scene. The fawns played a good ol’ fashion game of tag and splashed for the pure hell of it.
The other day, a massive caterpillar stopped me dead in my tracks as I was finishing up a run interval. It was hauling across the gravel, as if it knew it was at risk in the road. I’d never seen one like it, so Adam and I spent the evening combing through online guides to see if we could identify it from a photo I took. No luck.
All around us nature ticks on. It’s easy to look out at the corn and feel like man’s touch is everywhere. Even here where it’s quiet and we rarely see others. But nature’s battle all around us and a pecking order ensues. One hen came up missing last week. Evidence that she met her fate lay in a pile of feathers by the garage, then more feathers by the road and even more in the ditch. We’ve only lost two, so I started to get a little cocky thinking we’d outsmarted the predators. When I saw the feathers, I felt foolish for forgetting about hungry bellies of the fox, coyote, and raccoon.
The world feels so small right now; it used to feel large and open. Our weekends full of races, always looking forward to that next trip or booking that next Airbnb. But that isn’t current reality. With restricted boarders Adam and I are left wondering if we’ll be able to rebook tickets to Portugal; wondering if family will be able to adventure and take advantage of youth. A friend and I agree this a privileged problem, but it doesn’t stop the wanderlust. Maybe you’re not feeling wanderlust, but a yearning for something to return? Maybe you felt “it” 5 months ago, maybe “it” hasn’t hit or maybe “it” is just starting to seep in because winter is right around the corner. Winter already means slowing down, quiet, and isolation, when there has already been some slow, some quiet and some isolation in a time that is normally frantic and exhausting.
And I need to bring myself back to the forces around me. That nature ticks on around us. I haven’t heard the Sandhills in a few days. The swallow tail caterpillar which built a cocoon in Linden’s little bug house hasn’t emerged yet. And hazy sky to the west has been a reminder that something seemingly happening so far away is on the horizon. And that all is not right in the world. And that it’s not so small because we can see evidence of those fires 1,800 miles down the road. I think about the time this summer, when we burned a pile of decaying brush in the yard. That fire jumped and roared and came so close to a living walnut tree which could have set our entire windbreak on fire. Fire is powerful and I felt microscopic.
Nature has the ability to bring you close and bring you global and for that, it feels like my only compass.

Photo credit: Adam

Photo credit: Adam
Oyster Mushroom Kits
The rain has finally made our garden pop. Wow! I was getting a little nervous our seeds would lay dormant forever, but at last the rain worked its magic. The rain also has us wondering if the wild mushrooms have fruited. We’ve been checking some local woods regularly but have yet to explore since the much showers this past week.


As much as we enjoy exploring the wild for mushrooms, we are not foragers. Big confession: despite keeping our eyes open neither Adam nor I have ever found a coveted morel in the wild. We hope this doesn’t discredit us as growers as we appreciate the flavor and versatility of fresh mushrooms. We did happen upon the mother-load of wild mushrooms in 2016 after a very, very wet August. Thankfully we had our camera - see photo gallery. We didn’t pick any!
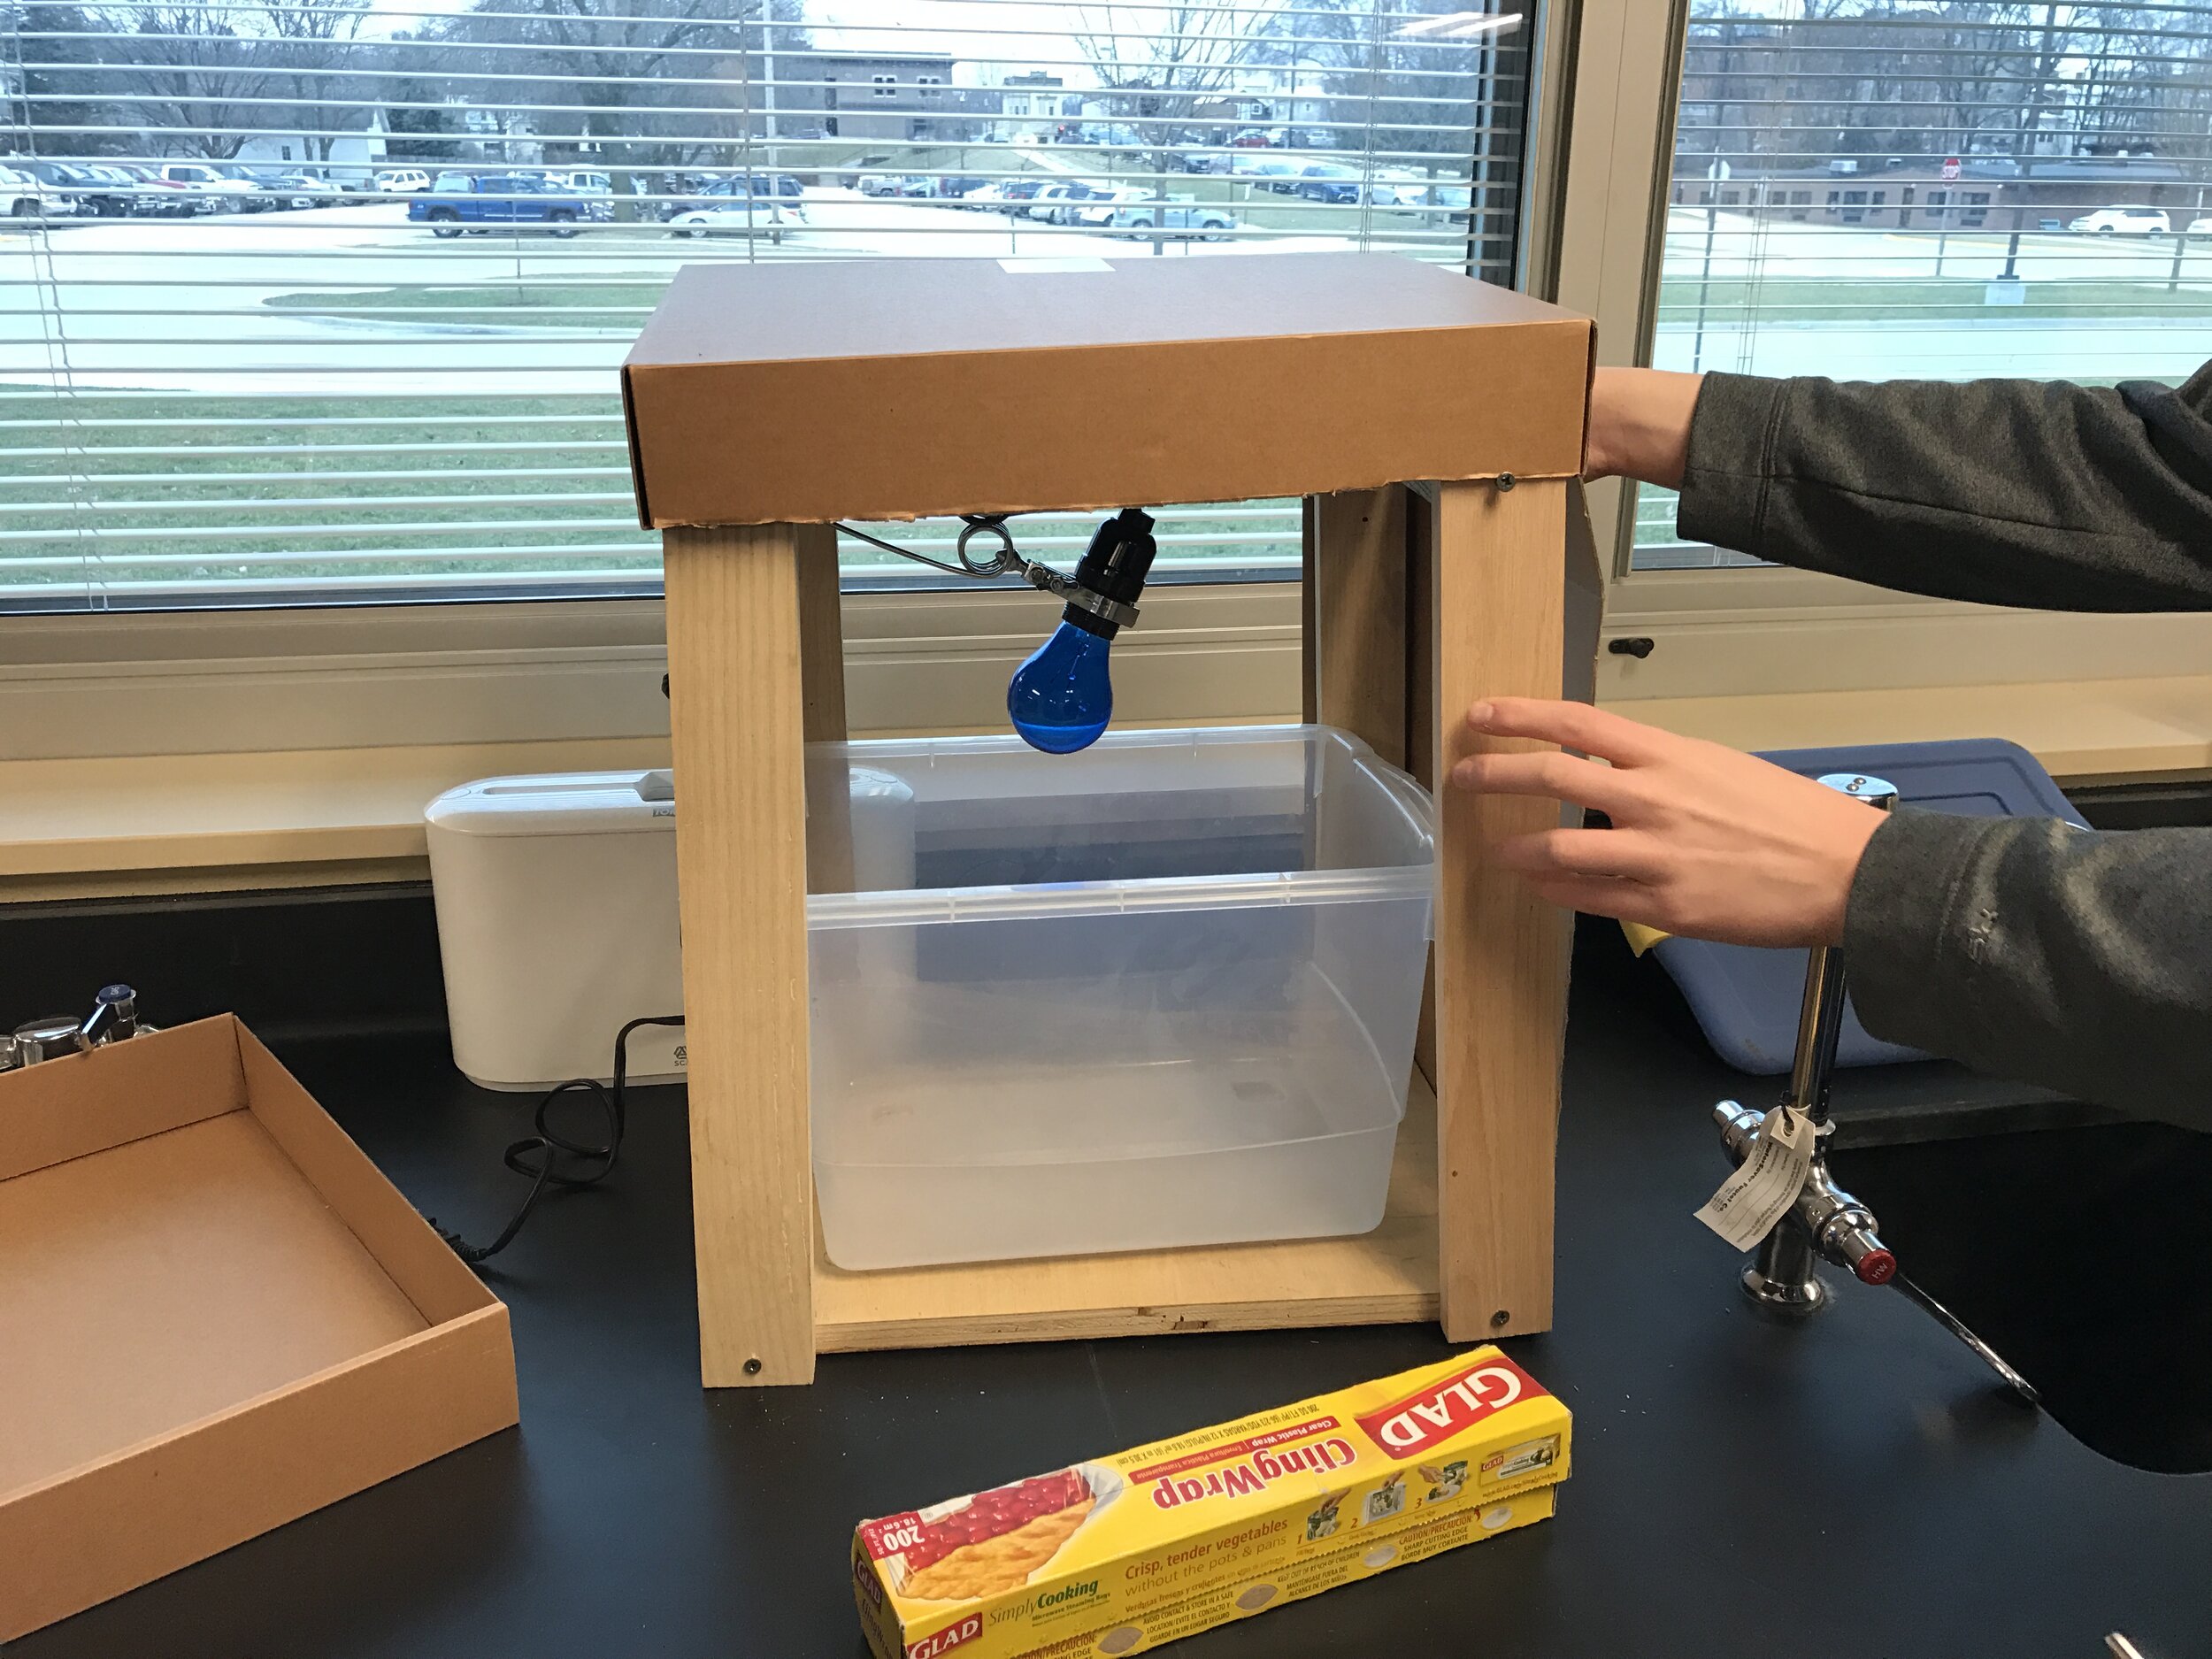
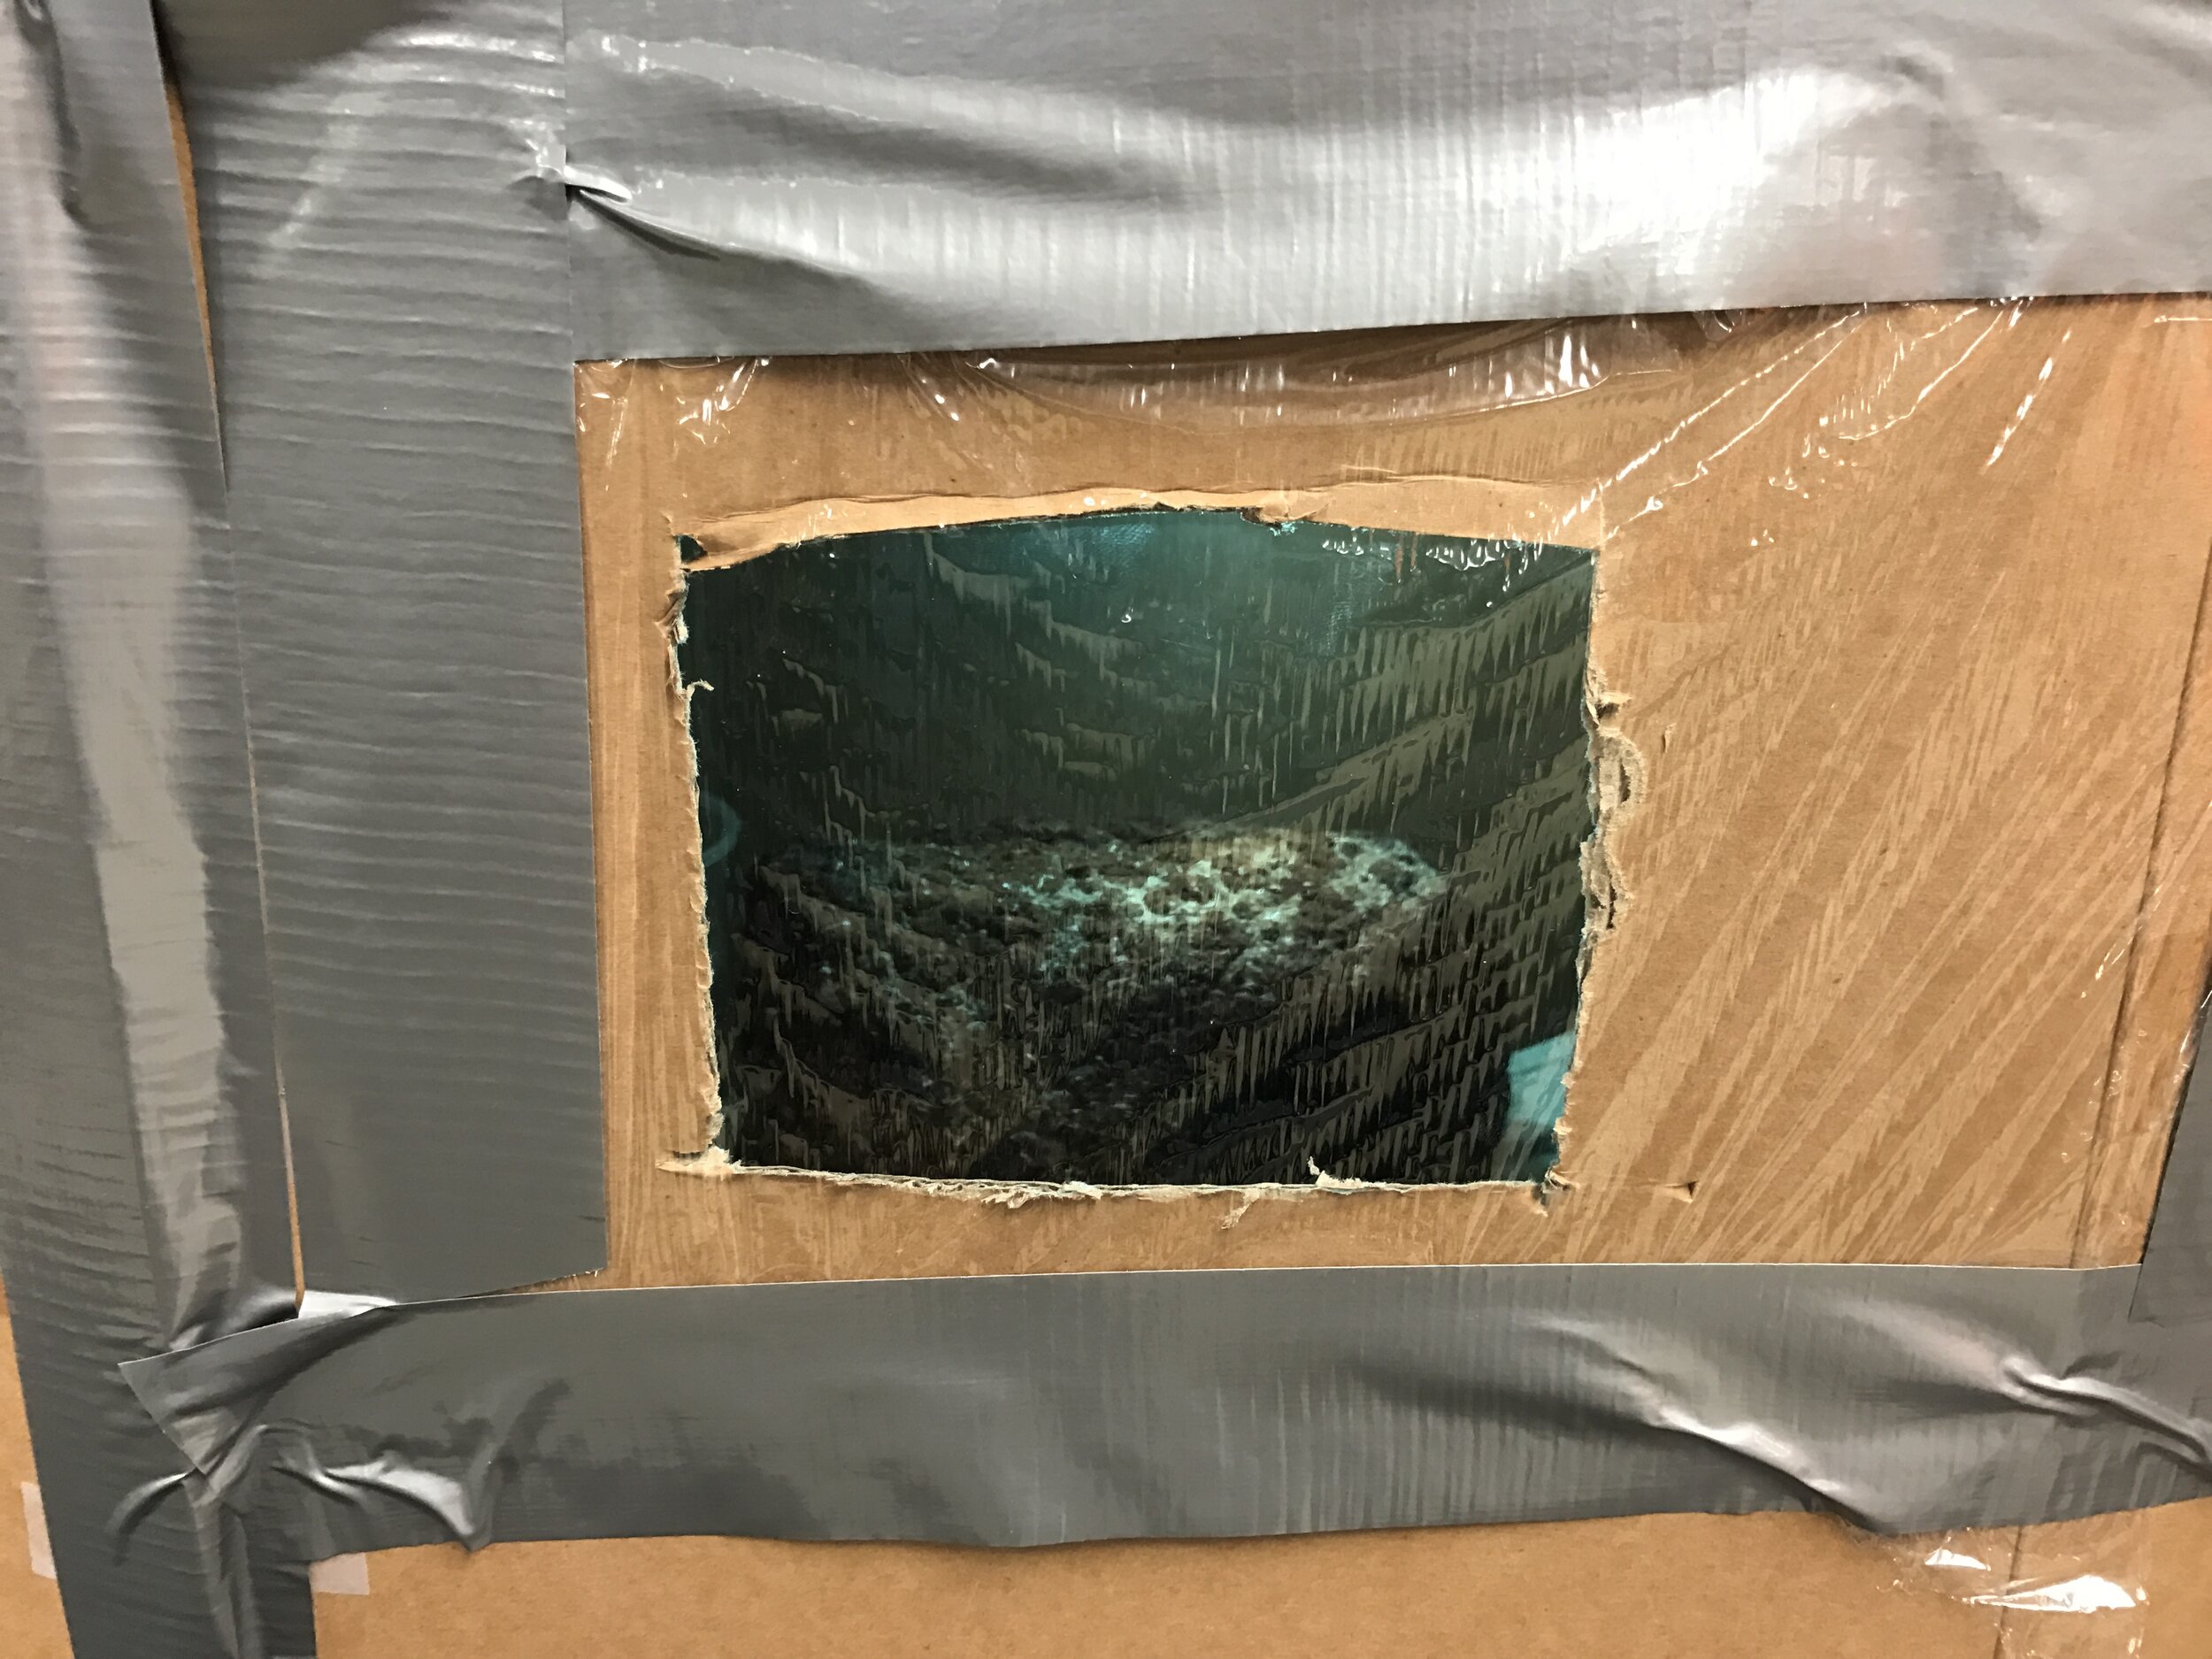

Adam first introduced me to shiitake mushrooms. For those who haven’t tried a shiitake, you’re missing out on a pleasantly earthy taste. Since 2011 Adam has done a project with his biology classes where students grow shiitake mushrooms. He orders pre-made shiitake log kits from Field and Forest. The kids work in teams to build a mushroom chamber for their “logs” and then market and sell them to school staff. The project finale includes a mini top-chef competition where students use their mushrooms to cook a meal judged by the school chef. Students really up their game and the recipes are clever. Raise your hand if you’ve ever tried grilled shiitakes drizzled with chocolate bacon over vanilla bean ice cream?
For the last handful of years we have been antsy to grow our own mushrooms using spawn and properly setting up the growing conditions. Despite having some experience with mycology, Adam recognized he needed some professional development in mushroom cultivation. In February 2019 we both attended a daylong Organic University course at MOSES all about starting mushroom cultivation.
We started oyster mushrooms last year with some success and learned a whole bunch. This year we decided to expand the oyster endeavor and venture into shiitake cultivation.
Why mushrooms?
For the Health of It! Both of us eat meat, but have gone through periods in our lives of being mostly vegetarian. Mushrooms are a great substitute for meat as they add texture and protein to vegetarian (or non-vegetarian) dishes. Additionally mushrooms contain Vitamin D (the only item in the produce section with it), help boost immune system function, regulate blood pressure and sugar levels, lower cholesterol and contain antibacterial and antiviral properties. They have even been shown to suppress cancer cells (Organic Mushroom Farming and Mycoremediation).
Like most cases of “grow your own” the flavor of home grown mushrooms can’t compete with those that are stored and shipped.
Conventional mushrooms are often cultivated with the use of fungicides. We like to minimize our exposure to these chemicals when and if possible.
There’s nothing quite like watching and participating in a life cycle. Mushroom growth is fascinating!
By the end of May and early June we will have limited amounts of grey dove and golden oyster mushrooms kits available. If you’re from the Decorah area and are interested in having a kit please contact us -
abohach@gmail.com or cerbfl01@luther.edu.


Homemade Bread
Smell that? Hmm, I wish you could. It’s homemade bread. If there was anything I could magically teleport to your household it would be our kitchen smells (and maybe a few of our chicken eggs). There’s usually something permeating - meatballs, Indian curry, squash lasagna, cookies, and bread.
Last Fall a truck unexpectedly pulled into our drive and two men rang our doorbell. I’d spent the morning cleaning and Adam had a loaf of bread in the oven, so I wasn’t self-conscious about the state of the house. It was the best it had looked all month, but I was off put by the unexpectedness of the two strangers. I beckoned Adam to be close in tow as back up incase we were going to be pillaged and robbed.
I opened the door and invited them to set a foot or two into the porch (Midwestern thing, I’m assuming). The older gentleman asked, no joke, “is this some sort of bed and breakfast?” My fear dissolved. Had they showed up a few hours earlier they would have gotten a waft of poopy diapers. Turns out they wanted to hunt pheasants on our land. No. Sorry we weren’t going to let strangers hunt on our land. But I almost said yes with all that good smelling, bed and breakfast, Martha Stewart Living sweet talk.
We recently ordered a 50 pound bag of flour and a pound of dry active yeast, not entirely because of the pandemic. We like to have bulk quantities on hand in normal circumstances. We have a root cellar and food grade buckets that we can store our flour. Time will tell how long the flour lasts us. I’m guessing 3 months. We’ll see.

Standard Homemade Bread Loaves
In response to some requests at work I made a video of Adam’s bread making routine and the staple recipe that he uses. It’s versatile and can be transformed into pizza dough, English muffins, cinnamon raisin bread and other gluteny goodness.
Here’s the Basic Bread Recipe adapted from the Tassajara Bread Book and the video tutorial to show you that baking bread from scratch really shouldn’t be intimating. This recipe makes two loaves.

Cinnamon Rolls - HOW TO MODIFY
GETTING STARTED: THE SPONGE:
Add 3 cups of lukewarm water to a mixing bowl.
Water should be about 95-105F.
Add 1/4 cup sweetener (e.g. honey, sugar or molasses).
Add 1 1/2 tablespoons of dry yeast.
Stir lightly & set it aside until it bubbles and foams.
Add 2 cups of white flour & 2 cups of whole wheat flour.
Add the yeast mixture to the 4 cups of flour, stir until fully incorporated.
Cover with plastic wrap or waxed paper & then cover with a dish towel.
Let it sit for 30 minutes at 80-100F temps (could turn your oven on briefly)
SEEING IT TO THE FINISH:
From here on out FOLD, rather than stir. Add 4 teaspoons of salt.
From here on out FOLD, rather than stir. Add 1/3 cup oil or butter.
Fold in another cup of whole wheat flour & 2 cups of white flour.
Flour your hands & knead the dough until incorporated.
Flour your hands, knead the dough. Let it sit for 50-60 minutes, until doubled in size.
Divide the dough into two even sized pieces, place in lightly oiled tins, knead a little.
Take a knife, cut down the center. Let rise until doubled in size.
BAKING:
Preheat oven to 350F (gas) or 325F (electric).
Bake for 35 minutes in the center of your oven rack.
We added 1 tbsp cinnamon & 1/2 cup raisins to our second loaf.
PRESTO! These loaves freeze well if you can keep from devouring the warm loaves right away.

English Muffins - HOW TO MODIFY

Pizza HOW TO MODIFY
Why Train ... Especially Now?
Adam came into the house last Saturday around 8:30am, salty and smelling of fresh wind. I’d been up for about an hour. Had some coffee. Checked the news. If I remember correctly Linden was still asleep. Adam had already run 20. Yup, 20. This is common. What’s uncommon? There are no races on the schedule.
You may also be grappling with a lost spring/summer race season or maybe you’ll be enlightened in the paragraphs that follow… why the heck would someone wake at 5:45AM on a Saturday and push themselves for 20 miles on lonely, semi-soft gravels?
It doesn’t all boil down to the love of sport, believe it or not.
Adam and I approach racing as a side business, fortunately (a.) we love to run and compete and (b.) we don’t have to rely on race winnings to pay our mortgage. In the middle of winter we set goals for the coming race season. We consider the following criteria when planning:
a competitive field (usually that coincides with prize $)
prize money and depth of payout
distance from home
estimated expense to travel (e.g. accommodations, gas mileage, etc.)
Our chance at prize money generally boils down to who shows up to race and how we are feeling on race day. A big benefit for us is that we both compete, which increases our chances at walking away with some profit. What income we do make goes into our savings.
Like any business there are inputs and outputs. We try and limit our inputs wherever possible. We’re fortunate to typically qualify for reduced or free entry. This often requires a qualifying time, which is pre-determined by the race director. Time standards vary from race to race. We race hard and often to earn points with our racing team, Runablaze Iowa. These points help to pay for shoes and offset travel expenses. We have a home gym rather than pay a monthly membership fee. When we do travel for races we try to stay in an Airbnb so we can cook our own meals, which not only saves money but tends to be better for pre-race fueling.
There is a finite amount of time that our bodies will be able to keep up with the front pack and have an honest chance at race winnings. With Adam turning 36 years old in June, he knows his time is running out. So like some of you, we were sad to see postponements and cancellations this spring. Here is a list of all the races we were planning on doing in 2020…Shamrock Shuffle 8k (Chicago, IL), Milwaukee Half Marathon (Flan) / Marathon (Adam), Green Bay Half Marathon (Flan) / Marathon (Adam), Run for the Troops Half Marathon (Flan) / Marathon (Adam). Dam to DSM 20k has been postponed to the fall.

April 23, 2020. We took to the Prairie Farmer Trail for 5k/5mi time trials today.
Since the pandemic was announced, I have continued doing semi regular time trials and Adam has still kept his average at 70 miles a week since December.
The easy road would be to ditch the running shoes and sit around and consume homemade bread, cookies and kettle corn. There’s been plenty of consumption of these things don’t get me wrong, but we continue to drag our butts out the door. For Adam that usually means 6:15am. The truth is we can’t take all spring off from training and expect to still be competitive in the next season (if that’s this fall or beyond).

Out of the three of us, one didn’t think the 8 miles of being lugged around was annnnny fun. He just wanted some of the action and insisted we “race” during my cool down.
Another reason why we continue to exercise is that moderate or regular activity has been shown to increase our immune health. There’s a fine line between training and overtraining, which can wear down the immune system, but thus far in 2020 we’ve been pretty healthy. Previously, my typical pattern tends to be a respiratory illness every 4-5 weeks (regardless of mileage). This year I have had uninterrupted training since February which I contribute to staying healthy, hovering around 35 miles week. Since staying home I haven’t been exposed to much of anything and Linden hasn’t been picking up any bugs at daycare. Perhaps the real reason I’ve stayed healthy is I’m getting more sleep now. No more rushing out the door at 7:00am.

I went first for a 5k (3.1 miles). Adam biked alongside this time for an unofficial 17:45.
Mental:
As much as I’d like to say its all about the physical benefits, we’ve continued to train mostly for our minds. With so much of the world changing on a daily basis, Adam found training to be one of the few things he could count on. The ritual of sitting down on Sunday to pencil in the workouts for the week ahead didn’t change. We both could count on knowing what distance and pace the run would be for the next day. This accountability has become a source of comfort in a world that seems to be shifting beneath our feet every day.
With there being so much depressing news in the media, especially when this first began, running became an additional source of stress. Contending with new routines and staying at home with our toddler left us both exhausted in the early weeks. When we tried and struggled to execute key workouts, running felt like just another additional stress in our life. To maintain balance, we’ve had to back off a little on the hard workouts and shift our mindsets. If the mind feels up to the challenge, then we’ll go for all 10 repeats. If we’re not in the mood, then maybe it’s only 6 or none at all. It’s all about perspective right now and running needs to be a place to relax and escape.

Adam went second immediately following my 5k. I wasn’t expecting a duathlon effort. Holy smokes, I couldn’t keep up with the bike and the trailer … evidence I need to work on some power. He completed his 5 miles in 25:26, with an impressive 4:50 last mile :)
Racing is an art. It can’t be simulated well when you run alone every day. It’s just not possible to push your body as hard as you would when you are with others or vying for that prize money. To try and keep our mental edge for racing, we have done our best to help one another. When I did my time trial tonight, Adam biked alongside for 5k while pulling Linden in the Burley. To return the favor, I did my best to average 12mph pulling Linden while still encouraging Adam to meet his goal. What’s gonna work?….TEAMWORK!
Despite our races being cancelled this spring and losing out on the opportunity to run faster times or make money, our training doesn’t look much different than before. In a world that currently feels very different, it is nice to have something that feels familiar. Whether it’s running or not, I hope you can find something in your life that gives you a sense of order and stability.

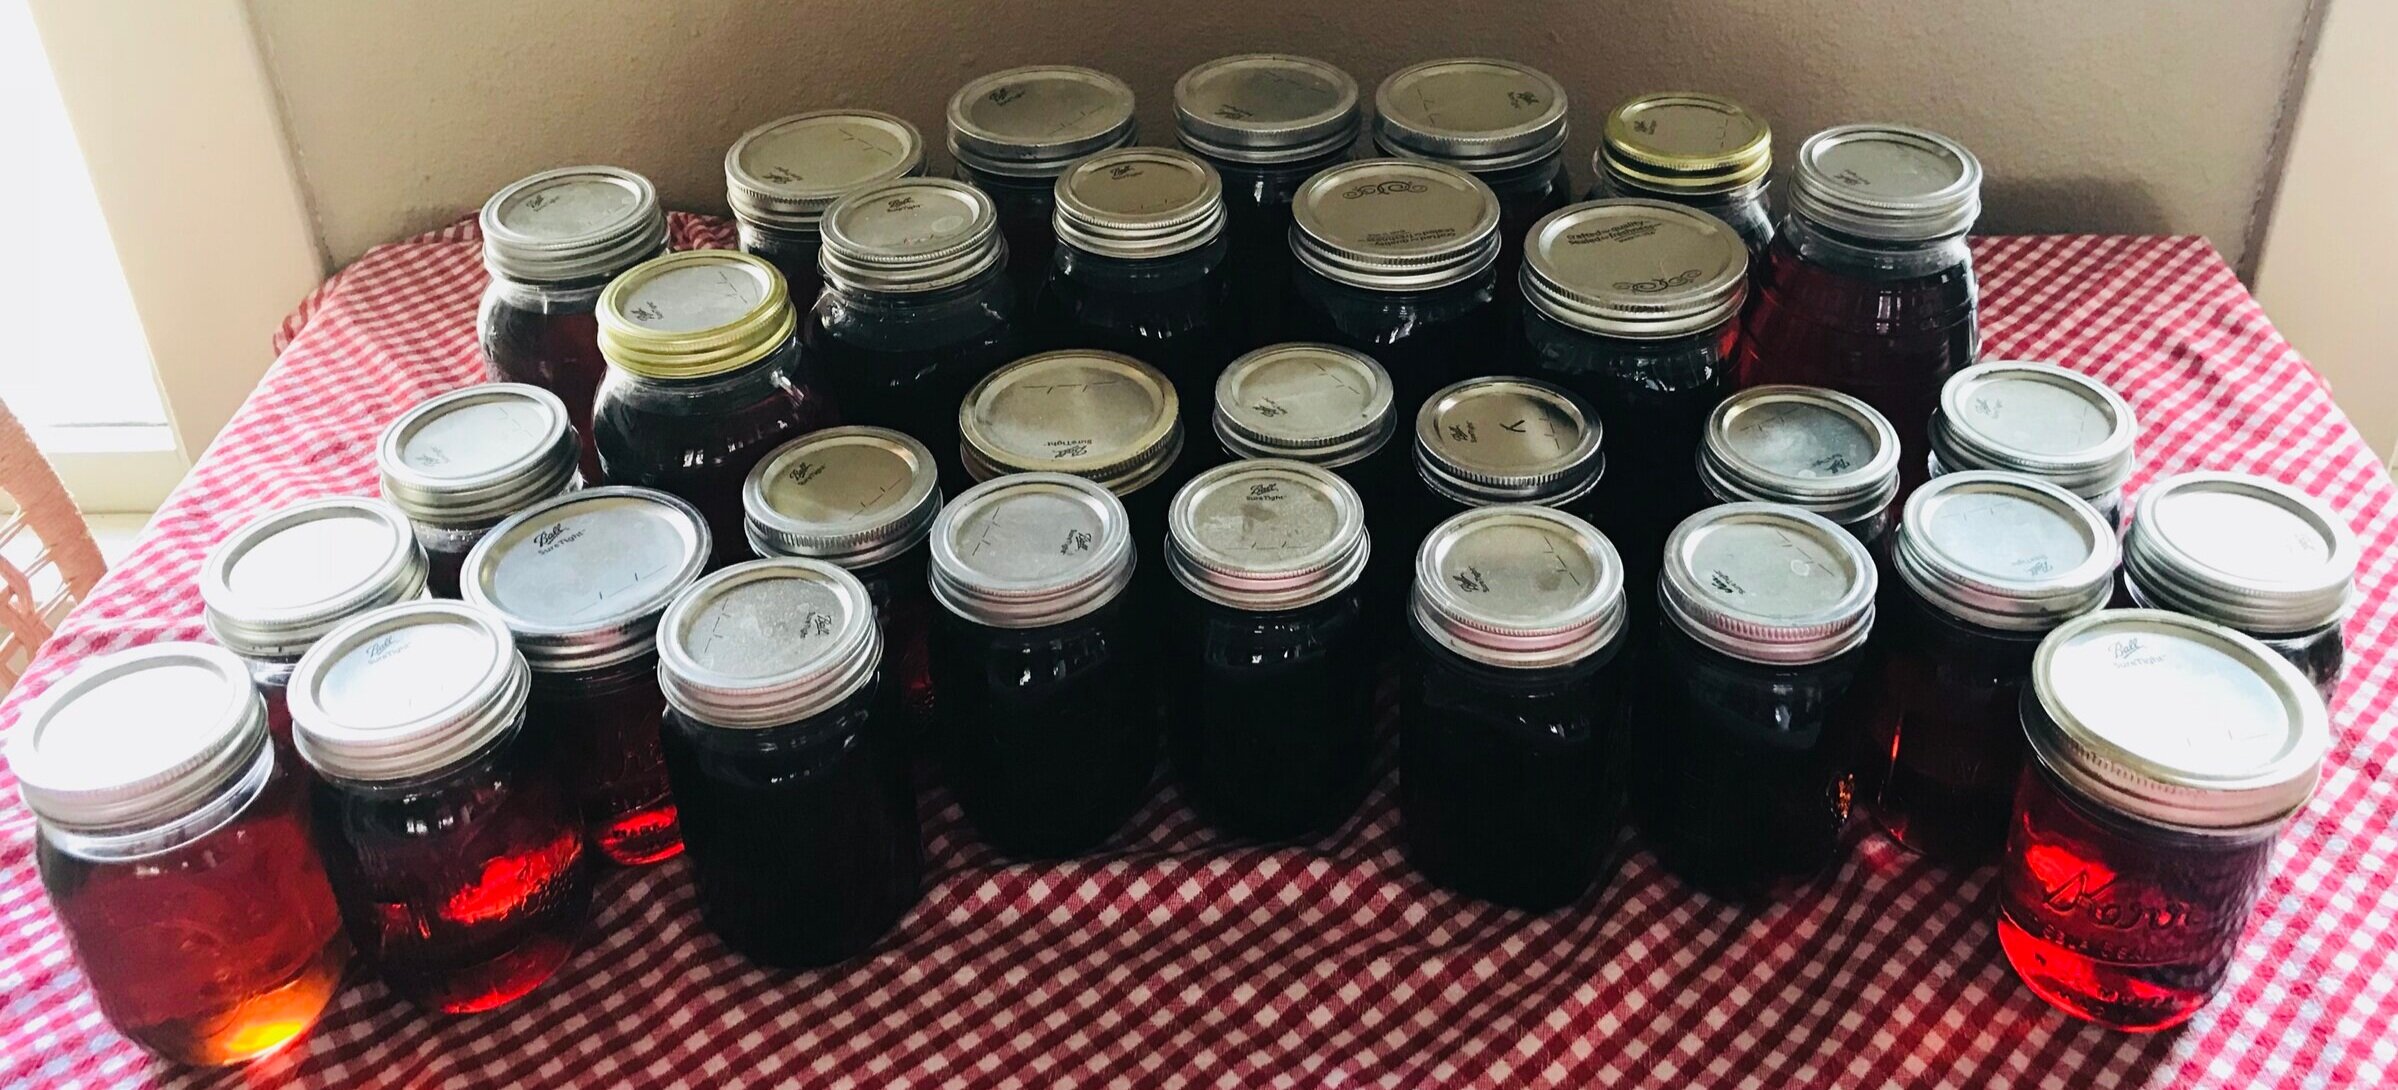
Canning Maple Syrup
There are traditions that mark the passage of time in our household, as I’m sure there are in your family. For us they usually involve some act of food acquisition or preservation, such as canning salsa, making pesto, making pepper jelly, visiting an orchard and making applesauce, going to SnowPac to stock up on frozen berries, visiting Mennonite greenhouses for potted plants, and the annual Decorah garage sale weekend (… wait Adam tells me this isn’t food related, but he doesn’t know about my annual white chocolate chip raspberry muffin from the local coffee shop).
We’ve been attending a maple syrup festival called Green’s Sugar Bush for the last 5 seasons. A sugar bush is a stand of trees used for collecting maple syrup. Oh, how we wish we had our own stand of maples, but alas we have a stand of black walnuts. I have yet to acquire the taste for these.
The festival always includes a big big pancake feed, with a line that usually takes a solid 1.5-2 hours and the chance to purchase syrup or maple syrup candies.
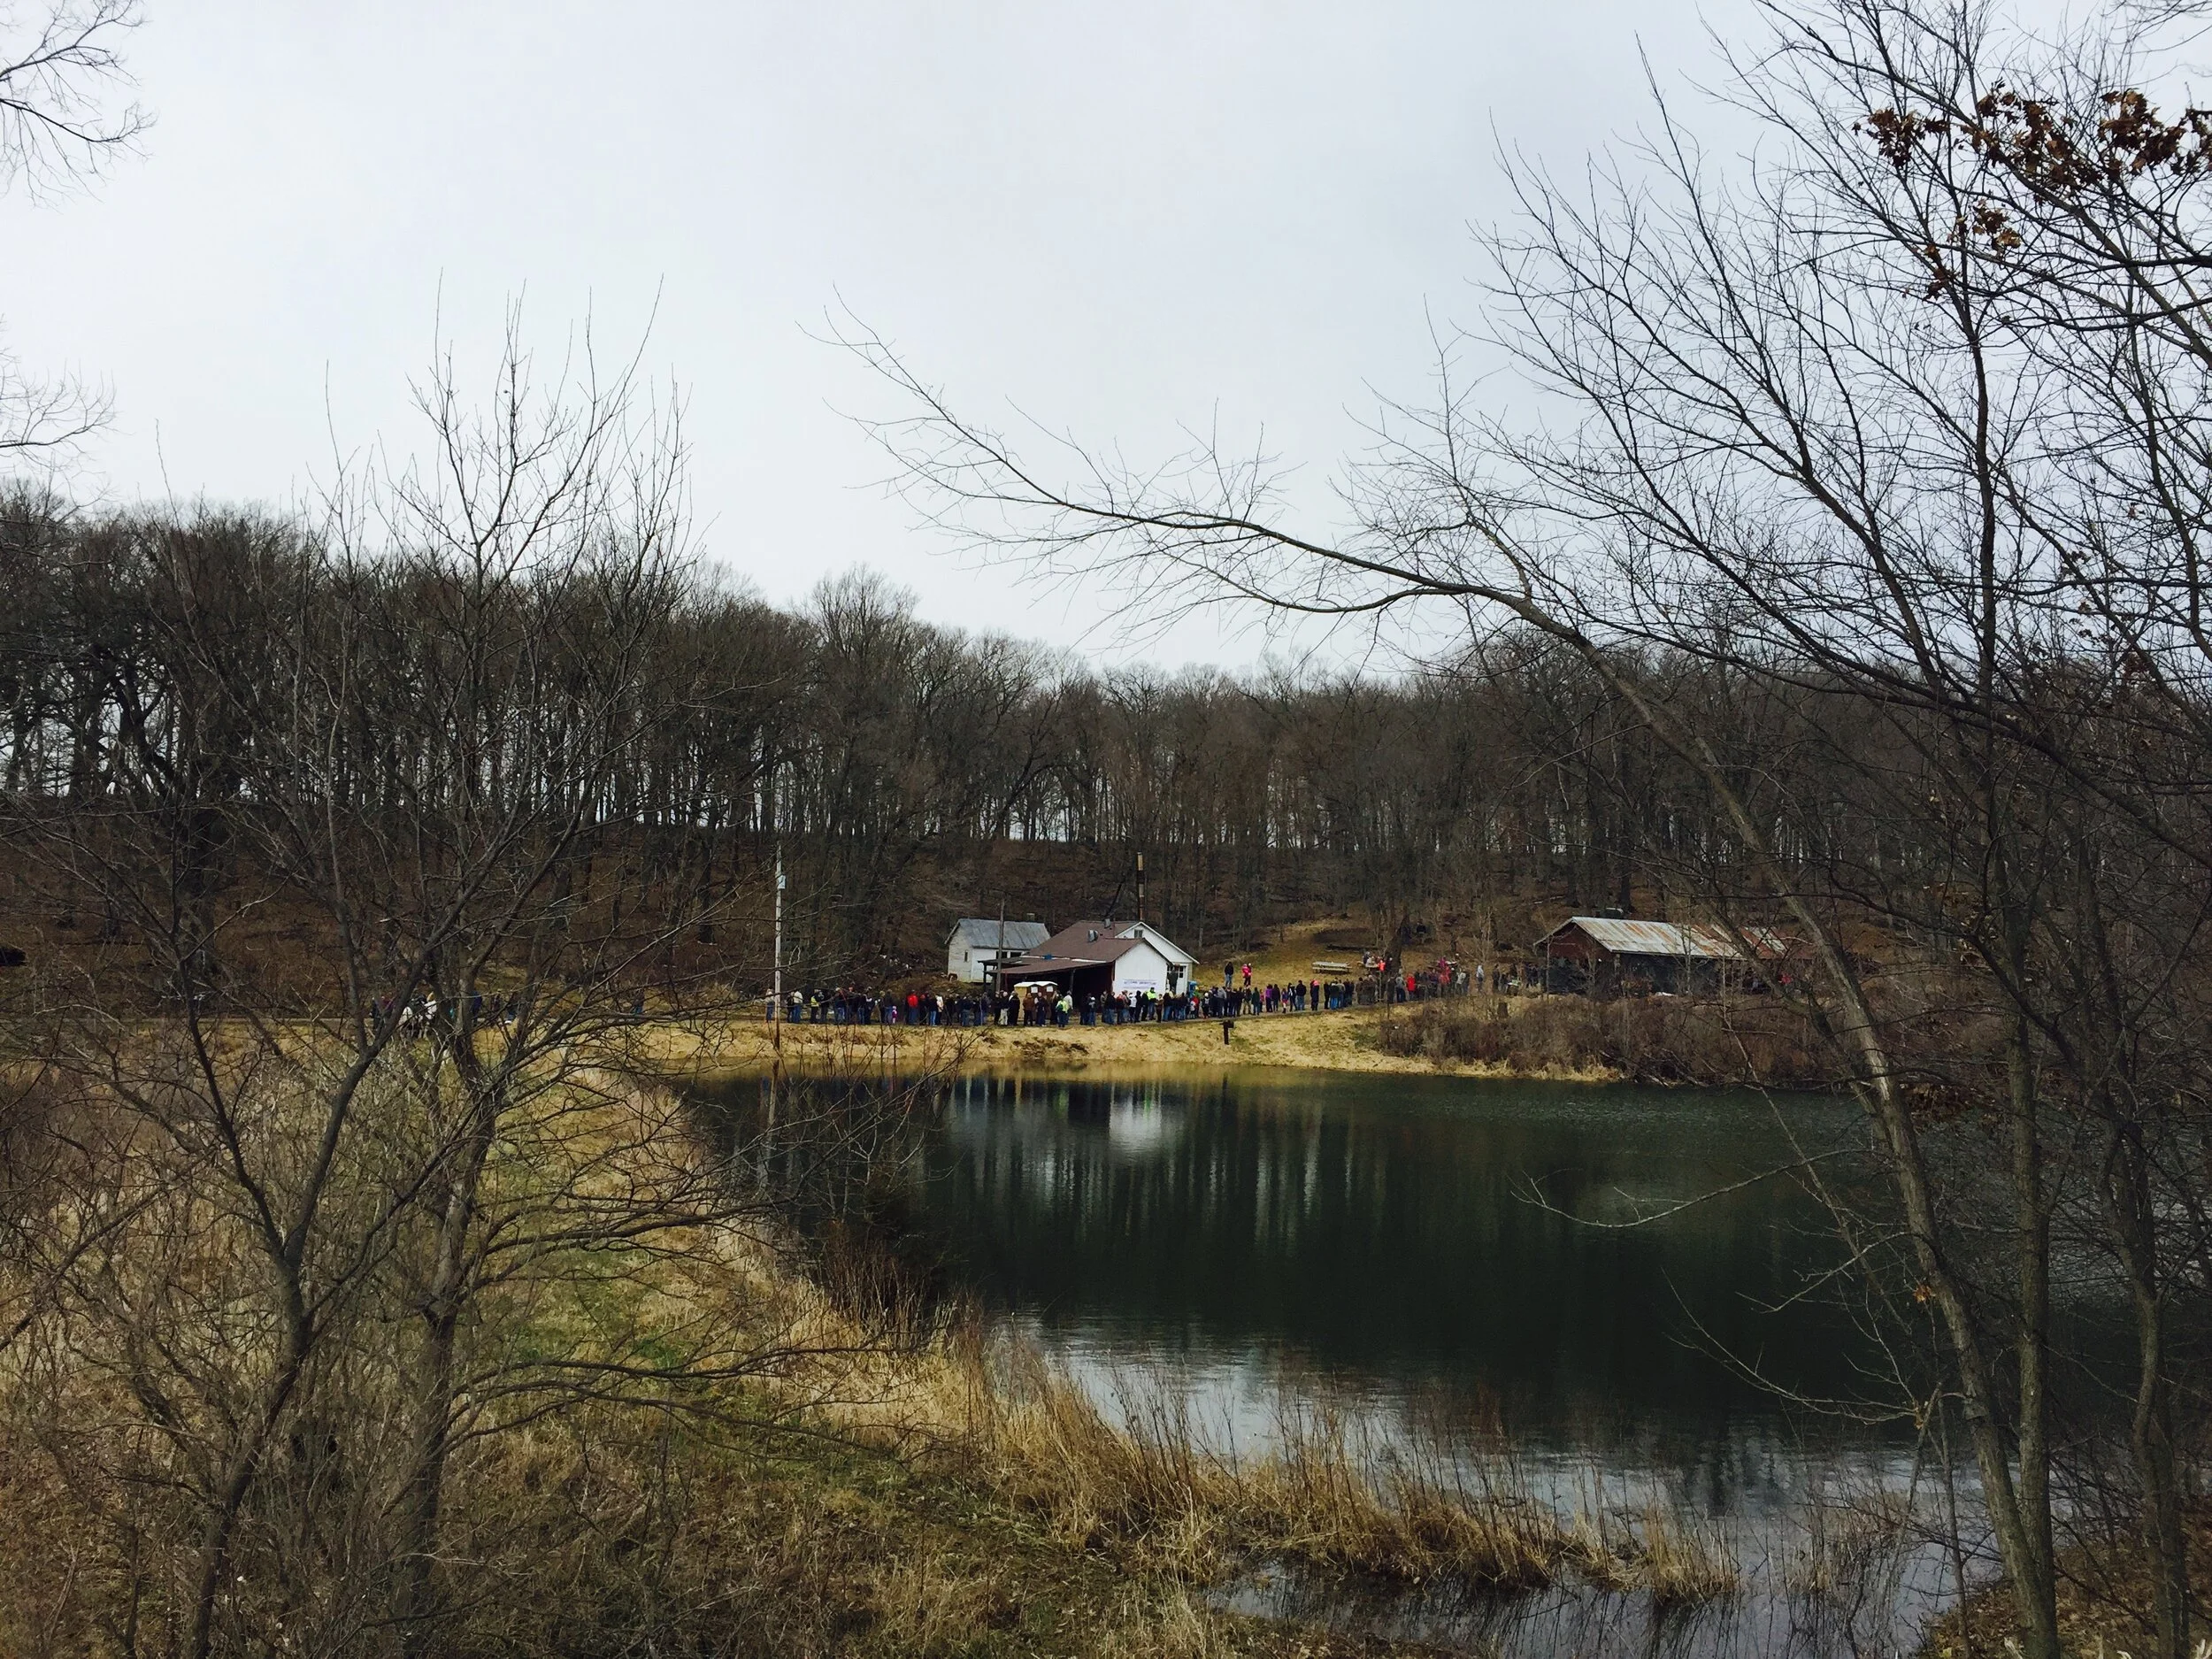
Green’s Maple Syrup Festival … take note of the “short" (ha) line for the pancake and sausage feast.

The typical line of cars at the maple syrup festival. Photo from 2019.
We weren’t sure our annual sugar run was going to happen this season due to COVID-19 and the social restrictions. Their festival has been postponed until the Fall, but we were still able to pick up syrup from their little sugar shack. We pretty much have our maple syrup use down to a science and know we need 4 gallons to see us through until the subsequent syrup festival.
I grew up smothering puddles of Aunt Jemima on my Dad’s infamous Uncle Bill pancakes. I suppose the smothering habit hasn’t died, but my taste palate has shifted. For those of you who’ve never had real maple syrup you’re missing out on a big treat. We use maple syrup for waffles and pancakes, which we make at least once a week in our house. We also use maple syrup on our homemade plain yogurt. We used to make granola using maple syrup, which honestly I think I overdosed on and we haven’t made it recently.
Our bill came to $189 for 4 gallons, mind you it’s cheaper to bring your own container. We have two recommendations if you’re buying in bulk:
1.) Don’t use glass - we witnessed someone break their full gallon-sized jar of maple syrup. Ouch
2.) We were told this year not to let the syrup sit for any length of time in the plastic jugs as the syrup will start to adopt the flavor of whatever was previously in the jugs, which for us would have been vinegar.
You might scoff at $47.25/gallon (very reasonable and competitive by industry standards), but we are supporting their family’s livelihood. We feel an overwhelming sense of do-good satisfaction in that and the flavor. The flavor. It transforms me to some life I’ve never lived - to long picnic tables in the mess hall of some backwoods Vermont Boy Scout camp, with wood-fire permeating the taste of sausages and the stacks of fluffy buttermilk pancakes oozing with the sweetness.
How to store maple syrup
Canning process - How to can maple syrup using a water bath. It’s NOT hard.
You will need:
Water (boiling)
4 burner stove
A canner (large pot) + rack
3 other pots - one for steaming jars, one for steaming lids/rings and one for heating syrup
Clean mason jars
New lids + rings
Ladle, funnel, tongs
Towels
Steps:
First and foremost, use caution when working with boiling liquid
1.) Fill the canner with water on the stove. The water should be approximately 2/3 to the top of the pot.
2.) Heat maple syrup to boil on stove.
3.) Sanitize mason jars either by washing with warm water/soap or run through a dishwasher cycle.
4.) Use about 2-3 inches of water and steam mason jars, lid-side down, in large pot on stove while syrup comes to a boil
5.) Put about 2-3 inches of water in a smaller pot and steam the new lids and rings
6.) Once syrup is boiling, remove pot from stove and place on counter. Take a mason jar and fill the jar using ladle, leaving about 1 inch of headspace at top (we usually fill until the point where the body of the jar meets the top).
7.) Quickly place lid and ring on mason jar and tighten, take care not to over-tighten.
8.) Fill as many jars as you can fit in your water bath (we can fit 5 quart jars into our canner). Once these jars are full, put the mason jars into the canner. The water should be boiling and hot. Let the jars sit in the boiling water for about 15 minutes.
9.) Once done, CAREFULLY place the mason jars on a protected surface (a couple of bath towels) and wrap them up. They will be hot, so use caution. Let them cool slowly and naturally for about 12 - 24 hours. Check the lids. They should have sealed, in other words they shouldn’t make a popping sound.
5 years in Green’s Sugar Bush signs. Note the selfie in 2020. Not a soul around to take the photo and Linden zzz’ing in the car.


Welcome: Tailwind Acres

There is a bit of irony that our first Tailwind Acres blogpost should be about homesteading and we are in thick of a pandemic. We speculate backyard homesteading will make a stronger emergence into mainstream culture after the COVID-19 pandemic subsides.
I hear it’s hard to find flour and yeast in the local groceries. Lately, I’ve seen more homemade bread loaves on my Facebook feed than kitten memes. We’ve heard that times of uncertainty are good for garden seed sales and indeed there has been a big uptick in seed purchasing. I also hear chicks are darn near impossible to mail order.
We’re accustomed to our own version and routine of homesteading. Aside from not going to our places of employment, we haven’t altered our practices. In weekend ritual Adam whipped up two loaves of bread today. Normally one would go into the freezer to pull out during the work week. Then half of one of the loaves would be consumed by the three of us fresh out of the oven. Today’s loaf was predictable, but no less delightful oozing with almond butter and honey. We took inventory of our seed collection back in December and received our shipment of seeds on January 13, two days after China had its first confirmed death from Coronavirus and before it hit U.S. soil. In fact, most seeds are germinated and under our bank of grow lights. We're not rationing eggs and collecting about 12-14 per day.
We’re watching the world react in a way that makes us feel very, very fortunate to have the ability to grow and nurture our own food in our backyard. We did this when we lived in town, through trial and error we found tricks that work for us. That’s the beauty in gardening, every year is cumulative. You always learn something from a season. Even if it’s let’s not do that again.

Did I mentioned we continue to fail at things? We continue to fail at things! We’ve never mastered storage potatoes. Please help us if you have tips. Inevitably our potatoes get so many eyes they’re some creatures from Monsters, Inc or worse yet, Alien.
Mind you we do feel accomplished by other things. We still have a few mangy fingerlings, frozen basil and cilantro based pesto, frozen enchilada sauce, frozen tomatoes, canned salsa, and jars of maple syrup. We recently used our last carrots and beets that we tried storing in sand for the first time, and we just used our last head of garlic this past week (mind you we planted 400 cloves this past fall so there will be NO shortage this year, baring no crop failure).
Indeed, we feel more and more acclimated and adjusted to life at Tailwind. We have been here long enough to have witnessed every season at least once to make subtle observations that’ll guide our future decisions. The list of things we want to do keeps growing. Truth is that our “reality list” is take our “dream list” cut it in half and then halve it again. I consider ourselves want-to-be-farmers (ok, I have milked a cow...once.)
If any of you have read this far, you’ll likely point out that I’m not doing a great job in sales. Rest assured, we are dabbling and experimenting with selling produce because frankly we hope it inspires YOU to try a hand at growing your own food. Will there be errors? Absolutely! Will there be unexpected victories. I hope!
I speak with more confidence and assertion when it comes to our ability to share, ad nauseam, the fitness aspects of our life. We have ~40 years of combined competitive running experience between us and are eager to share bits and pieces of what we’ve been learning about our running journey, tips for training, injury prevention and all around runner self-care.
The current situation hasn’t changed our training too much. Adam always trains solo, but now instead of running over his lunch and after school, he’s been setting the alarm for 5:45AM and taking to the gravels or treadmill. I’m missing runs with a colleague from work, but otherwise I’m running and becoming more accustom to some of the local gravels. We both have expressed we miss immediate access to pavement.
The other day, it was windy. It’s always windy here, but even by flat land standards… it was a windy day. I was dragging my feet to start my run. Adam and Linden dropped me off about 7 miles from home so I wouldn’t have to do my tempo run into a headwind [insert, awesome husband award!] It was the first run I’d done since Adam came up with the name Tailwind Acres. As I ran home I couldn’t help but chuckle. What an appropriate name.
Tailwind: : a wind having the same general direction as a course of movement
We’re not naive enough to think this will be the last pandemic nor the fact that we face immensities of climate change, habitat destruction, loss of biodiversity, pollution… that all threaten our immediate ways of life and human survival. I hope a year from now, I’ll look back on this posting with relief that our world has rid itself of the immediate threat of COVID-19. More so, I hope we are smarter, more engaged, more nimble and willing to refocus on taking care of each other and the mothership. I can’t help but feel the tailwind.
Tailwind : a force or influence that advances progress toward an improved condition
